Build a Beast of a Home Gym to Become a Beast in the Outdoors
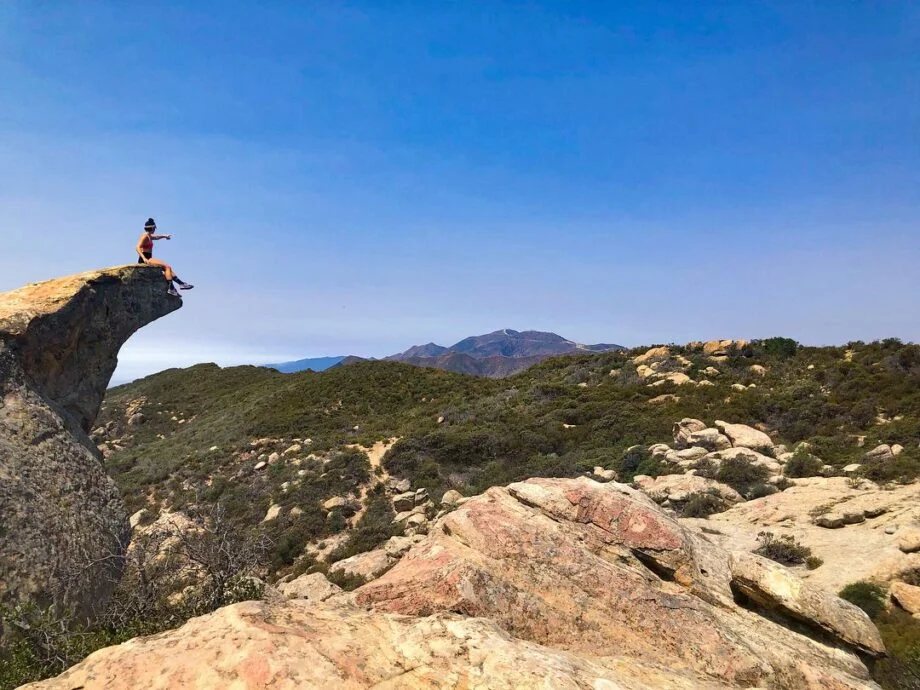
I’m a firm believer that the best way to get good at something is to do that something over and over again while implementing lessons from your failures. However, when it comes to outdoor training, that’s not always possible. Often, training for mountain biking, rock climbing, backpacking, and other outdoor activities involves time spent indoors developing requisite strength and conditioning.
For lots of reasons—uncooperative weather, long drives to parks, and busy schedules—most people can’t be out on the trails or waterways every day. Luckily, there are plenty of ways to prepare for life on the trails right at home. With my home gym equipment recommendations, you can tailor your daily workouts to develop skills essential to outdoor sports.
Why You Should Trust Us
I’ve been a certified personal trainer for almost five years, and I hold additional certifications in the health and fitness field. But when it comes to outdoor pursuits, the proof is in the practice: I’ve trained myself and others to successfully complete various outdoor endeavors, including long-distance trail races, backpacking expeditions, multi-day kayaking trips, and more.
While I haven’t summited any of the infamous 8,000-meter peaks out there, I’ve completed my fair share of tough treks: I’ve run several half marathons and obstacle course races; scrambled up too many mountains to count; backpacked several trails surpassing 30 miles; taken many a tumble (and learned lots of fun tricks) on my mountain bike; and have spent a lot of time navigating waterways in the swampy South. My own daily workouts are primarily targeted at becoming better at these activities.
Why Outdoor Training Is Important
I know that a lot of people embark on outdoor adventures unprepared, and I know that a lot of people get injured and even die while doing so. I know that a lot of people say, “Backpacking? How hard can it be? It’s just a long walk.” And then wind up in a bright orange search-and-rescue helicopter because, by mile 15, their 50-pound pack didn’t feel so doable anymore.
I don’t say this to sound foreboding or discourage you from getting outside—in fact, the opposite. I want you to go do cool things outdoors. But I want you to go prepared. All of the adventures are much more fun when you’re not wheezing or fighting off muscle fatigue, anyway!
Aside from the endurance aspect, most outdoor activities require a specialized set of skills to avoid accidents and injuries. I’m talking purely physical here; the topic of outdoor survival is a totally different story. Skills like balance, proprioception (a keen sense of self-movement and position), unilateral strength, and core stability are key to staying safe and having fun.
(A disclaimer I feel is important: You should work with a qualified professional if you plan on attempting something crazy like topping all of Colorado’s fourteeners in a month or conquering an over-nighter on Mount Whitney. This guide to building a home gym for outdoor athletes is not exhaustive, but intends to provide a sense of what type of equipment you would benefit from having to reach certain goals. Training for intense outdoor sports should be treated like training for any sort of fitness-related competition.)
How to Build a Home Gym for Outdoor Training
So, for those of you whose interests lie both in the gym and in the great outdoors (hello, friends), here’s how to build a home gym catered to kicking your adventures up a notch.
You’ll find that some recommendations overlap across different activities, which is to be expected. All outdoor sports have one thing in common: They require a great deal of balance, core control, and unilateral strength.
I’ve also included how the basics—kettlebells, dumbbells, barbells, and weight plates—can help you with outdoor training for different activities.
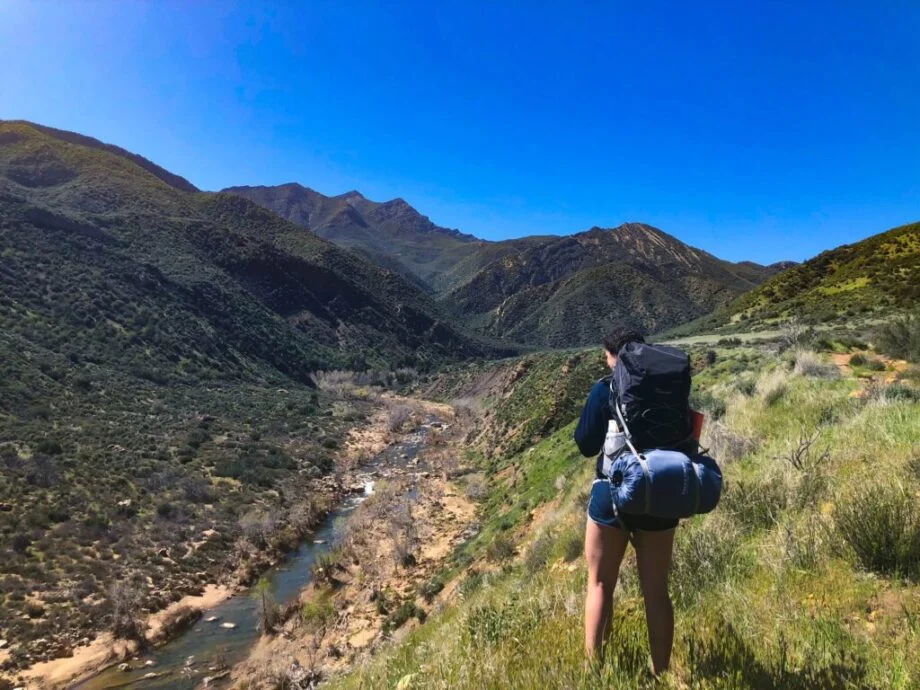
How to Train for Hiking and Backpacking
Hiking is arguably the easiest outdoor pursuit, and the definition is pretty broad. Sure, most people reading this are probably already in good enough shape to tackle a moderately challenging day hike with no specific preparation. But once you start edging into backpacking or thru-hiking territory, and certainly if you’re teetering on the line of mountaineering, targeted prep becomes essential.
Skills essential for thru-hiking and backpacking:
- Cardiovascular endurance
- Muscular endurance
- Stamina
- Single-leg strength
- Core stability
- Back strength
Rucksack or Weighted Vest
There’s no better way to prepare for a long hike with 20-plus pounds on your back than to spend a lot of time walking with 20-plus pounds on your back. I think a rucksack or a weighted vest is the most essential item for backpacking training because it most closely mimics what you’ll be doing in the wild. You can wear one while walking, running, and on short hikes, but you can also add a vest to strength training movements like step-ups, lunges, push-ups, and pull-ups to build up your stamina.
Best Weighted Vest for Backpacking Training
GORUCK Ruck Plate Carrier 3.0
Product Highlights
- The GORUCK Ruck Plate Carrier 3.0 is constructed from durable 1000D Cordura fabric.
- Depending on your chosen size, you can load the Ruck Plate Carrier 3.0 up with as much as 90 pounds.
- The plates are housed in the back pouch, which keeps your chest and sternum open for added comfort.
- Given the more rugged Cordura fabric, this GORUCK plate carrier can be prone to breathability issues.
Pros & Cons
Pros
- Backpack design leaves your chest open
- Lumbar padding makes for a comfortable fit
- Made of durable Cordura fabric
Cons
- Weight isn’t evenly distributed
- Plates sold separately
- Cordura fabric isn’t as breathable as other textiles
Bottom Line
_The GORUCK Ruck Plate Carrier 3.0 purposely centers the entire load on your back and leaves the chest and abdomen open in this backpack-style vest._
_
What our tester says:
__“Everything about this vest feels well-made and super durable. The Velcro is super secure and the material of the vest is really thick and high-quality. I don’t feel like it would rip or tear anytime soon.”_
Manual Treadmill
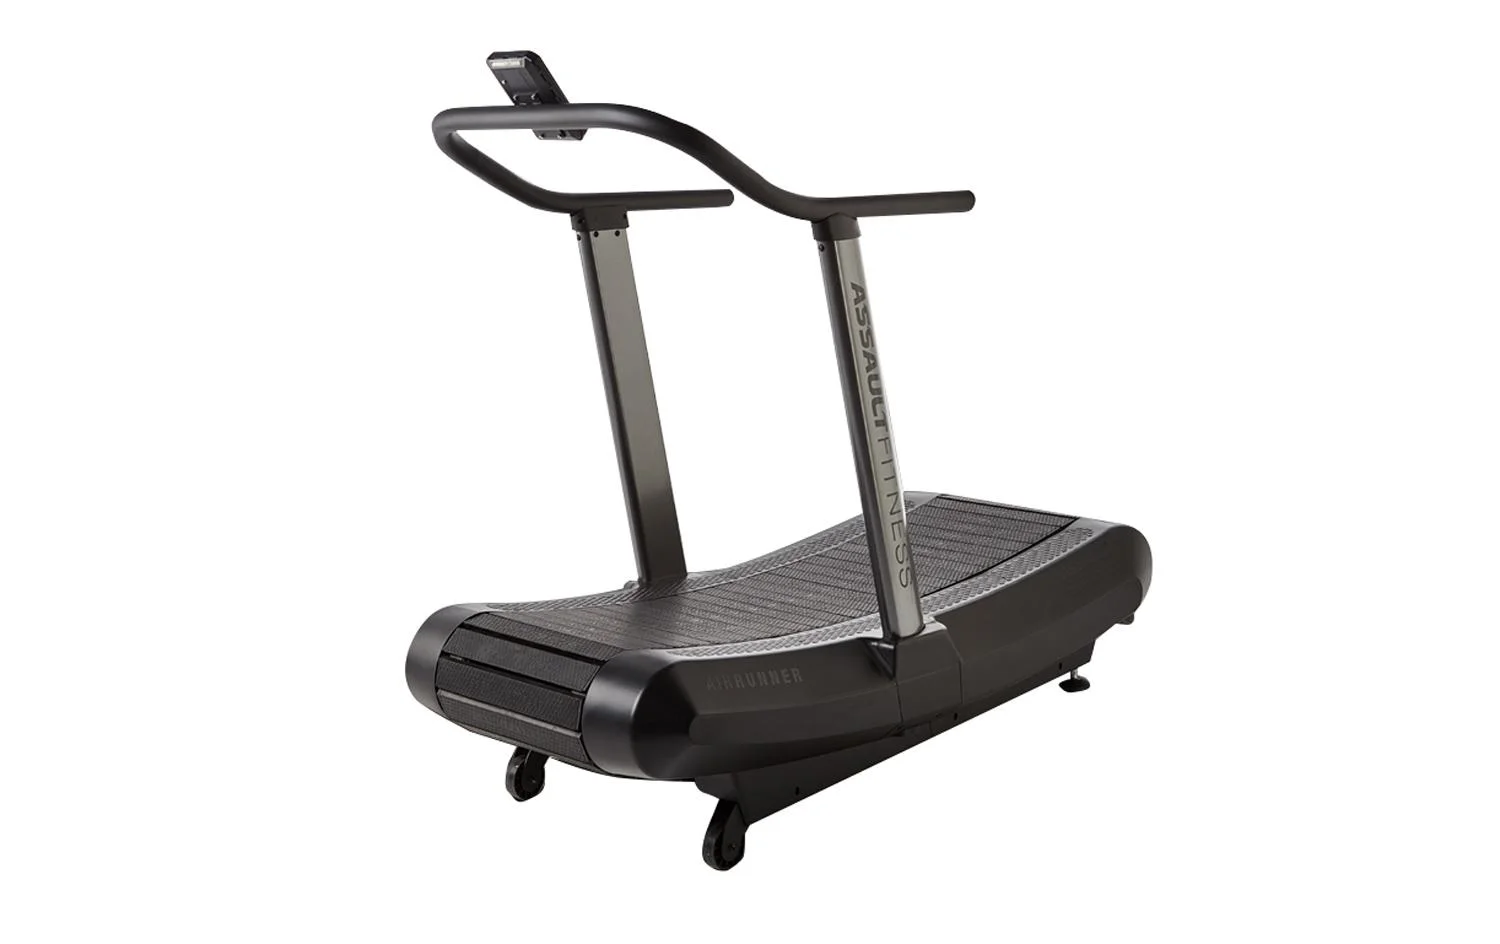
You won’t find a motorized treadmill in nature, so if the weather isn’t permitting you to practice your hiking skills on real terrain, consider a manual treadmill to better mimic a true trek through the outdoors. Because a manual treadmill is powered solely by you, you have to work harder to achieve the same speed you might achieve on a motorized treadmill.
RELATED: Best Manual Treadmill
Best Manual Treadmill for Backpacking Training
AssaultRunner Pro
Product Highlights
- Free shipping to contiguous U.S.
- 7-year frame warranty
- Financing options available
Pros & Cons
Pros
- Extremely popular
- Durable machine
- No motor means fewer maintenance issues
- Easy-to-read monitor
- Thick rubber belt provides great traction
- Bearings under belt provide smooth run
- Sturdy
- Rear handle makes moving easier
- Powder-coating withstands the elements
- Affordable curved treadmill
- Staple for CrossFitters
Cons
- Extremely heavy
- Curved shape takes getting used to
- Plastic shell may crack
- High spin rate on belt
- No fancy monitor, water bottle holder, or other conveniences
- Shipping & Returns
Bottom Line
The AssaultRunner Pro is one of the best value non-motorized treadmills for home gyms on the market.
Vertical Climber
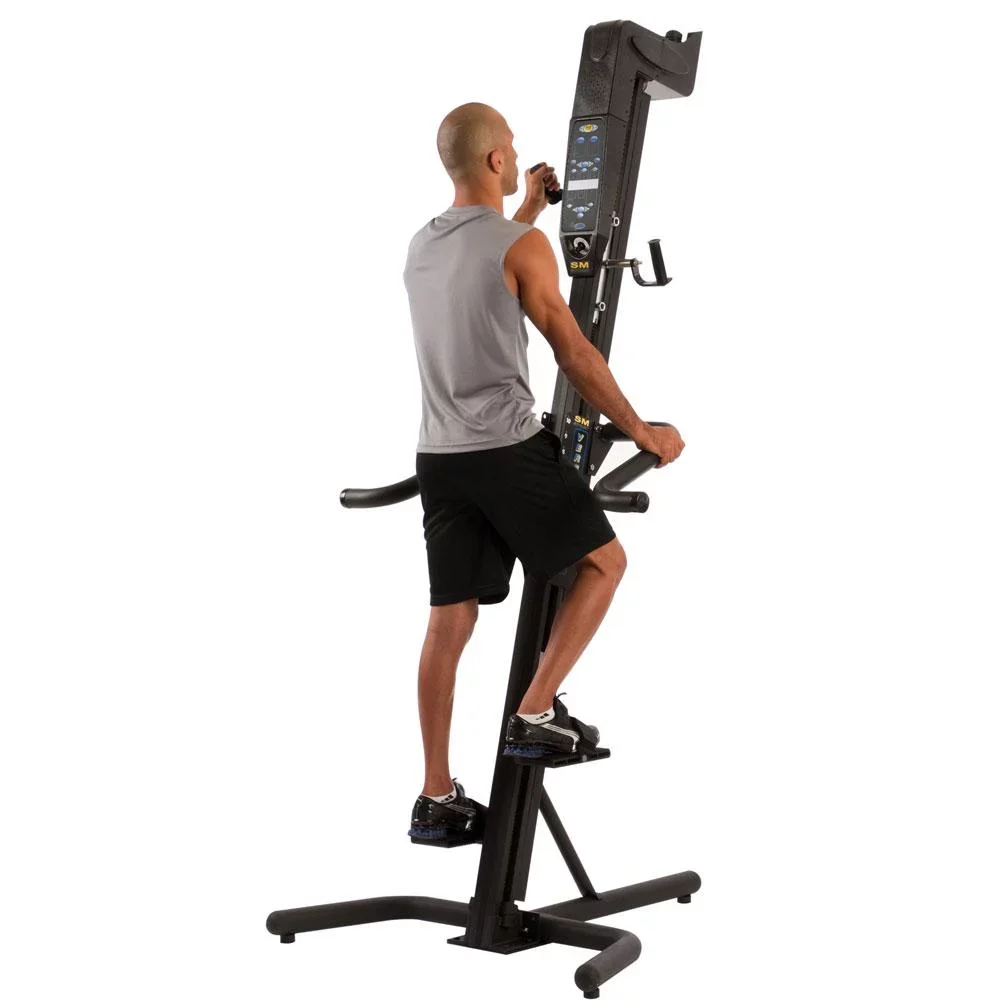
Chances are, if you head out on a long backpacking or mountaineering trip, you won’t just be walking. You’ll be scrambling over boulders, hoisting yourself up onto ledges, and carefully navigating varying terrain. A vertical climber can help you develop the full-body muscular endurance needed for these tasks while also helping you develop a greater sense of balance and body awareness.
Best Climber for Backpacking Training
VersaClimber SM Sport Model
Product Highlights
- Fixed or variable resistance models
- Bluetooth option available
- Adjustable step and arm height
Pros & Cons
Pros
- Available in fixed or variable resistance
- Adjustable step and arm height
- Comes with or without Bluetooth
Cons
- Very basic LCD monitor
- Shaky at max heights
- On the noisy side
Bottom Line
The original home gym vertical climbing machine is still a good one, albeit a bit pricey
Plyo Box
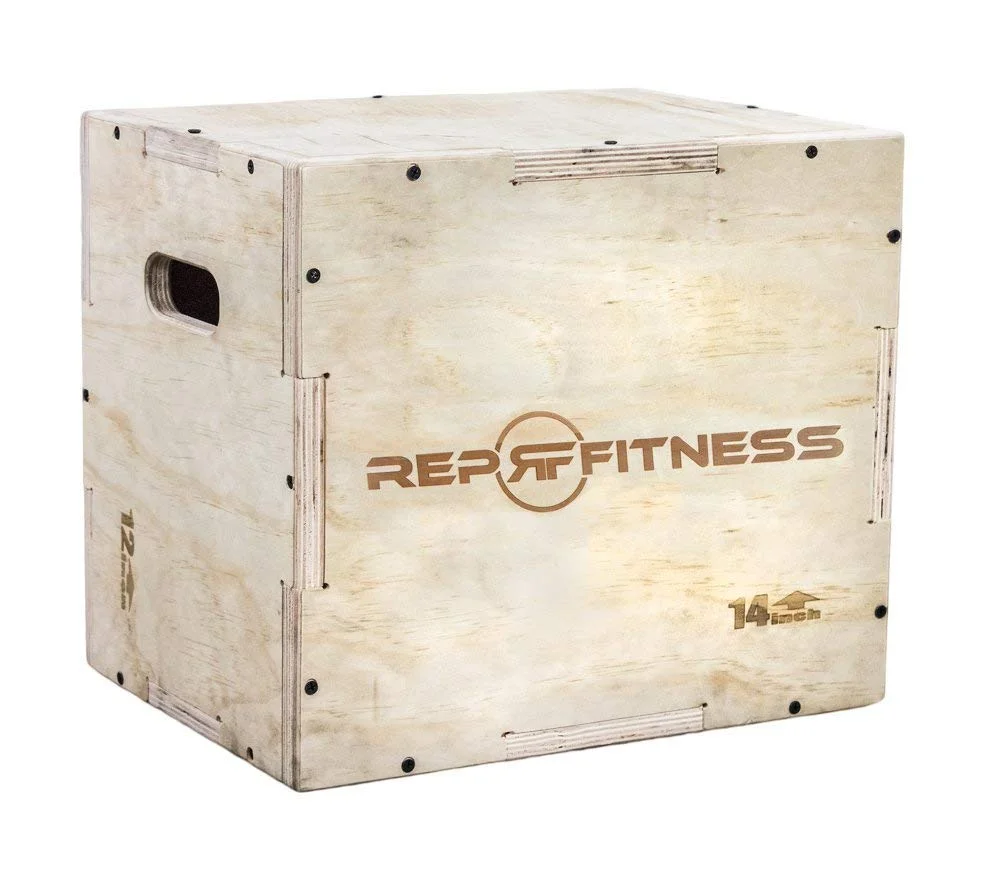
You don’t need a box for jumping (although that can be helpful), rather for stepping. On a backpacking trip, you’re sure to encounter terrain that requires large steps forward, sideways, and upward. A simple plyo box is a top-tier tool for training those single-leg movement patterns. To prepare, use a plyo box for deficit lunges, forward step-ups, lateral step-ups, and pistol (single-leg squat) drills. Better yet, wear a rucksack or hold a kettlebell in one hand for added stability training.
Best Plyo Box for Backpacking Training
REP Fitness 3-in-1 Wood Plyo Box
Product Highlights
- Engineered with construction-grade, 3/4-inch plywood and reinforced with internal support
- Easy assembly – predrilled holes and interlocking joints
- Available in four sizes each of which offer three different height options
Pros & Cons
Pros
- Variety of sizes
- Built-in handles
- Easy assembly
- Versatile
Cons
- Larger size is cumbersome to move around
- No shin protection
- No added traction in the form of texture
Bottom Line
The REP Fitness 3-in-1 Wood Plyo Boxes offer quality construction and an affordable price for anyone looking to add a traditional box to their gym space.
Reverse Hyper
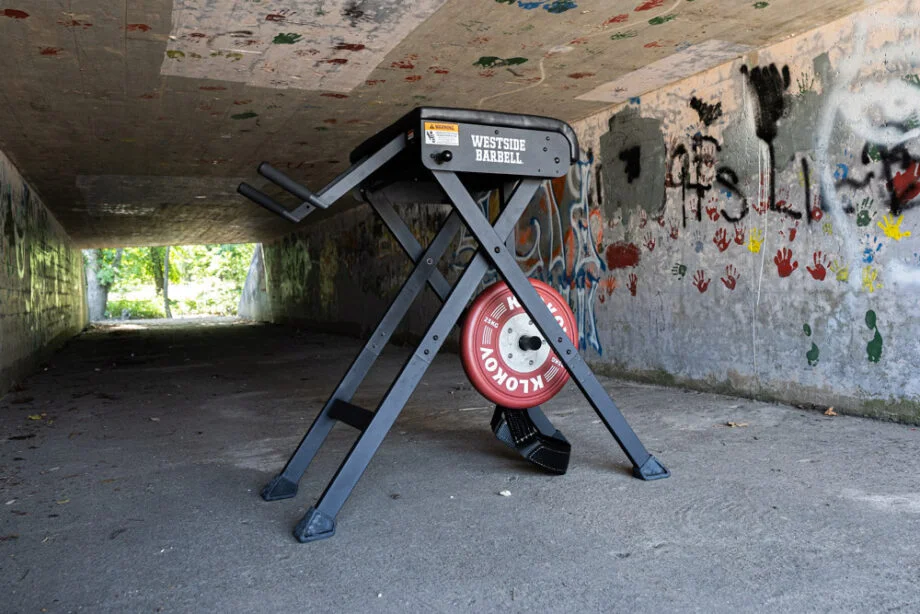
You don’t just need strong legs and a strong heart to safely enjoy backpacking trips. A strong back is another key element: You’ll need it to support your heavy pack over long distances. A reverse hyper allows you to train posterior strength, which will help prevent slumping and thus prevent pain and unnecessary fatigue during long trips.
Best Reverse Hyper for Backpacking Training
Rogue Westside Scout Hyper
Product Highlights
Pros & Cons
Bottom Line
The Scout Hyper is a patented, foldable reverse-hyper machine developed by powerlifting legend Louie Simmons and Westside Barbell. This uniquely lightweight and mobile design features hinging legs that lock into place with pop pins and easily fold back for efficient storage after use (the total depth of the unit, when folded, is just 13”). \n \nLouie Simmons created this model with home, work, and light clinical use in mind—with particular benefits for younger athletes or those new to reverse hyper training. The unit comes standard with a durable, round-edge pad (27.5” wide x 21.5” deep x 2” thick) to limit friction against the hips, as well as a nylon webbing hyper strap, two weight posts (5.25” loadable length), a set of spring collars, and 6” long handles. A bolt-on handle extension kit is also available a la carte for users who need to accommodate a shorter distance from the end of the pad to the handles. \n \nThe Scout Hyper comes with rubber feet (to provide grip to the floor and help keep the unit level) and a rubber-covered step for safe mounting and dismounting. When a workout is complete, the user simply has to (1) pull out and spin the pop pins to unlock the unit, (2) tip the machine up while pushing on the horizontal rear leg crossmember, and (3) press down on the handles to complete the folding process. Please Note: The unit stands up by itself when folded, but we do recommend either storing it flat on the ground or, if storing it upright, to do so against a wall and out of the reach of children. \n \nWhether you train in a small garage gym or a large-scale facility, space efficiency always counts. The Westside Scout Hyper offers storage convenience with its patented groove folding mechanism, collapsing down to a depth of just 13” when stowed. It’s also considerably lighter and more portable than most traditional Reverse Hyper machines, making it easy to move, unfold, and lock-in before each use. \n \nRegular use of the Scout Hyper can provide safe traction, pressure/tension relief in the lower back, and strengthening of the posterior chain. “We spend hours sitting or standing at home, work or at school,” Louie Simmons says. “These simple yet everyday occurrences place significant pressure and torsion on our lumbar spine leading to mild or even severe daily discomfort. That’s where the Scout steps in. A daily prescription of three to five sets of 15 reps on this machine could be the difference from painful to pain-free lumbar health.” \n \nUser assembly is required with this unit, but should take less than 30 mins. All required hardware is included. Rubber feet are provided for improved stability, and a rubber covering on the step makes it easier to get on and off of the machine. Please BE CAUTIOUS when folding and unfolding the Scout, and be aware of pinch points. If the red marking on the pop pin shaft is visible then the pin is NOT fully seated. Periodically check that the pop pin and swing-arm bolts are tight on both sides of the machine, as well as the bolt that secures the hyper strap.
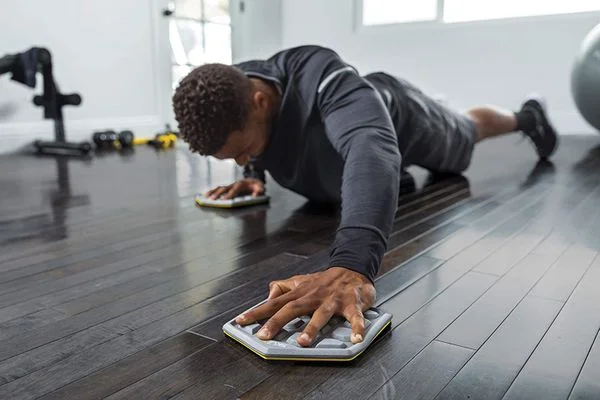
Sliders
Ever been hiking and have the ground slip from beneath you? Yeah, yikes. It’s a scary feeling, but it’s actually something you can prepare for—with a simple, inexpensive piece of equipment. Lateral lunges, mountain climbers, hamstring curls, plank arm extensions, and croc walks (using your arms to walk your body forward in a plank position) are all examples of muscle-shaking movements that’ll prepare you to catch yourself when the earth inevitably shifts under your feet.
Best Sliders for Backpacking Training
SKLZ Court Slidez Exercise Sliders
Product Highlights
Pros & Cons
Pros
- Foam grip on upper side for comfort
- Won’t leave a mark on your floors
- Hex shape reinforces natural hand placement
- Helps build core strength and stability
Cons
- Might be too big for people with smaller hands
Bottom Line
These exercise sliders are high-quality and durable, and are an inexpensive investment for core and stability training.
The Basics
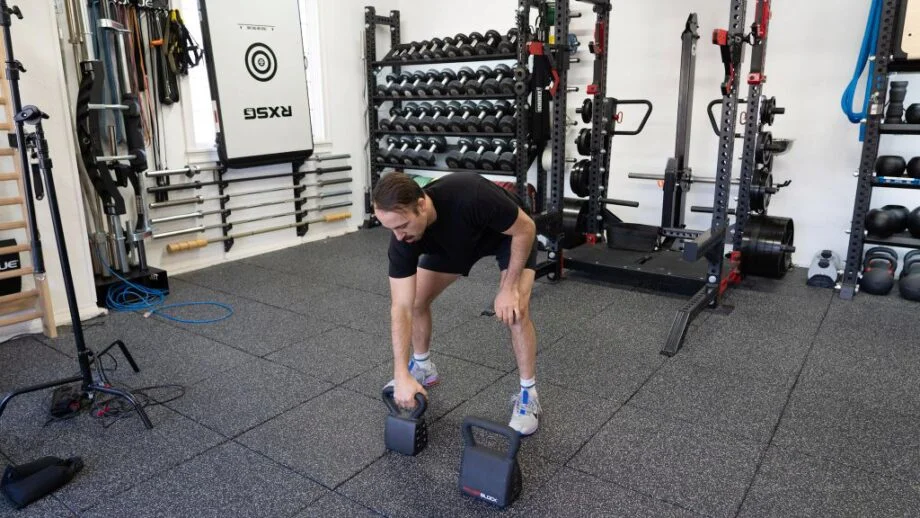
On top of all of those specifically selected pieces of equipment, having a few basic strength training tools opens up your options for backpacking workouts. Kettlebells and dumbbells are fantastic for developing the unilateral strength required for tackling treacherous routes while carrying a large backpack full of water, food, tools, and camping gear. I like to use kettlebells for single-leg Romanian deadlifts, cross-body step-ups, suitcase lunges, front-rack carries, single-arm rows and other functional exercises.
And we all know how useful a barbell and a good set of weight plates is—the number of exercises you can do to build strict and explosive strength is virtually endless. All barbell exercises help prepare you for hiking and backpacking in one way or another.
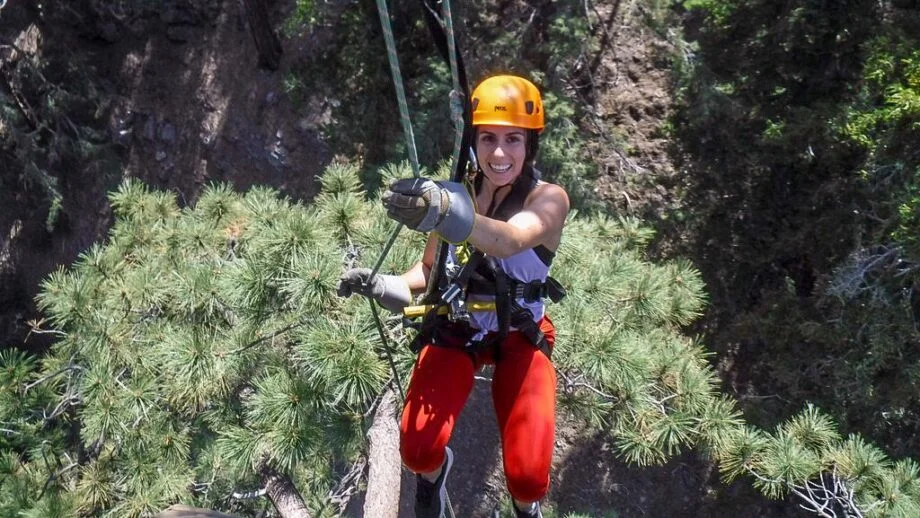
How to Train For Rock Climbing
Rock climbing is one of the most challenging outdoor sports there is. It requires ample strength, but rock climbing is really a skill-based sport. Deck your home gym out with these suggestions to master all of the skills you need for this thrilling outdoor adventure.
Essential skills for rock climbing include:
- Grip strength (fingers, hands, wrists, and forearms)
- Balance and coordination
- Body awareness
- Pulling strength
- Hip strength and power
- Strong hip abduction and adduction
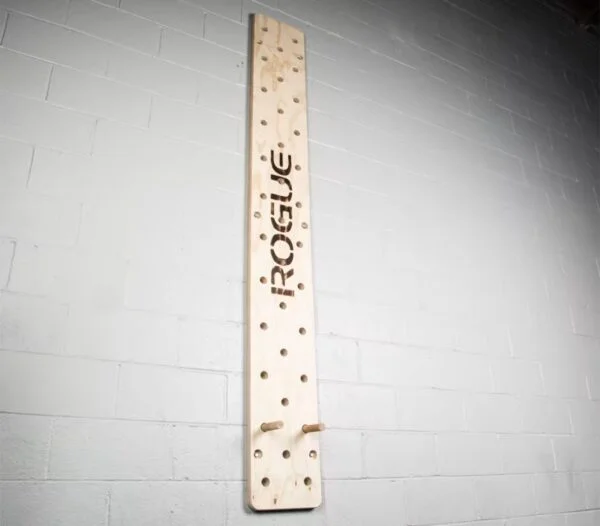
Peg Board
Peg boards provide excellent stability and strength training for rock climbing. Picture yourself up on a rock face, digging your feet into the cliff (called smearing) and clutching a hand hold while you search for your next move. A peg board can help you develop the strength and stamina needed to master this crucial rock climbing skill. (You can even DIY a peg board.)
Best Peg Board for Climbing Training
Rogue Peg Board
Product Highlights
Pros & Cons
Bottom Line
The official, wall-mounted Rogue Peg Board is made in the USA from your choice of top-quality maple or pine. Each set includes one 1.5″ thick board (95.625” tall x 11.75” wide) and two grip-friendly wood dowel rods—each measuring 6.5” in length and 1.19” in diameter. \n \nAn increasingly popular tool for upper body training, climbing peg boards can be a simple but dynamic addition to a small garage gym or a larger training facility. Rogue’s design includes 35 staggered holes along the roughly 8-foot ascent of the wood board, with six counter bored holes for mounting (mounting hardware not included). The full unit weighs in at 38LB \n \nAlong with selecting which type of wood you prefer (via the column on the right), you can also choose between a standard Rogue Peg Board and the Rogue Echo Peg Board.
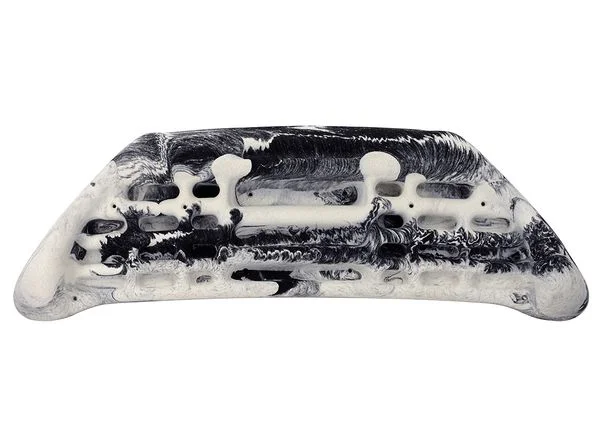
Hangboard
A hang board is similar to a peg board, but it’s for your fingers and hands only, and you don’t actually climb it. It’s more so intended for practicing different finger holds used during rock climbing and performing endurance hangs. This is by far one of the best pieces of equipment a climber can have in their home gym.
Best Hangboard for Climbing Training
Metolius Contact Training Board Hangboard
Product Highlights
Pros & Cons
Pros
- Grippy material resists sweat and slipping
- Slightly grainy texture is gentle on skin but mimics real stone
- Comes with a training guide
Cons
- Only comes in one color (blue discontinued)
- Intended for more advanced climbers
Bottom Line
The Metolius Contact Training board is a fun and effective way to build functional strength in your forearms, wrists, hands, and fingers.
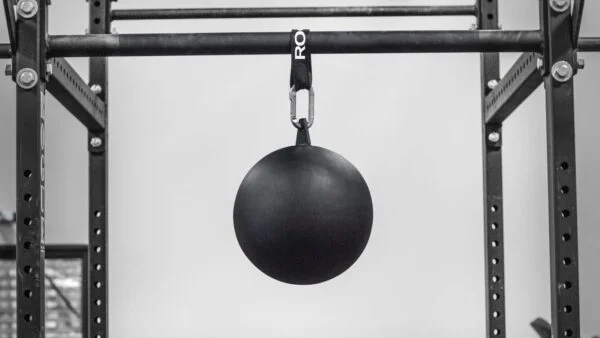
Globe Pull-Up Bar
We all know how important pulling strength is for rock climbing. But pulling strength is nothing without grip strength in this sport, so here’s another tool to help you develop both. A pull-up globe makes pull-ups and chin-ups even more challenging than they already are by requiring unusual hand placement. You can also try single-arm holds and pull-ups on a pull-up globe.
Best Pull-Up Bar for Climbing Training
Rogue 12-Inch Pull-up Globe
Product Highlights
Pros & Cons
Bottom Line
Sandbags and atlas stones are widely used now a days for ground to shoulder training, here is one that adds difficulty to training the pull up. The Rogue Pull Up Globe is the first single tool that we’ve designed to add gymnastic and strength training variance in a major way. It is one of the best tests of grip strength and upper body strength. And it’s challenged the strongest in arm and grip strength.The system comes with a Rogue strap and caribiner so that you can add and train with other implements in the Rogue Grip System.
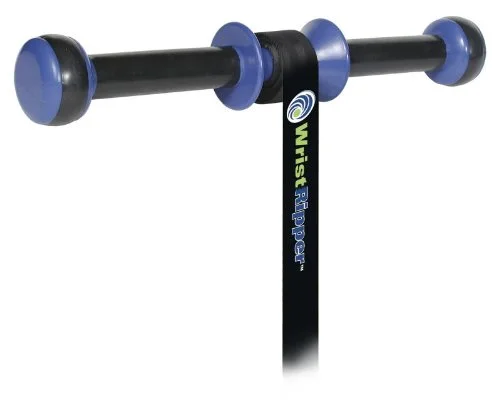
Wrist Roller
A wrist roller is yet another way to develop grip and forearm strength for rock climbing prep. I like wrist rollers because they provide an element of instability and can be used for muscular endurance training. Wrist rollers also engage your anterior (front) deltoids and biceps, both of which are important for climbing.
Best Wrist Roller for Climbing Training
WristRipper Wrist Roller
Product Highlights
Pros & Cons
Bottom Line
The WristRipper is a wrist roller exercise device that puts a new twist on one of the oldest and most effective ways to strengthen your hands, wrists and forearms – the wrist roller. In just minutes a day, you can improve your wrist and forearm strength. The forearm muscles are the key to wrist and grip strength which is why this product is used by golfers, baseball players, hockey players, tennis players, body builders and rock climbers. This product will help improve performance for any activity that requires grip strength and the use of your hands and wrists. Simply roll the weight up and down as many times as you can to exercise and strengthen your hands, wrists and forearms. Depending on how strong you are, it is recommend to start with 2.5lbs or 5lbs and add additional weight as you get stronger. This product allows for multiple gripping options. You can grip the handle or outer knobs to work different ranges of motion to get a complete forearm workout. Weight plates are not included with the product and can be purchased at Amazon.com, local sporting good stores or other online retailers. The weight-loading pin is compatible with 1″ standard; and 2″ olympic weight plates. Maximum recommended weight is 10lbs.
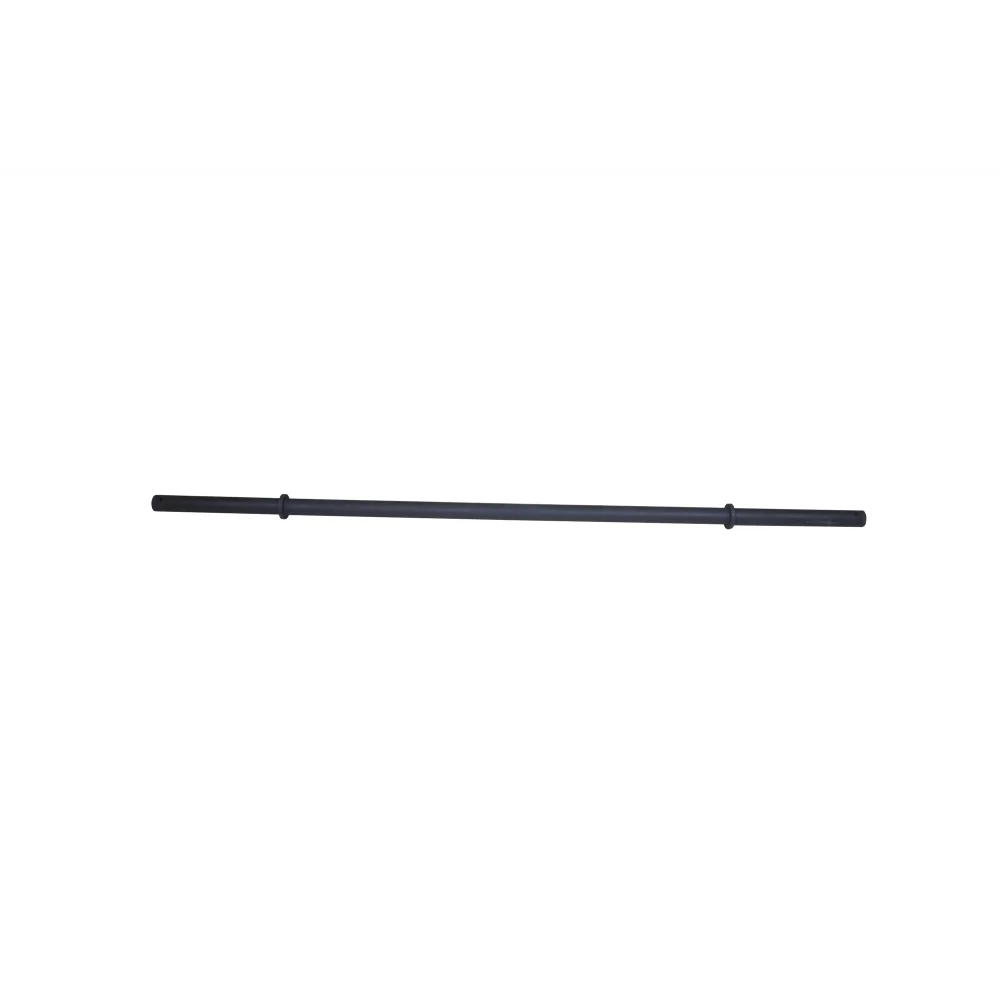
Axle Bar
An axle bar is a thick barbell, usually with a 1.75-inch to 2.25-inch diameter. The width of an axle bar makes it much harder to grip and use, so it turns every exercise into a training session for your forearms.
Alternatively, if you don’t have the space or funds for an axle bar, you can grab some Fat Gripz. These rubber grips are axle bar adapters and can fit most Olympic barbells, specialty barbells, pull-ups bars, and other equipment to increase the width.
Best Axle Bar for Climbing Training
Titan 84-Inch Axle Bar
Product Highlights
- With the Titan Axle Barbell you can keep your lifting regiment and change your bar to achieve more results in the gym!
- Bust of out of slump or change up your lifting focus with the 1.9" diameter Axle Bar.
Pros & Cons
Bottom Line
With the Titan Axle Barbell you can keep your lifting regiment and change your bar to achieve more results in the gym! \n \nBust of out of slump or change up your lifting focus with the 1.9″ diameter Axle Bar. The 1.9″ diameter fat grip taxes your grip strength and forearms while still working common lifts: bench press, deadlift, clean and jerk, curls, and many more. \n \nFeatures: \n- Great substitute for a standard Olympic barbell. \n- 1.9″ fat grip builds more grip strength and wrist control over a standard barbell \n- Makes lifts more challenging than a standard bar. Don’t up your weight and risk injury! \n- 7 ft. in total length with 15.5″ of loadable sleeve length. \n \nSpecifications: \n- Weight: 30 lbs \n- Overall length: 84″ \n- Grip and sleeve diameter: 1.98″ \n- Handle length: 52″ \n- Loadable sleeve length: 15.5″ \n- Finish: Black powder coating \n- Fits: 2″ Olympic plates
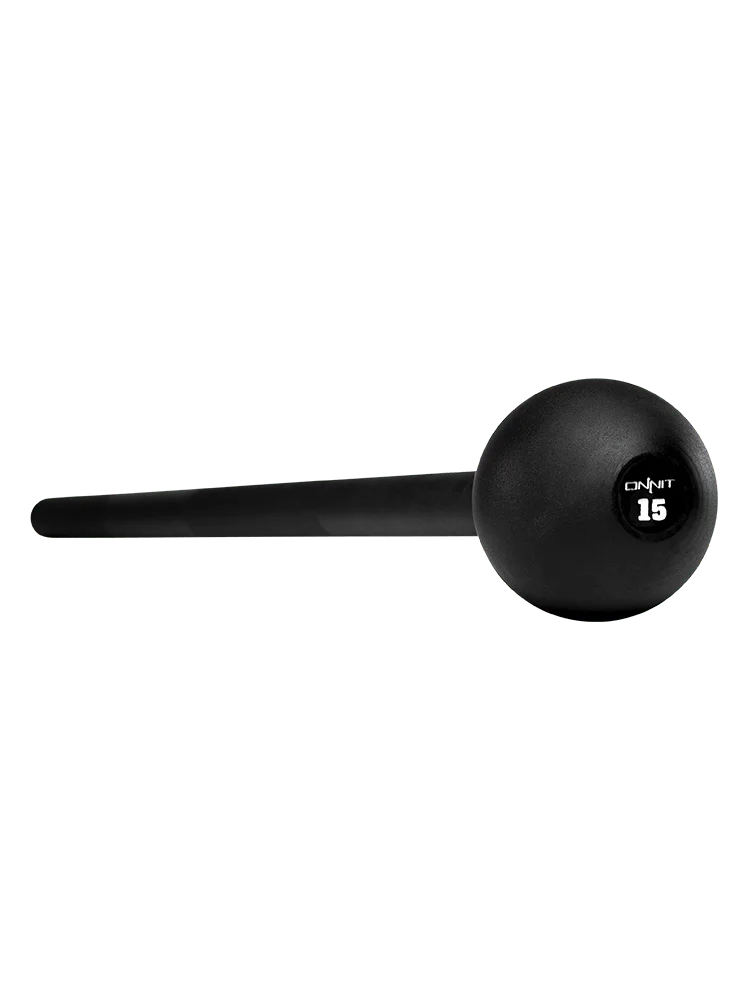
Steel Mace
No, you won’t be swinging a mace up on a rock face, but you will be fully engaging all of your body’s stabilizer muscles and be under constant tension in your core. Maces have a highly uneven distribution of weight, making them prone to rotation and susceptible to gravity. When you train with a mace, you develop rotational core strength and the ability to stabilize your muscles under variable resistance, two skills crucial to successfully ascending rock climbing routes.
Best Mace for Climbing Training
Onnit Steel Maces
Product Highlights
Pros & Cons
Bottom Line
In the real world, loads are rarely ever perfectly balanced. You juggle kids, your groceries, and imperfectly balanced boxes. Steel maces were originally developed by the Persian Warrior Elite for real world combat and wrestling. Thanks to the disproportionate weight displacement, you’ll be optimizing your stabilizer muscles, joints and primary power centers. \n \nThe Onnit Steel Mace is one of the most effective ways to train and condition your whole body while mimicking real world movement. \n \nMace training dates back all the way to 13th century Persia, where the elite warriors and wrestlers of the day would train with the heavy Gada to condition their muscles for battle. The first Gada used in training were nothing more than stone attached to a bamboo staff, however when made for battle, the Gada were often made of iron or bronze. Mace training continued into modern day India, where it began to trickle down into mainstream strongman training at the start of the 20th century. A recent resurgence in unconventional and functional training by elite athletes have put this ancient exercise implement back on the forefront of cutting edge performance exercise. \n \nWith an extremely disproportionate weight displacement many normal movements prove quite challenging and beneficial to the myriad of stabilizer muscles surrounding our joints and primary power centers. The mace is one of the most effective ways to build core and rotational strength, and is a steel testament to one’s desire to take fitness back to its primal roots. \n \nThe majority of the weight of the steel mace is in the ball at the end of the steel shaft. Because of this imbalance in weight, the steel mace allows for some very challenging counterbalancing movements that can work muscles in a completely unique way. Here are some popular steel mace movements.
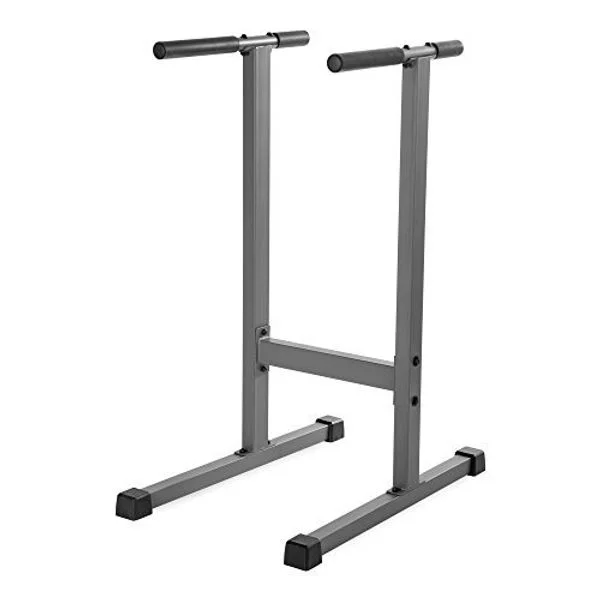
Dip Station
Believe it or not, climbing isn’t all about pulling. There’s a ton of turnover involved, much like what happens during the infamous muscle-up, but not quite so pronounced (usually). Practicing dip variations can help you develop this turnover strength. A freestanding dip station is a great option for home gym owners who don’t have room for a full power tower or power cage.
Best Dip Station for Climbing Training
XMark Freestanding Dip Station
Product Highlights
Pros & Cons
Pros
- Supports up to 500 pounds
- Made of 2-inch-by-3-inch steel tubing
- Angled grips for multiple positioning options
- 2-inch thick grips
Cons
- Comes at a fixed height of 50 inches, not adjustable
Bottom Line
The XMark Freestanding Dip Station is a sturdy standalone piece of equipment with dip bars.
Mini Resistance Bands
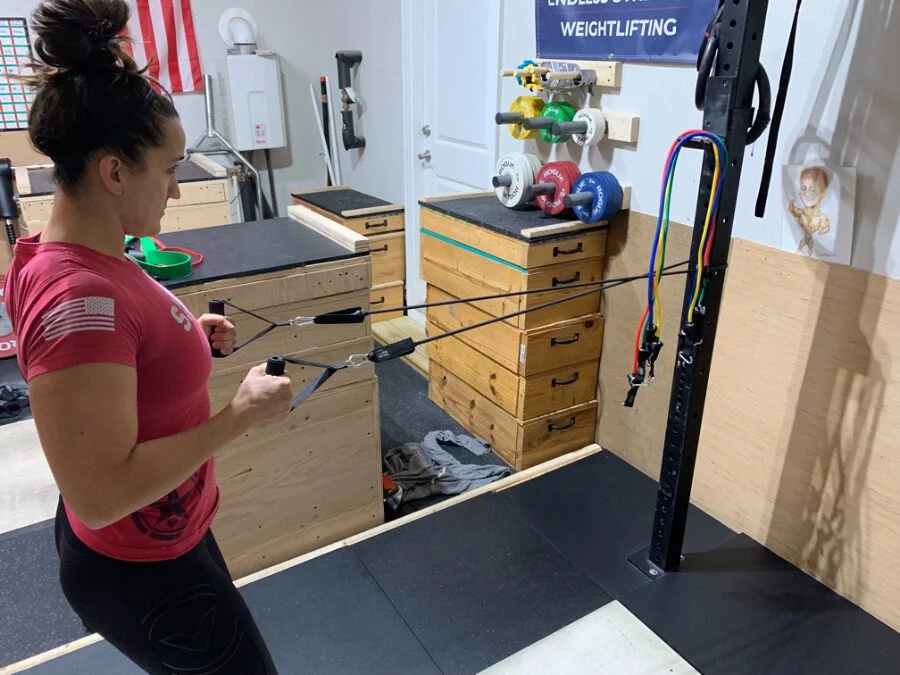
When you’re holding yourself up on a rock face trying to find your next hold, your hip adductors (inside of thighs) and abductors (gluteus medius and more) will be engaged, depending on your position. Both of these muscle groups are important for maintaining your positioning and avoiding a fall. Using mini resistance bands for isolation exercises, as well as to add to compound movements like squats and deadlifts, helps strengthen these important muscles used for climbing.
Mini Resistance Bands for Snow Sports Training
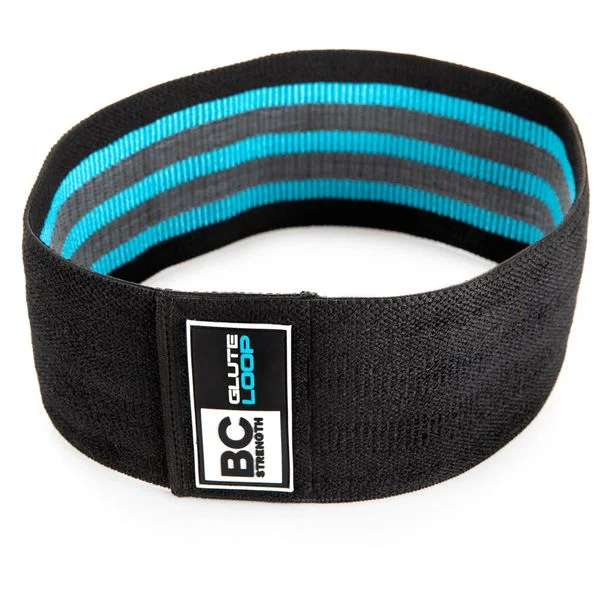
BC Strength Glute Loop Package
Product Highlights
Pros & Cons
Pros
- Constructed of durable fabric
- Interwoven elastic bands hold up for a long time
- Come in six different resistance levels
- Latex-free
- Can buy in a set or in singles
Cons
- Fabric isn’t water-or sweat-resistant
- Fabric can feel itchy at times
Bottom Line
BC Strength Glute Loops are among the best mini resistance bands for glute strength and overall lower body development.
The Basics
New climbers often underestimate the role of their legs, hips, and glutes in climbing. The best way I can describe it is to use a ladder as an analogy: When you climb a ladder, you don’t pull yourself up it. You step up and use your hands and arms mainly for balance. In a lot of cases, this is what happens (or should happen) during rock climbing, too.
Basic gym equipment such as a barbell and weight plates gives you an opportunity to strengthen your lower body so you can generate as much power from there as possible when you’re on the face of a cliff. Hip thrusters, deadlifts, and reverse lunges are great functional exercises for rock climbers—adding tempos or pauses further prepares you for long holds on a rock wall.
How to Train for Mountain Biking
Mountain biking is a thrill that necessitates a whirlwind of skills and capacities, from cardio endurance to balance to full-body strength. To excel at mountain biking—or simply enjoy it without falling or for more than 10 minutes at a time—your home gym should support training for these skills:
- Conditioning (cardiovascular fitness)
- Explosiveness/power
- Lower body strength and stamina
- Full-body muscular endurance
- Balance and coordination
- Quick reflexes
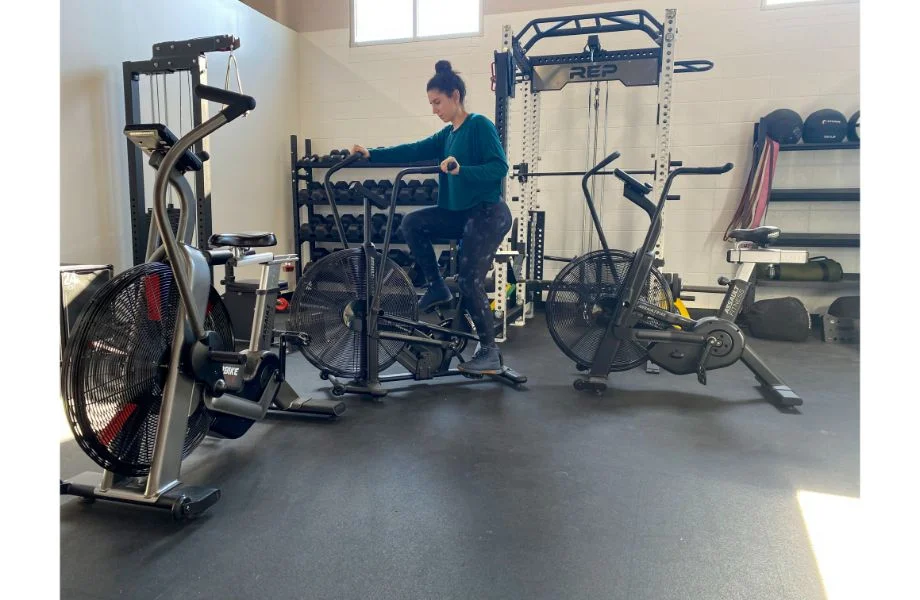
Best Air Bike for Mountain Bike Training
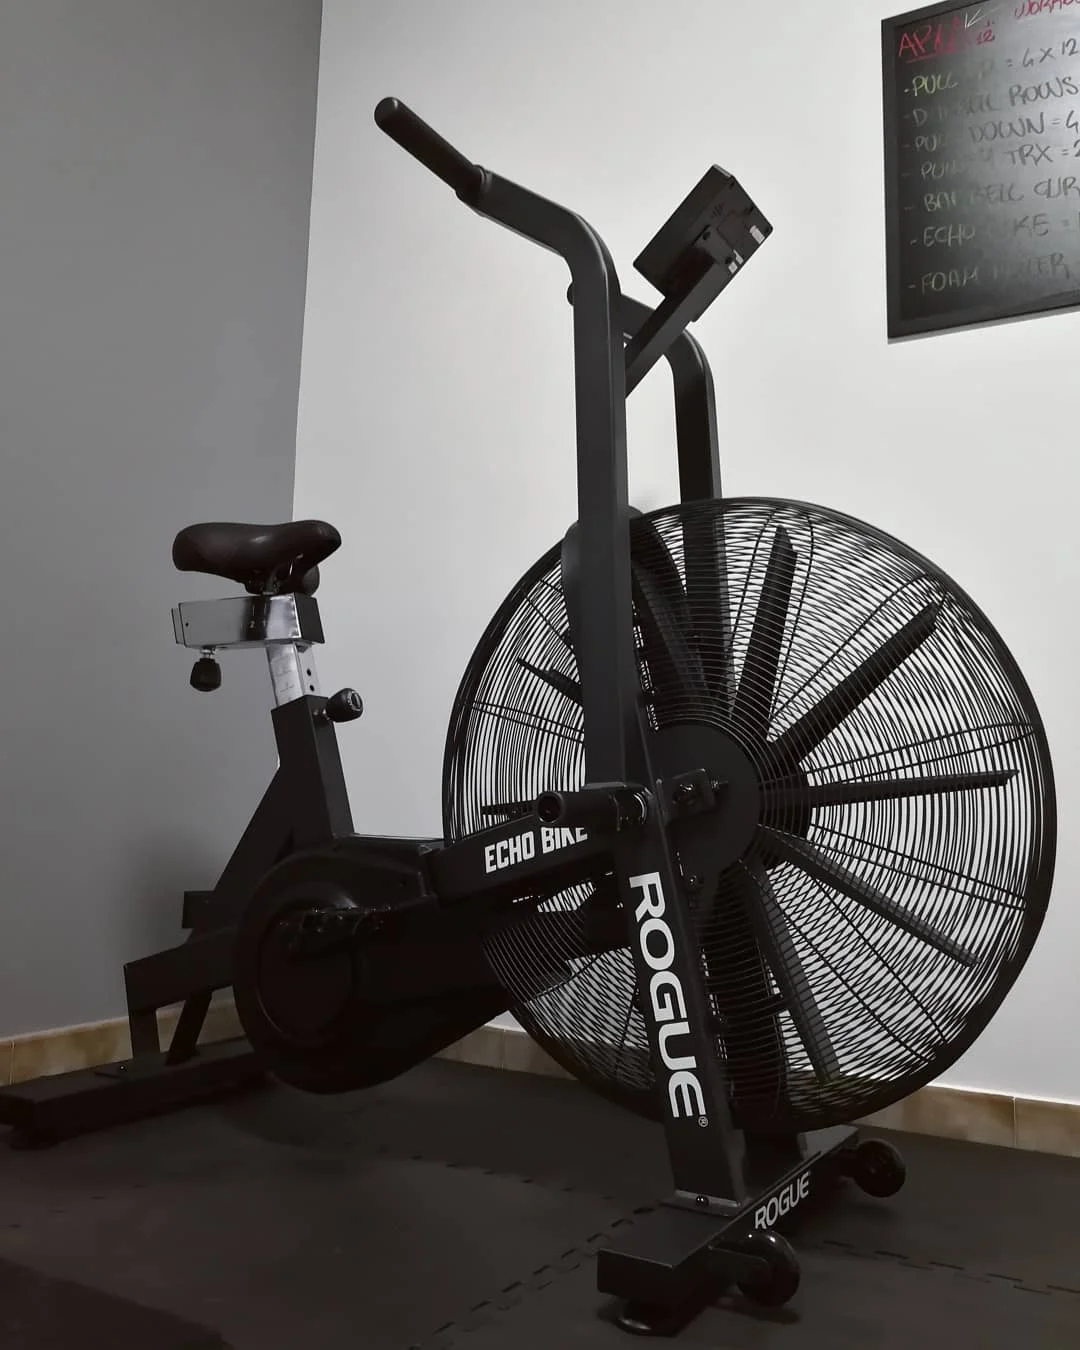
Rogue Echo Bike
Product Highlights
- Heavy duty steel
- Overbuilt for smooth ride
- 350 lb weight limit
- Solid foundation for max outs
- Easily portable
Pros & Cons
Pros
- Extremely durable, beefy construction
- Very little rocking or side-to-side movement
- Black powder-coated metal on almost everything
- Belt-driven fan for much less maintenance.
- Easy-to-read LCD console screen
- Legs feature adjustable leveling feet
- Somewhat compact
- Oversized, heavy-duty front wheels
- Sleek, attractive look
Cons
- Larger than other stationary bikes
- Belt drive is overall harder to push than a chain drive
- Not the cheapest air bike on the market
Bottom Line
We’ve tested just about every air bike on the market, and the Echo combines many of our favorite features into one. The belt drive is much more durable and requires less maintenance than a chain drive. The size and weight make it extremely stable, and the price is much less than we’d expect for such a quality piece of equipment.
Air Bike
I personally think air bikes mimic mountain biking more accurately than other stationary exercise bikes. When you go mountain biking, you’re constantly using your arms to maneuver the bike through obstacles and lift the handlebars to crawl over rocks and hop over gaps. Air bikes, like the Rogue Echo Bike, train your upper body unlike most stationary bikes. Air bikes also happen to be phenomenal for conditioning, which you’ll definitely need for mountain biking.
Plyo Box
Mountain biking requires a good deal of explosive power: When you jump the bike over gaps or lift the front wheel coming off of a drop (ledge), that momentum has to come quickly. Box jump variations such as regular box jumps, squat box jumps, box jump overs, and burpee box jumps will be helpful here.
Best Plyo Box for Mountain Bike Training
REP Fitness 3-in-1 Wood Plyo Box
Product Highlights
- Engineered with construction-grade, 3/4-inch plywood and reinforced with internal support
- Easy assembly – predrilled holes and interlocking joints
- Available in four sizes each of which offer three different height options
Pros & Cons
Pros
- Variety of sizes
- Built-in handles
- Easy assembly
- Versatile
Cons
- Larger size is cumbersome to move around
- No shin protection
- No added traction in the form of texture
Bottom Line
The REP Fitness 3-in-1 Wood Plyo Boxes offer quality construction and an affordable price for anyone looking to add a traditional box to their gym space.
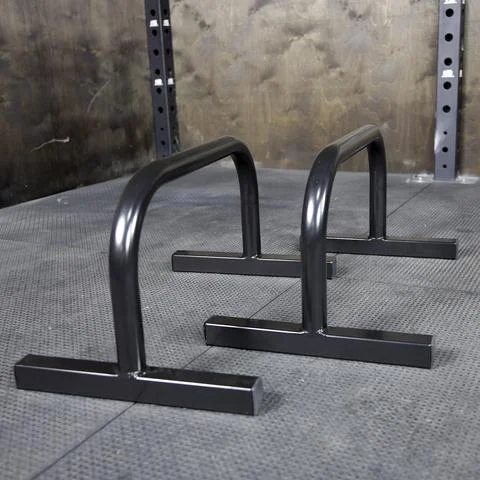
Parallettes
The first couple of times I went mountain biking, I was surprised when my chest and triceps, not my quads, were the most sore part of my body. It clicked when I realized how much maneuvering of the handlebars—namely, the pressure you put on the bars to engage the suspension and then lift the front wheel—was required. Use parallettes to add an extra challenge to push-ups, as well as train core stability exercises such as tucks and L-sits.
Best Parallettes for Mountain Bike Training
Fringe Sport Steel Parallette Set
Product Highlights
- They are 23″ long and 12.
Pros & Cons
Bottom Line
Introducing our Parallette Set, we’ve constructed this piece of equipment to last and to make sure you feel secure in your workouts using it. \n
- \n
- They are 23″ long and 12.5″ high, which is adequate for for L-Sits or Hand Stand Push-Ups. \n
- The set weighs 25lbs so they are sturdy and easily stored. \n
- The 14″ x 23″ base (per bar) provides stability to prevent rocking or tipping. \n
- Steel parallettes mean they are durable and will last for years. \n
Glute-Ham Developer (GHD)
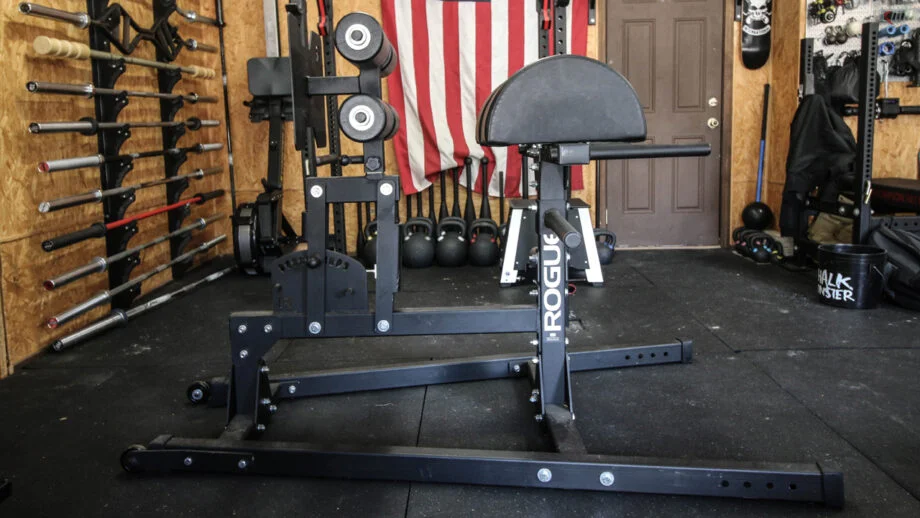
Most people who don’t participate in mountain biking tend to assume that the quads do all of the work. This couldn’t be further from the truth: When mountain biking, your hamstrings and glutes engage at all times, particularly during inclines. On a GHD, you can do a variety of posterior chain exercises to strengthen your hamstrings, glutes, and lower back to assist with mountain biking.
Best GHD for Mountain Bike Training
Rogue Abram GHD 2.0
Product Highlights
- Like other Rogue profiles, the Abram GHD 2.0 is constructed with high-quality, 11-gauge steel.
- Per our tester, the vinyl padding across the design is comfortable yet resilient enough for regular use.
- The Abram GHD 2.0 measures 73 inches in length and 44.5 inches wide.
- The triangular geometry of the base can be great for keeping dimensions compact while also promoting stability.
Pros & Cons
Pros
- Easy to adjust with 10 lock-in positions
- High-quality materials
- Durable black powder coating
- Handles and wheels make it more portable
- Manufactured and sourced in the USA
- Great resale value
Cons
- Pricier than many other GHDs on the market
- Larger footprint
- Footplate could be larger
- Some users experienced vinyl coming off
- Extra adjustments might be unnecessary for most users
Bottom Line
Considering everything, the Rogue Abram GHD 2.0 is one of the best GHD’s on the market. Even with more companies putting out GHDs than ever before, nobody touches the quality of the Abram 2.0 for the price. If you take into account features, quality, price, and versatility then the value on the Abram 2.0 is hard to beat. It is big, it is bulky, and it is stable, but if you have the room and plan to use it, having a GHD like this in your garage gym is awesome. If you own a CrossFit Affiliate, I don’t see many other options to pursue.
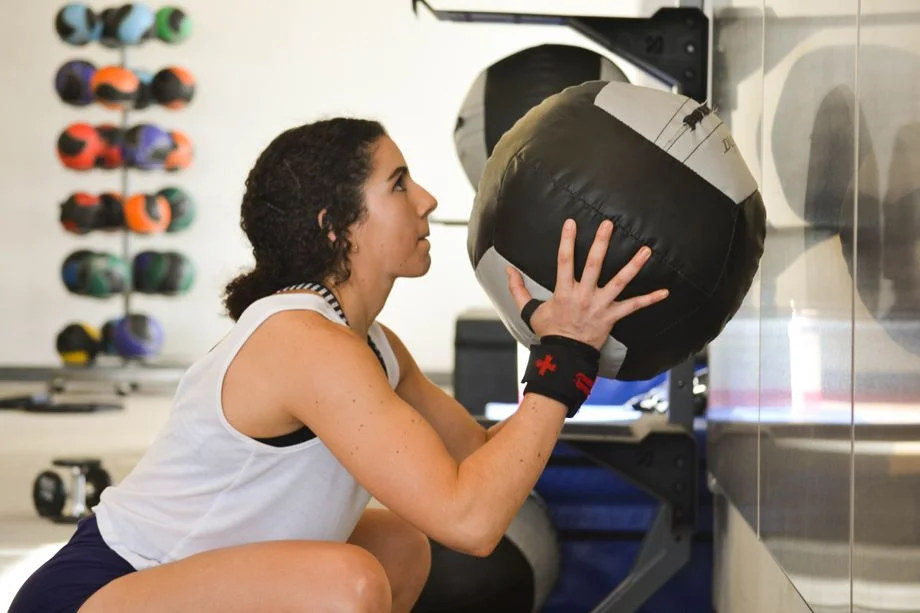
Medicine Ball
I love medicine balls for training both the conditioning and reflex aspects of mountain biking. Use one for wall-balls, ball slams, and medicine ball thrusters and cleans to increase cardiovascular fitness; use one for wall slams, partner med ball situps, and partner tosses to train reaction time and coordination.
Best Medicine Ball for Mountain Bike Training
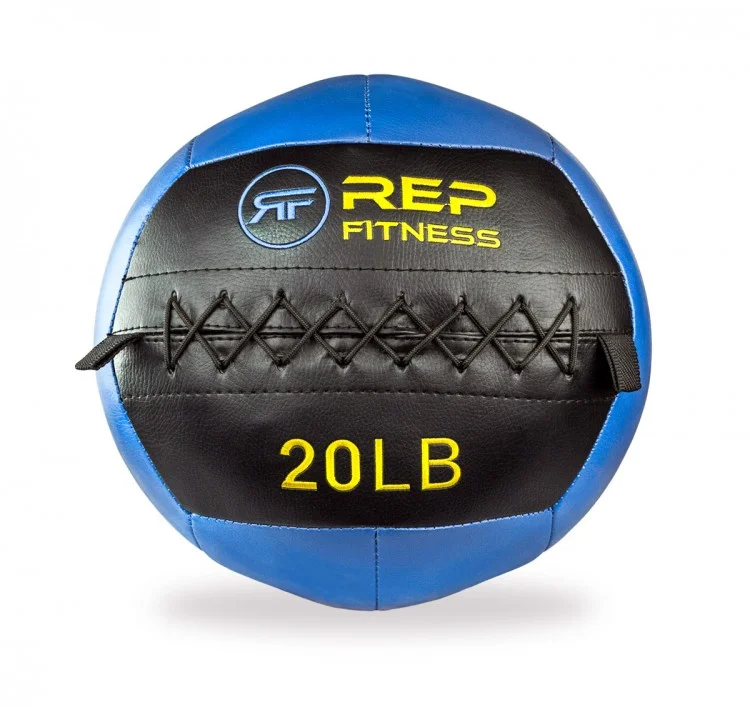
REP Fitness Medicine Balls V2
Product Highlights
- Won’t lose their shape
- Vibrant colors
- Soft outer shell
- Available in 4 lbs to 30 lbs
Pros & Cons
Pros
- Double-stitched seams
- Hand-stuffed
- Won’t lose their shape
- Vibrant colors
- Soft outer shell
- Available in 4 lbs to 30 lbs
Cons
- Gets pricey at higher weights
- Using as a slam ball will void your warranty
Bottom Line
Featuring double-reinforced seams and a double-lined shell, these med balls are hand-stuffed and stitched with thick threading.
The Basics
General strength is obviously great to have for mountain biking. Use kettlebells, dumbbells, and a barbell with weight plates to train basic compound movements, including squats, deadlifts, overhead press, rows, lunges, power cleans, and more. Even if it doesn’t feel like these exercises are improving your mountain bike fitness in the moment, they are. Single-side leg exercises are especially helpful.
How to Train for Kayaking and Paddling
Lots of water adventures involve leisurely paddles over glass-top water—but lots involve unexpected obstacles and rapids. Water is unpredictable, so it’s best to launch prepared. To navigate any water, calm or not, these skills will prove helpful and, at times, necessary:
- Cardiovascular fitness/endurance
- Balance
- Rotational strength
- Pulling strength
- Shoulder strength and stability
Best Rower for Water Sports Training
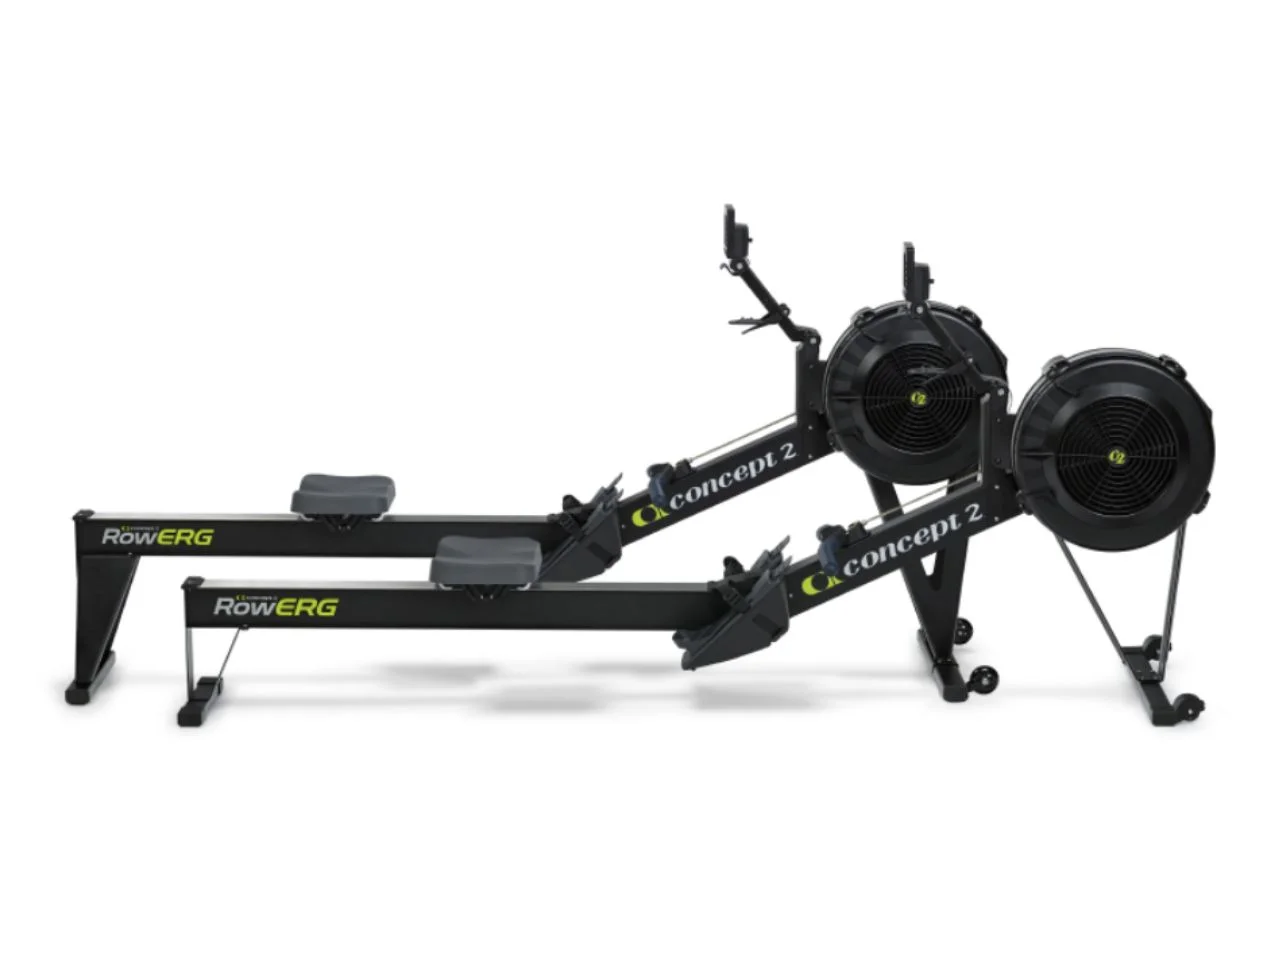
Concept2 RowErg
Product Highlights
- Priced around $1,000
- Uses air resistance generated by the fanned flywheel
- Advanced PM5 Performance Monitor
- Low impact full-body workout fitness machine
- Lightweight and easily portable
- Can be broken down into two pieces for storage
- Can also be hung for storage
Pros & Cons
Pros
- Quick and easy assembly
- Above-average weight capacity
- Easy to replace parts as needed
Cons
- Built-in programming is fairly basic
- Costs more than $1,000
Bottom Line
The Concept2 RowErg is the best rowing machine we’ve tested and reviewed, including those that are much more expensive like the WaterRower. There’s a reason you can find Concept 2 products in nearly every gym in the world, including CrossFit Boxes, and home gyms. After having the Model D for over two years, we are still as satisfied with it as we were on day one.
Rower
If you want to get good at rowing, row! Paddlers can easily mimic on-the-water training at home with a rowing erg. A rowing machine will help you improve two of the most important skills all paddlers should have: cardiovascular endurance and stamina in your pulling muscles.
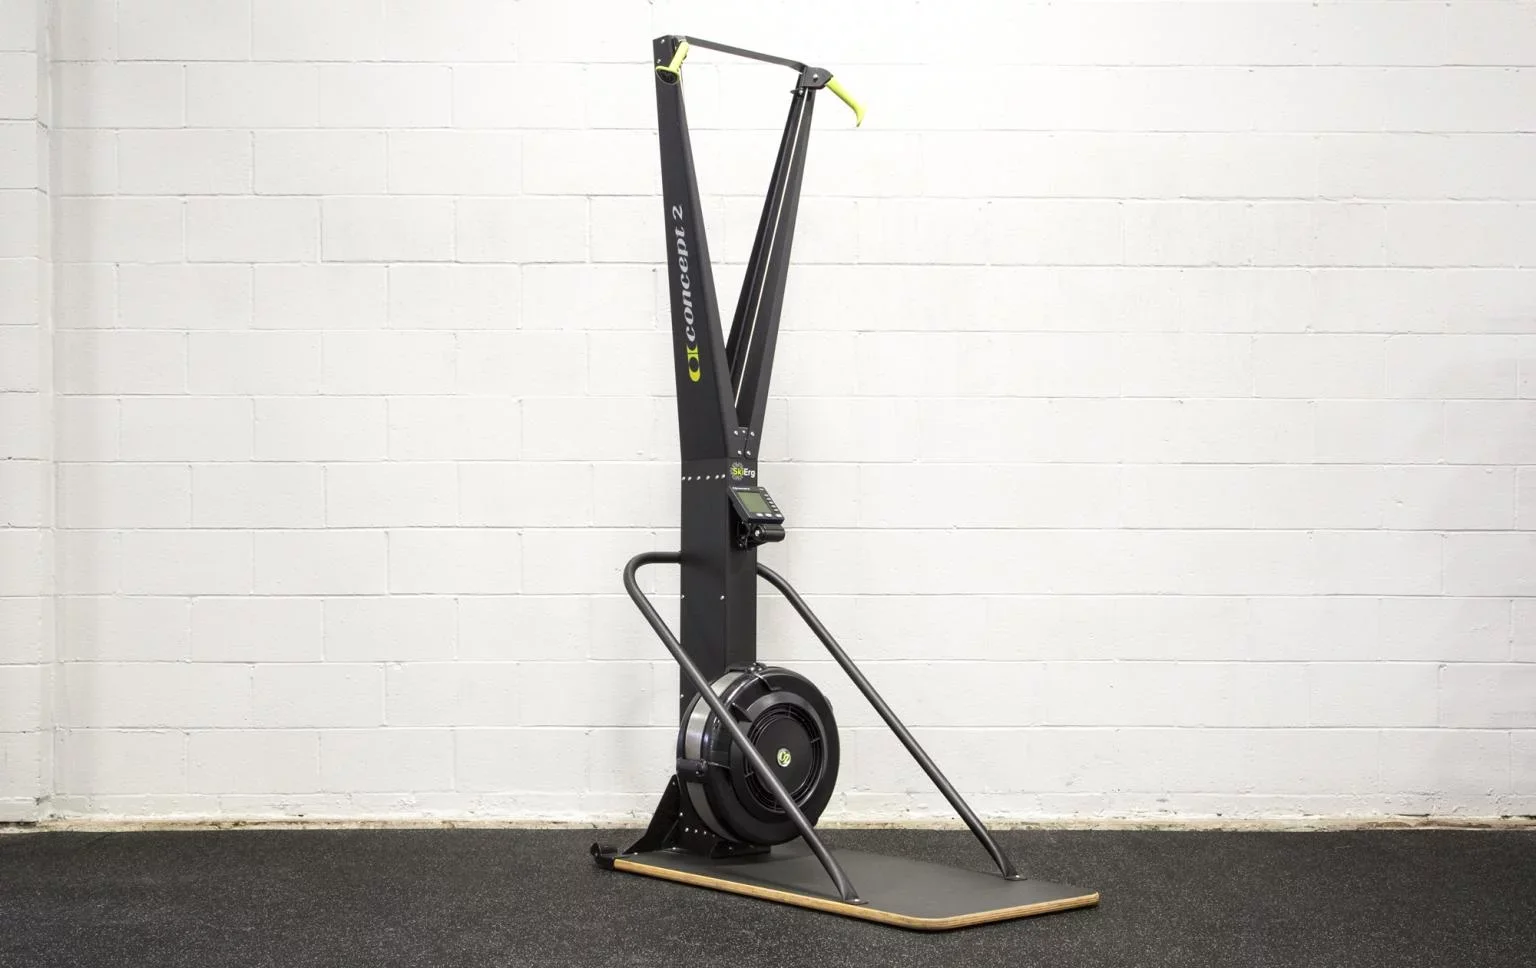
Ski Erg
If you have the space and money to have both a rower and a SkiErg, the SkiErg is a helpful addition. It trains endurance in the vertical pulling pattern, and generally, you’ll need both horizontal and vertical pulling strength for paddling excursions, especially when rapids are involved.
Best Ski Erg for Water Sports Training
Concept 2 SkiErg
Product Highlights
- Textured, strapless handles don’t soak up sweat
- State-of-the-art monitor
- High-strength cords
- Free-standing or wall-mounted
- For serious athletes
Pros & Cons
Pros
- Strapless handles with texture that doesn’t soak up sweat
- Durable and well-built monitor
- High-strength cords provide options for different pulling methods
- Can be free-standing or wall-mounted
Cons
- Geared more towards serious athletes
- Would like to see additional handle options
- Would like to see more pulleys
Bottom Line
Adapting key rowing machine elements like flywheel resistance and a state-of-the-art PM5 Performance Monitor, the SkiErg turns the athlete’s orientation vertical, simulating the movements of real cross-country skiing with both double-pole and classic alternating arm technique.
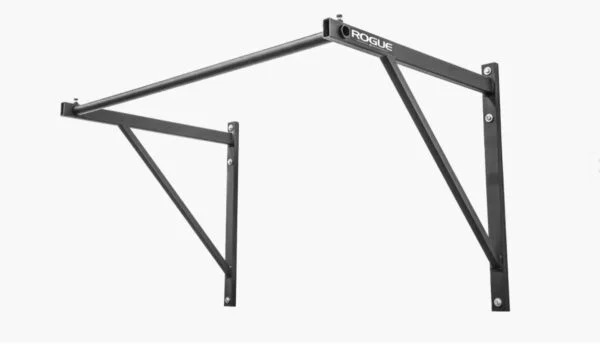
Pull-Up Bar
Generally, water sports require a lot of pulling strength. Whether you’re rowing oars, maneuvering an ocean kayak, or simply enjoying a stand-up paddle, your back muscles will be put to work. Pull-ups are arguably the most functional pulling exercise in existence. If you can rep out a few good strict pull-ups, you can rest assured you have the pulling strength it takes to navigate the water.
Best Pull-Up Bar for Water Sports Training
Rogue P-4 Pull-up System
Product Highlights
Pros & Cons
Pros
- Made of 11-gauge steel
- Has a 30-inch depth to allow for kipping
- Can buy brackets and bars individually
Cons
- Mounting hardware not included
- Powder coat gets slippery when hands are sweaty
Bottom Line
If you want a wall- or ceiling-mounted pull-up bar that you can kip on, go with the Rogue Fitness P-4 Pull-Up System.
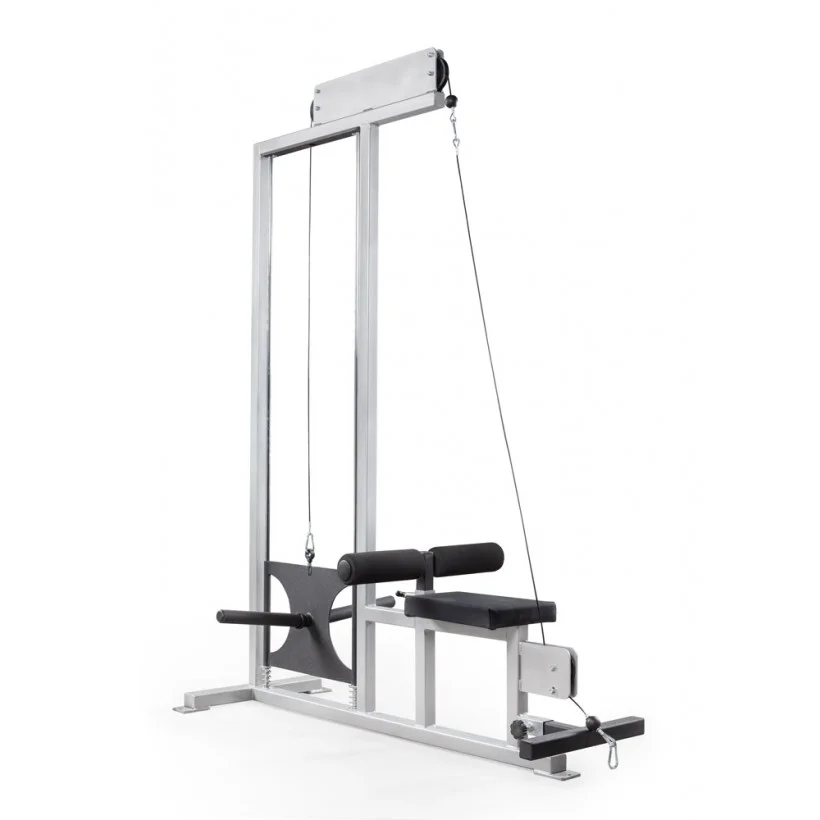
Lat Pull-Down and Low-Row Cable
You may be wondering why I recommend both a pull-up bar and a lat pull-down for paddlers and rafters. Well, there’s a lot of unilateral movement happening out on the water, and it’s important to independently train both sides of your body to account for that. Unless you’re an expert at calisthenics, I’ll assume you can’t do a single-arm pull-up, and that’s where a lat pull-down and low-row combo comes into play: unilateral upper body strength training. The low-row aspect also trains horizontal pulling muscles versus vertical pulling muscles.
Best Lat Pull-Down for Water Sports Training
EliteFTS Scholastic Plate Loaded Lat Pulldown and Low Row
Product Highlights
Pros & Cons
Bottom Line
The elitefts Scholastic Plate Loaded Lat Pulldown and Low Row
\n\nThe back building, dual pulldown/low row combo is an essential piece for any gym. Combining these allows for a single work place and smaller footprint for overall back development. Overbuilt with premium quality steel, 2 inch tubing and foam leg pegs for comfort.
\n\n\n\nDimensions: 28″ wide ,93″ tall, 65″ deep
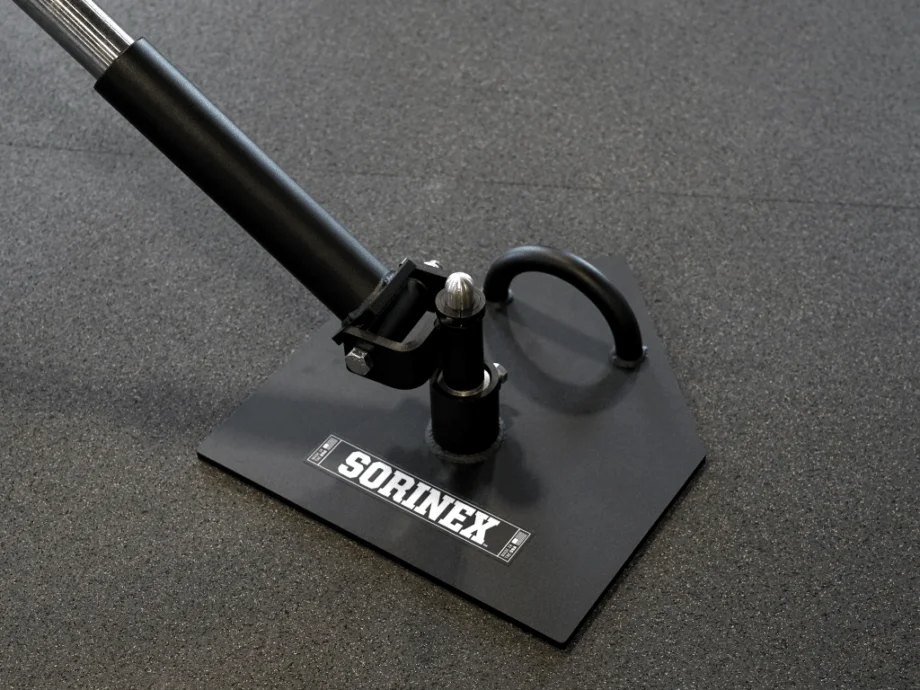
\nLandmine
Build rotational strength and shoulder strength with a landmine station. Even on calm waters, you must constantly rotate your core and engage your shoulders to propel your vessel through the water. Try out landmine presses, landmine thrusters, landmine kneeling presses, and landmine upright rows.
Best Landmine for Water Sports Training
Sorinex LandMine Home Base
Product Highlights
Pros & Cons
Bottom Line
The Sorinex LandMine was originally developed in 1999 to help co-owner, Bert Sorin, train for Hammer throwing. This is the tool that started the Angled Barbell Training craze. The LandMine turns any barbell into a ground based torso trainer, row unit, and is use for other sport specific applications. The universal joint swivel point rotates and swings in multiples axes, allowing a wide range of different movements. Fits Olympic sized bars. \n \nWeight: 40 lbs \nWidth: 15″Â \nLength: 18″Â \nDiameter: 2″Â \nMaterial: 11 ga. steel \nFinishing: Black Texture Powder Coat
The Basics
Your back and shoulders aren’t the only muscle groups putting in work on a kayak, canoe, or paddleboard. Compound exercises such as squats, deadlifts, lunges, bent-over rows, step-ups, and more all build general strength and fitness that’ll help out on the water. You can also use basic strength training equipment to add more rotational movements, like windmills and wood chops, to your routine. If you plan to stand-up paddle, use dumbbells and kettlebells for unilateral lower-body work to prepare for all of the weight shifting you’ll be doing on the board.
How to Train for Snow Sports
Skiing and snowboarding require a super specialized set of skills. You need to learn how to keep your mass centered while cutting and carving; how to balance while moving at fast speeds; how to stabilize when thrown off-kilter; and much more. Certain skills like foot positioning, pole planting, and carving can really only be learned on the slopes. But you can set yourself up for success by building some prerequisite strength and coordination.
Physical skills required for skiing and snowboarding that you can practice in a home gym include:
- Balance
- Stability
- Stamina/cardiovascular fitness
- Lower body power/explosiveness
- Unilateral strength
SkiErg for Snow Sports Training
Concept 2 SkiErg
Product Highlights
- Textured, strapless handles don’t soak up sweat
- State-of-the-art monitor
- High-strength cords
- Free-standing or wall-mounted
- For serious athletes
Pros & Cons
Pros
- Strapless handles with texture that doesn’t soak up sweat
- Durable and well-built monitor
- High-strength cords provide options for different pulling methods
- Can be free-standing or wall-mounted
Cons
- Geared more towards serious athletes
- Would like to see additional handle options
- Would like to see more pulleys
Bottom Line
Adapting key rowing machine elements like flywheel resistance and a state-of-the-art PM5 Performance Monitor, the SkiErg turns the athlete’s orientation vertical, simulating the movements of real cross-country skiing with both double-pole and classic alternating arm technique.
SkiErg
A SkiErg will improve your conditioning using the very same movement pattern you’ll use while skiing (not so much for snowboarding, but it’s still helpful here, too). The Concept2 SkiErg was actually designed originally for cross-country ski athletes. It uses a flywheel to create resistance and the movement pattern targets your core, lats, and triceps—all essential to a strong skier.
Treadmill
Another way to improve cardiovascular fitness is simply with a treadmill. Although you don’t need to have the stamina of a marathon runner to ski or snowboard, a basic level of cardiovascular endurance does help. It’ll make your trip to the snowmasses much more enjoyable, at the very least.
Treadmill for Snow Sports Training
NordicTrack Commercial 1750
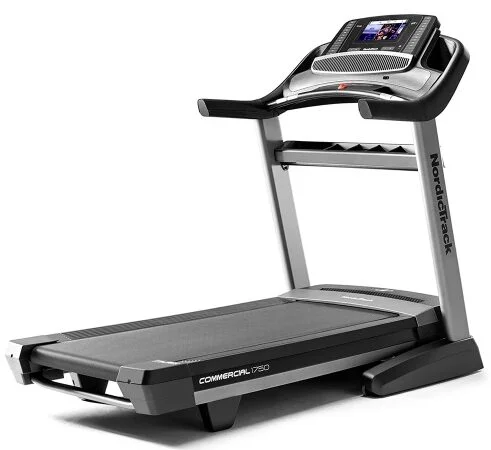
Product Highlights
- Spacious running deck
- Compatible with iFIT
- 14-inch touchscreen
- Incline and decline training
- Financing available
Pros & Cons
Pros
- Compatible with iFIT
- 3.5 CHP motor
- Free trial of iFIT subscription with purchase
- Treadmill with incline and decline training
- Foldable to save space (EasyLift Assist)
- Run that feels similar to road running
- Financing options available through NordicTrack
- Generous speed range
- Wide running deck
- Cooling fan
Cons
- Big footprint
- Heavy and not the easiest to move
- Price is around $2,000
- Warranty is voided if the treadmill is used/stored in a garage
Bottom Line
If you’re looking to add a workhorse of a treadmill to your home gym, we recommend the NordicTrack Commercial 1750. It’s one of the few treadmills that has decline training capabilities and is compatible with iFIT, one of the best training programs.
Sliders
Tiny but mighty, exercise sliders (also called glide discs) take regular ol’ movements to a new level. Sliding burpees, sliding lunges and lateral lunges, and sliding mountain climbers are just a few examples of exercises you can make more challenging with sliders. Using sliders forces you to fight with momentum more than you would without them, a skill that translates well to the slopes.
Sliders for Snow Sports Training
SKLZ Court Slidez Exercise Sliders
Product Highlights
Pros & Cons
Pros
- Foam grip on upper side for comfort
- Won’t leave a mark on your floors
- Hex shape reinforces natural hand placement
- Helps build core strength and stability
Cons
- Might be too big for people with smaller hands
Bottom Line
These exercise sliders are high-quality and durable, and are an inexpensive investment for core and stability training.
Balance Board
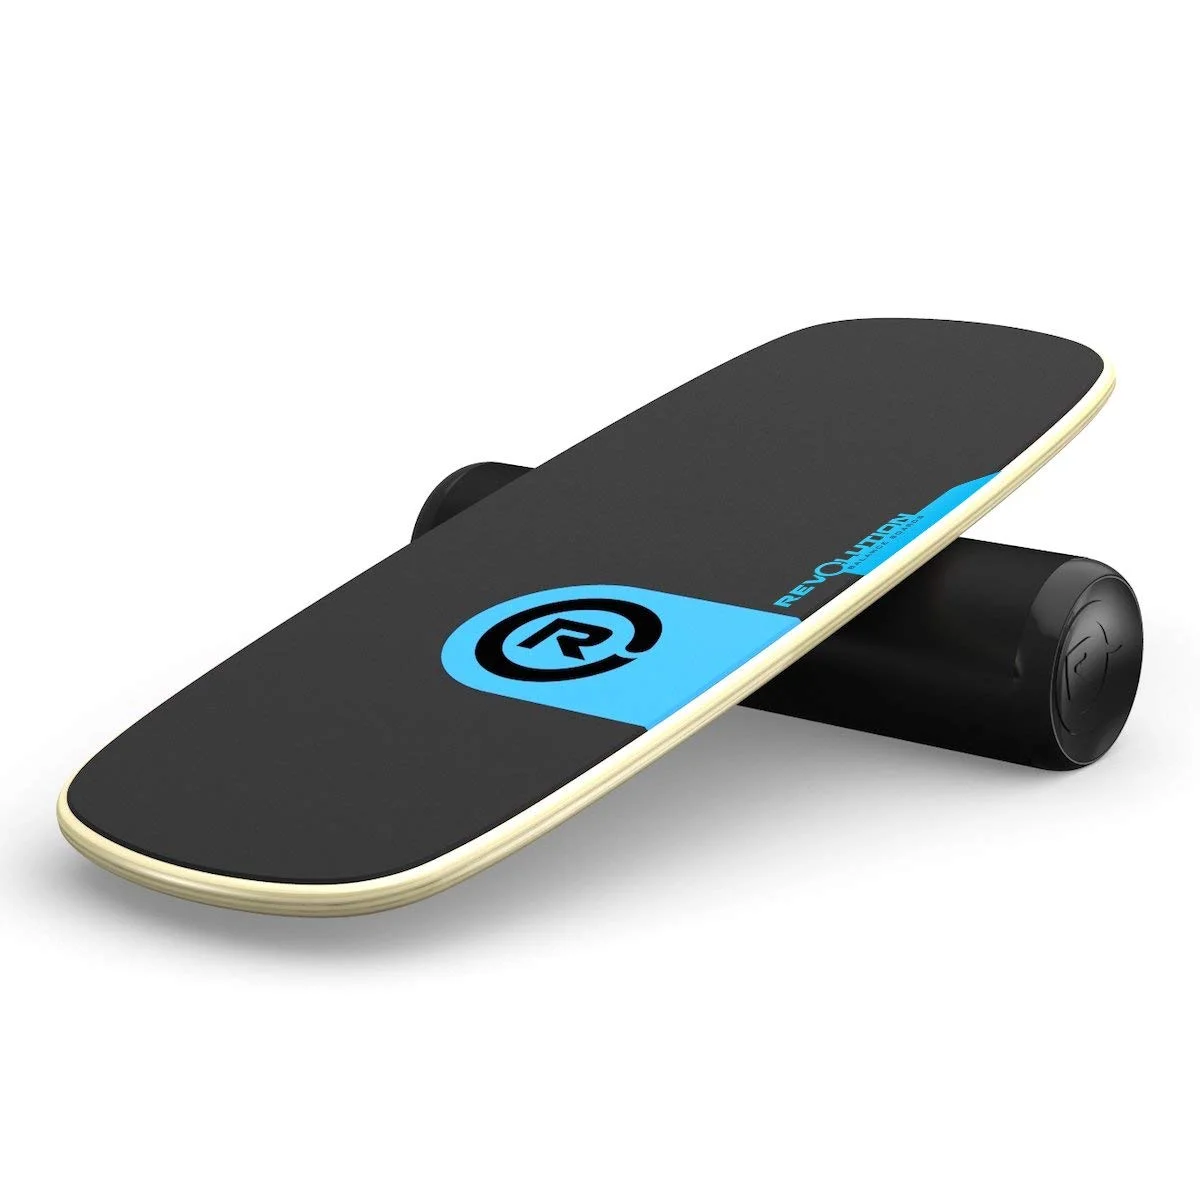
If you want to get serious about improving your balance and body awareness, definitely get a balance board for your home gym. These are more applicable to snowboarding, but all balance practice is good practice. Balance boards hone your ability to quickly shift your center mass to accommodate fluctuations in your body position, translating to cutting and carving on a snowboard.
Balance Board for Snow Sports Training
Revbalance 101 Balance Board Trainer
Product Highlights
Pros & Cons
Bottom Line
IMPROVE YOUR BALANCE. AND A WHOLE LOT MORE. \n \nThe Revolution 101 is not only a great balance board to get started with, it will still keep challenging for years to come. Improves your balance? Check. Burns calories? Check. Really fun and keeps your skills fresh? Double check. Whether you are looking for something to improve your board riding, sports skills, or fitness, the 101 won’t let you down. \n \nThe 101 is a 2-piece roller style balance board and offers much more movement, and more challenge than a round wobble board or single piece board. \n \nHANDCRAFTED IN THE USA. \n \n_______________________________ \n
REVOLUTION BALANCE BOARDS | THE 101
\nFOR BOARDSPORTS: \n \nThe 101 is a fun and challenging way to improve your balance and body control for skateboarding, snowboarding, skimboarding, surfing, wakeboarding, stand up paddle boarding, longboarding and more. Simulate any boarding activity wherever you are, any time. Good weather not required. \n \nFOR FITNESS: \n \nGreatly strengthen core muscle groups (stomach & waist) as well as legs (thighs, hamstrings, hip, butt) and overall stability. You can also incorporate the 101 into your routine by combining it with other exercises like weight training or calisthenics. Make your workout more fun and dynamic. \n \nFOR ATHLETICS: \n \nA great way to improve your balance and stability for athletics like Hockey, Golf, Baseball, Tennis, Martial Arts, Dance, Gymnastics and many more. Faster balance recovery can help you a get a step up on your opponents, and training with the 101 can give you just that. \nFIND YOUR BALANCE
\nDURA-SOFT TRACTION TOP: \nThe Dura-Soft grip on the top of the 101 make it the most comfortable balance board to use. Great for using with, or without shoes. \n \nUSE ANYWHERE: \nThe 101 features heavy-duty made in the USA construction that is durable enough to use on outside, but still very freindly for indoor use. We reccomend begginers start by learning to use the board on carpet. \n \nSTAY IN CONTROL: \nRoller stops on the base of the 101 balance trainer keep you from rolling too far one way or the other. Advanced users can remove these stops for more freedom. \n \nFOR ALL AGES: \nNot only is the 101 a great board for kids (because of it’s compact size) it is also usable and a lot of fun for the entire family. We regularly get feedback about family’s and roomates challenging each other to livingroom balance contests. Game on. \n \nMini Resistance Bands
Wanna know two underrated muscle groups that are incredibly important to all that carving you’ll be doing? Your hip abductors and adductors. These are actually super important to pretty much everything you do. Your adductors are responsible for moving your legs toward the midline of your body, while your abductors move your legs away from the midline of your body. In other words, they’re ultra-critical for stabilization during lateral movement—of which you’ll be doing a lot in the snow. Mini resistance bands are great for isolated adduction and abduction, as well as for abduction during squats, deadlifts, and hip thrusters.
Mini Resistance Bands for Snow Sports Training
BC Strength Glute Loop Package
Product Highlights
Pros & Cons
Pros
- Constructed of durable fabric
- Interwoven elastic bands hold up for a long time
- Come in six different resistance levels
- Latex-free
- Can buy in a set or in singles
Cons
- Fabric isn’t water-or sweat-resistant
- Fabric can feel itchy at times
Bottom Line
BC Strength Glute Loops are among the best mini resistance bands for glute strength and overall lower body development.
The Basics
Use kettlebells and dumbbells for general strength training, but specifically core stability exercises. Windmills, Russian twists, woodchops, and lunges with torso rotations can all be done with dumbbells or kettlebells.
Resistance bands are another great option: Anchor one to a door frame or your power cage and use it to rotate with resistance in every which way. And, as always, a barbell and weight plates are helpful for building strength and stamina through traditional compound movements, but I wouldn’t call them necessary for a winter athlete’s home gym if you have other free weights.
Cross-Training for Outdoor Athletes
For the avid adventurist who likes to try their hand at just about anything (we ride! And run and ski and climb and, yeah), cross-training is key. Having general strength and conditioning equipment in your home gym is essential—a barbell and some bumper plates can go a long, long way. Mix and match the above equipment recommendations to best support your outdoor pursuits.