When we think about the best home gym equipment, a few pieces come to mind: Olympic barbells, squat racks, and, of course, weight plates. Cast iron plates and bumper plates can be expensive, and it may even be challenging to find them in stock. You can take matters into your own hands, but you have to be comfortable doing DIY projects.
Creating DIY weight plates comes at a fraction of the cost of commercial plates. Even better, these plates can be made in a variety of weights. And, as an added perk, they are incredibly durable, great for bodybuilding, weightlifting, and CrossFit.
Follow our step-by-step guide below to make your own Olympic weight plates.
DIY Weight Plates Video Tutorial
Benefits of DIY Weight Plates
When Coop Mitchell, the founder of Garage Gym Reviews and resident DIY gym equipment expert, originally made the video tutorial on these DIY concrete weight plates, weight plates were one of many exercise and fitness equipment items that were facing pandemic supply chain issues. You simply could not walk into a store and buy what you wanted.
This DIY approach allows you to get around the supply chain hiccups. Here are some of the other benefits you should keep in mind before making your own.
Durable: These Are A Solid Option
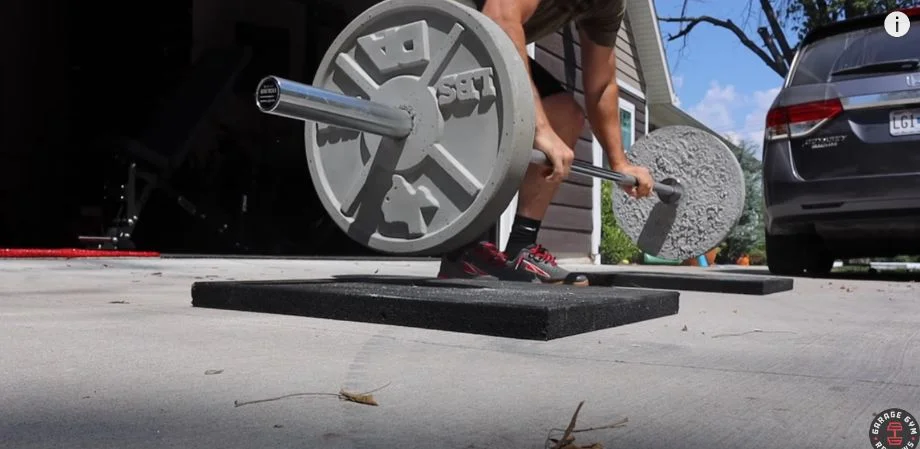
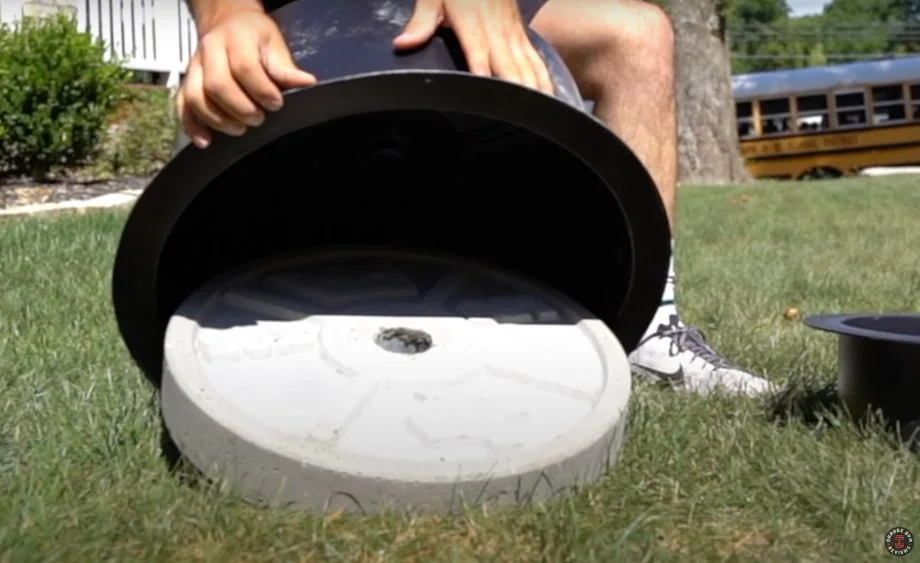
To test the durability of these plates, Coop dropped them on Thug Rugs, which are rugs that are less than an inch thick. Then he repeated the experiment from deadlift height, where he says, “and they still held up perfectly.” This was super impressive, given that the experiment was done after only two days of curing. However, Coop says, “Ideally, you’d let them rest about seven
days to cure even harder,” as this allows them to get to their full strength.
In the words of Coop, “We are solid, bro,” with these concrete plates, especially since most people will not be intentionally dropping the plates on their home gym flooring.
May Be More Affordable
Even though the DIY approach requires buying some basic materials and molds, it is still a cost-savings for many customers. These are a good deal considering how much some of the best weight plates from brands like Rogue and REP Fitness cost.
Choose Your Own Weight
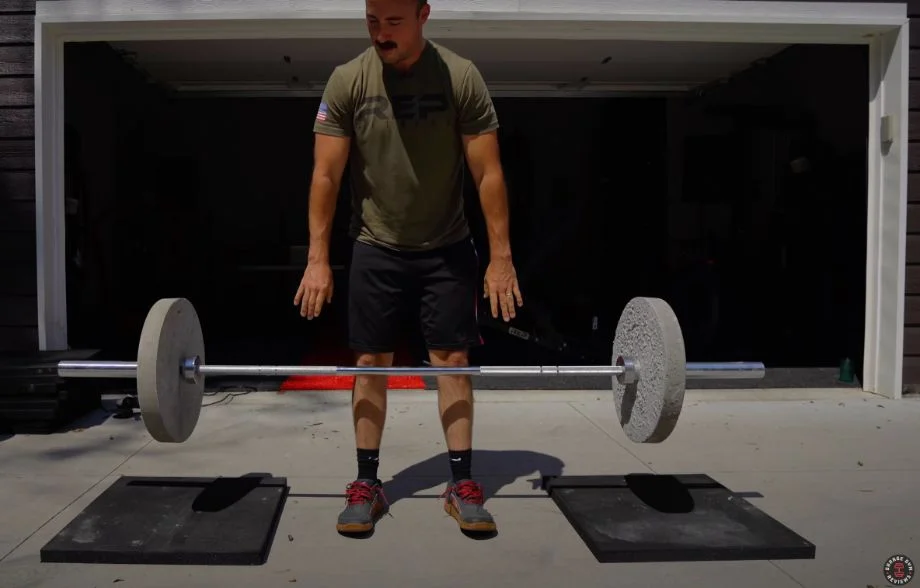
One of the biggest perks of the DIY concrete weight plates is that you can get whatever weight you want within reason, depending on the size of your mold. Coop made both 45-pound plates and a smaller 10-pound plate.
It may take some trial and error to get exactly the weight you want, though. This happens because some of the water in the mixture evaporates as it dries, and you lose some weight there. You also need to remember that your molds weigh a couple of pounds.
But, despite this trial and error, Coop noted, “By measuring and remeasuring your concrete, you will be able to get pretty close to your desired plate weight.”
With enough time and patience, and preferably plenty of molds so you can do multiple weights at once, you can build a complete weight set.
Materials List
- Concrete weight plate mold
- Bucket: A bucket is essential for mixing concrete. I you don’t have a mold, you can also use it as an alternative to the mold.
- Silicone spray
- High-strength concrete: This high-strength concrete mix minimizes the chance your concrete will crack.
- 2” electrical conduit or PVC pipe.
Most of these items can be purchased at a hardware store or online through a site like Amazon.
Steps for DIY Weight Plates
Below in our tutorial, we describe the step-by-step process to build these DIY concrete weight plates.
- Mix the concrete, ensuring you stir while pouring into a bucket. The consistency should be similar to a protein shake without any clumps.
- Pro Tip: add toothpicks and/or small pieces of metal, such as nails or tacks, to act as rebar throughout your mix.
- Spray the molds with silicone spray. This will make it easier to remove the concrete upon completion.
- Apply silicone to the cylinders to ensure the conduits remain in place while pouring the concrete.
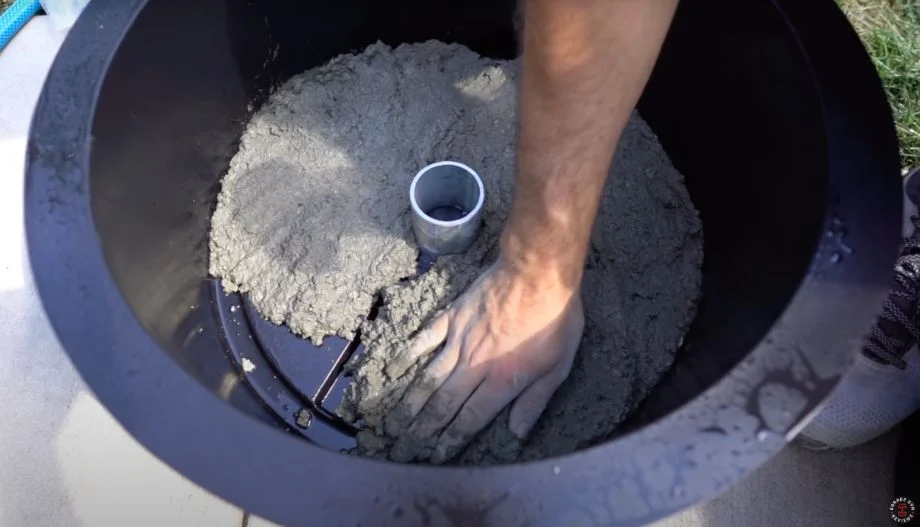
- Place the conduits or PVC pipe in the center of the weight mold to avoid filling up the center.
- Slowly pour the concrete into the mold, starting with a small layer and gradually filling it up. The first layer you should do by hand. After that, you can pour concrete in.
- Let the concrete dry. Make sure that your mix is not too soupy.
- Shake the weight mold to remove any air bubbles.
- Place the molds on a scale and add or remove concrete based on the desired weight. Remember to subtract the weight of the mold when calculating the weight. You may not hit the weight exactly on. But it is pretty easy to get close.
- Place the barbell through holes in the weight plates. You can also always use an angle grinder if the weight pops out of the mold with any imperfections. This is especially important to make sure that the plates slide smoothly onto the barbell.
Expert Final Thoughts: DIY Concrete Plates
Coop was very impressed with the look of the concrete weight plates, which had a nice logo from the mold. It was a highly professional look that rivaled many commercial metal weight plates. Another thing that impressed Coop was how close the plates were to the desired weight. As he noted, these DIY plates came closer to hitting the target weight than many of the cheap metal weights on the market.
According to Coop, concrete weight plates seem like a great, versatile, and potentially money-saving addition to any home gym. Plus, once you learn how to do these, you could probably make your own DIY concrete dumbbells and kettlebells, too!
FAQs DIY Weight Plates
Can you make your own weight plates?
Yes, and it’s not that difficult to do either. You can easily make DIY concrete weight plates with just a few basic materials and some solid instructions. We use molds, concrete, and little else to product 45-pound weight plates.
How do you make homemade weight sets?
Our step-by-step instructions for making weight plates:
1. Mix the concrete, ensuring you stir while pouring into a bucket. The consistency should be similar to a protein shake without any clumps. Pro Tip: add toothpicks and/or small pieces of metal, such as nails or tacks, to act as rebar throughout your mix.
2. Spray the molds with silicone spray. This will make it easier to remove the concrete upon completion.
3. Apply silicone to the cylinders to ensure the conduits remain in place while pouring the concrete.
4. Place the conduits or PVC pipe in the center of the weight mold to avoid filling up the center.
5. Slowly pour the concrete into the mold, starting with a small layer and gradually filling it up. The first layer you should do by hand. After that, you can pour concrete in.
6. Let the concrete dry. Make sure that your mix is not too soupy.
7. Shake the weight mold to remove any air bubbles.
8. Place the molds on a scale and add or remove concrete based on the desired weight. Remember to subtract the weight of the mold when calculating the weight. You may not hit the weight exactly on. But it is pretty easy to get close.
9. Place the barbell through holes in the weight plates. You can also always use an angle grinder if the weight pops out of the mold with any imperfections. This is especially important to make sure that the plates slide smoothly onto the barbell.
How do you make concrete molds for weights?
Instead of making your own concrete molds, you can order some from Amazon or Stix and Stones.
How can I make heavy weights at home?
If you want to make heavy weights, purchase a large plate mold and fill it with concrete. Once it’s dry, place the mold on the scale so you can determine how much it weighs. If it’s not heavy enough, add concrete until you reach that weight.