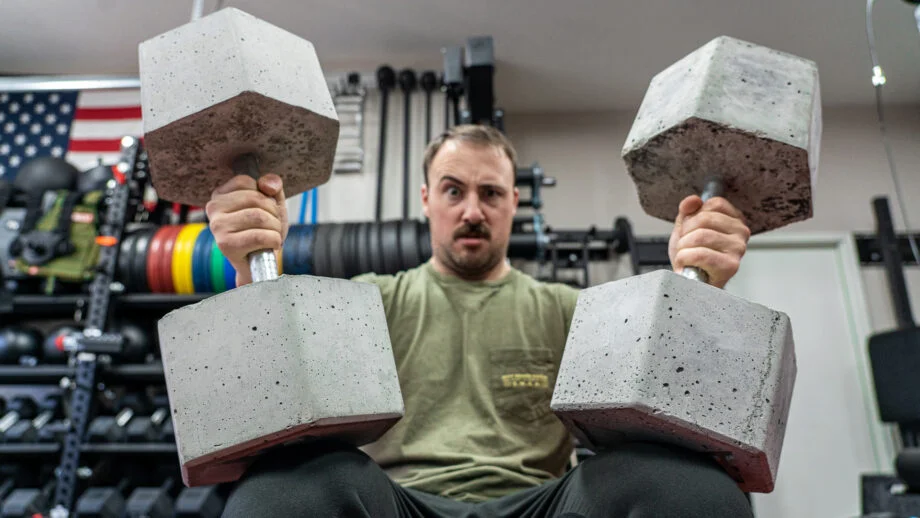
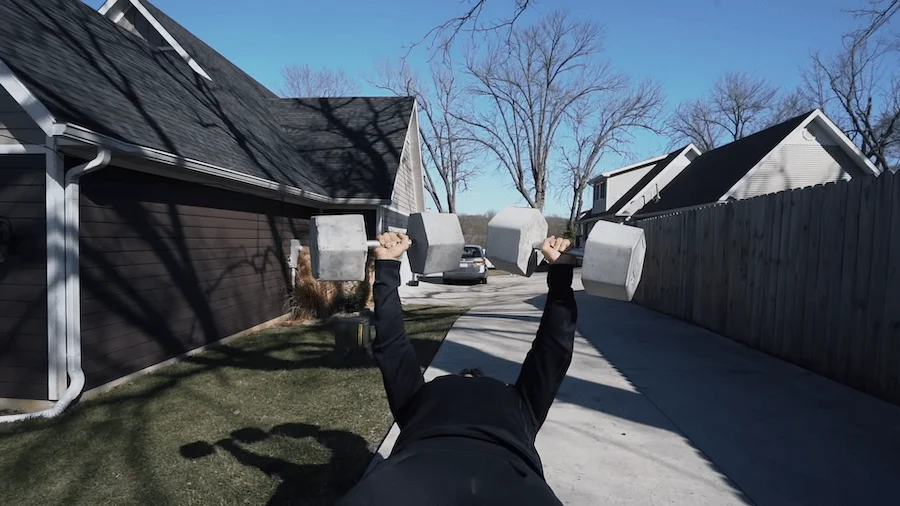
Nearly every home gym in the world features dumbbells. The issue for most is that they take up a lot of space and they’re expensive. In this guide, we’re going to solve one of those problems by showing you how to make DIY Concrete Dumbbells for less than $20. With the proper creativity, you could get these above 150 LB or as low as 5 LB and do it cheaply.
Dumbbells are an essential part of the best home gyms and need as part of the best home gym equipment. They’re incredibly versatile and can be used for many obvious exercises like using the best weight benches for bench press, curls, and shoulder press, but also lunges, goblet squats, and more. Dumbbells, however, are expensive. So, I want to show you how you can make a full set of the best home dumbbells by following our do-it-yourself dumbbell guide and using some cheap concrete. With patience and attention to detail, you can create concrete dumbbells that rival the real thing.
Why Concrete for Dumbbells Instead of a Different Material?
The origin of dumbbells are believed to have come from ancient Greece and were called ‘halteres.’ Halteres were used by Spartan athletes and were most often made of either stone or metal.
These were the materials available, so it’s what was used.
In the same vein, if 2000 years ago stone was good enough for the Spartan athletes training for their lives in colosseums, that it will still work great in our humble garage gyms today.
Now let’s set aside the history of dumbbells for a moment. For commercial dumbbells, you usually pay somewhere in the neighborhood of $1.50-2.00 per pound of weight. This means that for one set of 45lb dumbbells you can expect to pay upwards of $150 not including shipping for a pair.
In contrast, a 60 LB bag of high-strength concrete costs just over $6, can be bought at any hardware store and only requires water and some sweat equity to use.
Concrete is also one of the few long-lasting building materials that doesn’t require an excessive amount of tools or experience to use. Yes, it’s not as strong as iron, but it’s also used as the foundation for every modern house in the world.
With all of this said, concrete is an excellent choice for DIY dumbbells and when combined with rebar or steel shot, can produce great results at heavy weights.
If you’re looking to buy dumbbells, we recommend checking out our best adjustable dumbbells guide for most home gym owners.
Video Tutorial
Materials List
In order to build your own homemade set of dumbbells, you don’t need a ton of items. If you’re going to build a full set of dumbbells, your main expense will be your time and the costs of concrete.
Here are the materials we used to build our DIY dumbbells:
- Stix and Stones Dumbbell Molds or small painters buckets
- ¾” steel pipe
- 4″ screws
- Rebar tie wire
- Silicone lubricant
- High tensile strength concrete
- Wooden blocks
Tools Needed
Similar to materials, you don’t need a full tool chest to build some dumbbells. Tools will make the job easier, but they’re not really even necessary.
Here’s what we had on hand and decided to use:
- 5-gallon bucket for mixing concrete
- Weight scale
- Shovel
- Wire cutters
- Duct tape
- Drill with metal cutting drill bits.
- Metal file if you’d like to add knurling
DIY Dumbbell Instructions
Now that you have all of your materials and tools assembled, it’s time to build some dumbbells. The biggest recommendation I have to give before starting this endeavor is to section off some time. The assembly doesn’t take a ton of time, but the patience required to wait for the concrete to cure does.
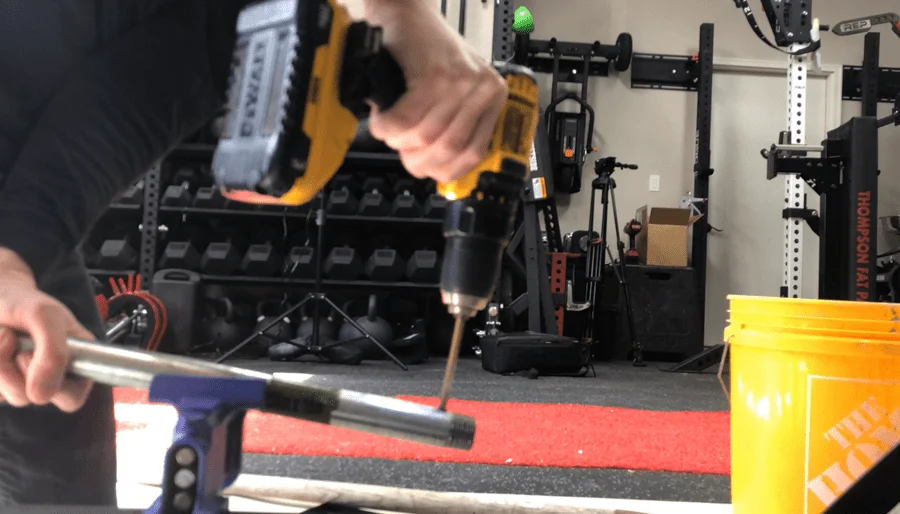
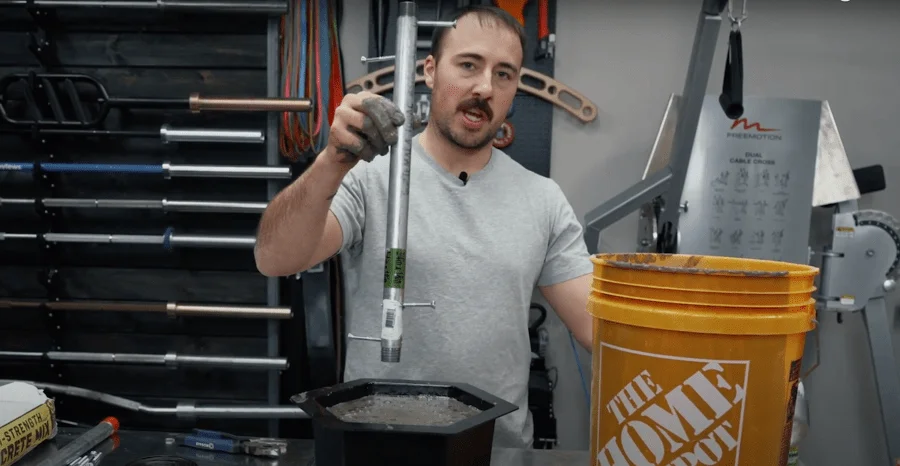
Step 1: Handle Prep
It’s important to remember that when making your concrete dumbbells the pipe you are using for your handle has a very smooth surface to it. The problem with this is that when your concrete hardens it will have problems with bonding to the surface of the pipe which can eventually lead to your dumbbell heads falling off of the bar.
Don’t worry though, we’ve thought ahead of time on this one and have a fix for this issue. All you need to do is drill 4 holes in your pipe ( 2 on each side) that are offset from each other and spaced about half an inch apart.
This will give you the ability to insert your 4” screws into the pipe giving your concrete a better surface to bond too.
The same thing is done with the center ring on bumper plates to provide more surface area for the rubber to adhere to. We’re just taking this idea and applying it to dumbbells.
Pro tip- use a drill bit that is slightly smaller than your screws to ensure your screws go in nice and tight.
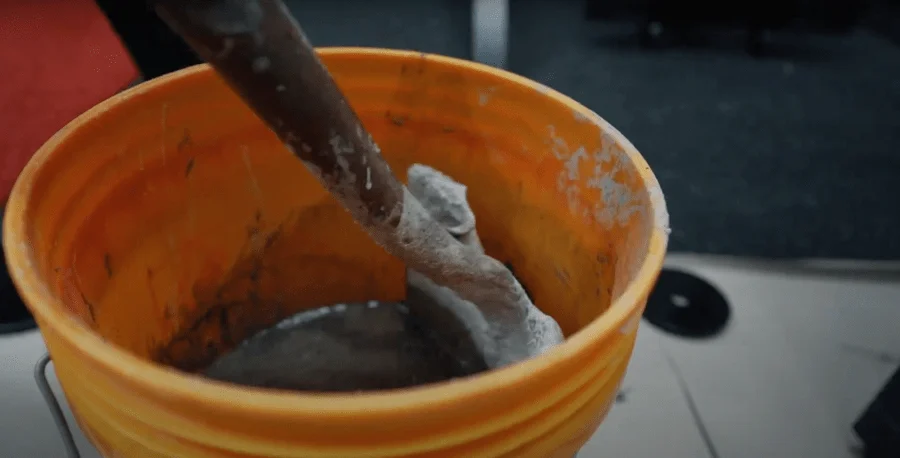
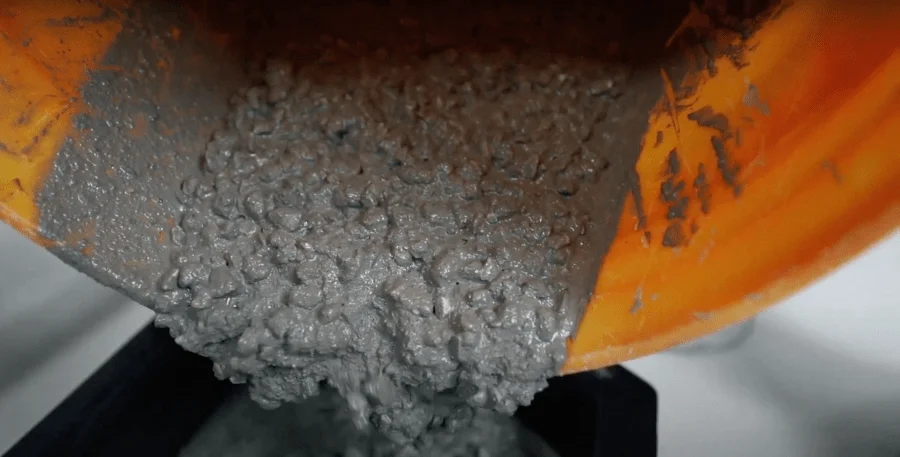
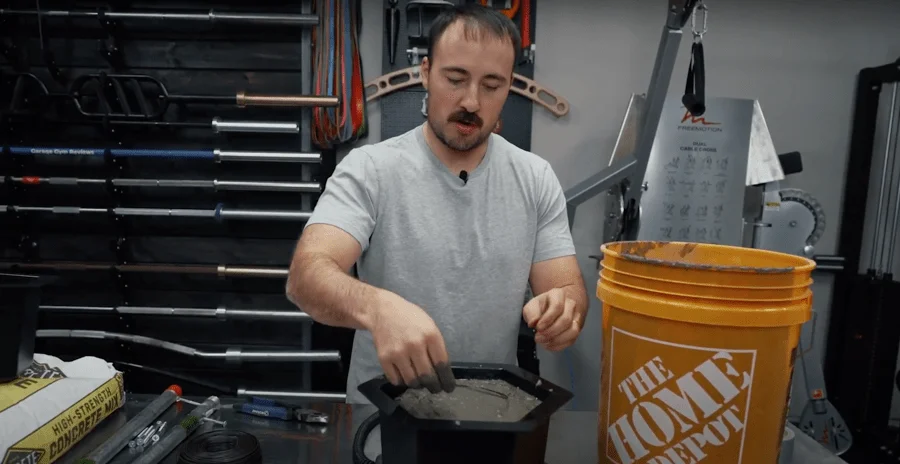
Step 2: Mix the Concrete
The amount of concrete will depend on how heavy you want your dumbbells to be. The heavier the dumbbell, the more concrete you’ll want.
Understand that concrete isn’t nearly as dense as iron. For this reason, a 50 LB dumbbell made of concrete will be much larger than a 50 LB dumbbell of cast iron. If you’d like to increase the weight of the dumbbell without increasing its size, we suggest adding lead shot or rebar to the mold.
Pro Tip – It’s important to add water slowly while mixing concrete to avoid your mix becoming too watered down. Continue to mix your concrete until it becomes a nice thick consistency that is still easily pourable.
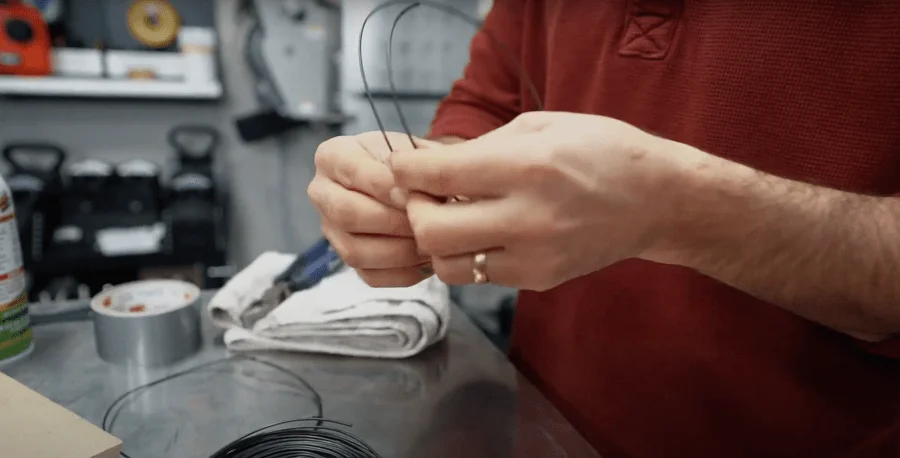
Step 3 – Get Your Rebar Tie Wire Ready
The tie wire is one of the most important steps when making your concrete dumbbells. Tie wire acts similar to rebar when used in laying a concrete foundation for a house. In this case, its primary purpose is to increase the tensile strength of the concrete, helping it resist cracking and breaking.
With increased tensile strength, you increase the durability and lifespan of the dumbbells. You’ll want at least 3 for each head of your dumbbell if you are making heavier sets. Lighter, you can do fewer.
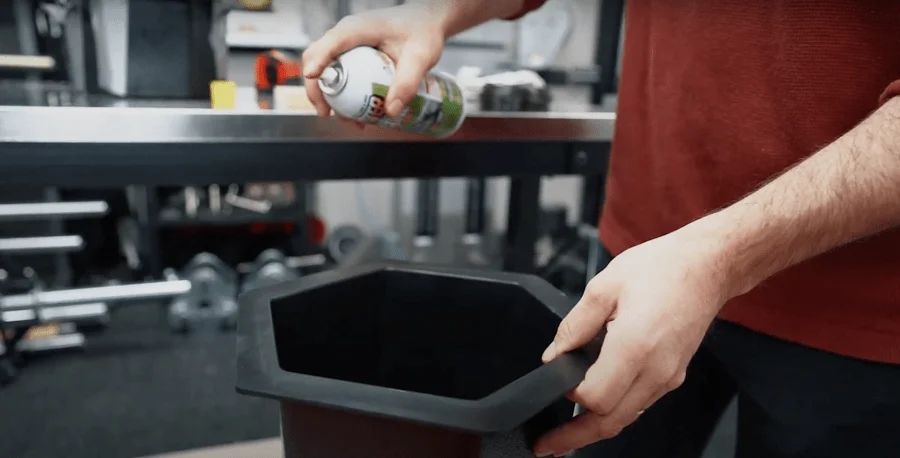
Step 4: Lubricate the Mold
Silicone Lubricant spray is an effective lubricant on most surfaces and is noncorrosive. I like to think of it as similar to cooking spray on a cast iron pan.
When spraying your Stix and Stone Molds or small painter’s buckets remember to put a nice even coat through the entire mold.
Pro Tip – Don’t spray too much. More is not always better. if the spray starts to pool in the bottom of the mold you have sprayed too much and should use some paper towels to clean it up a bit.
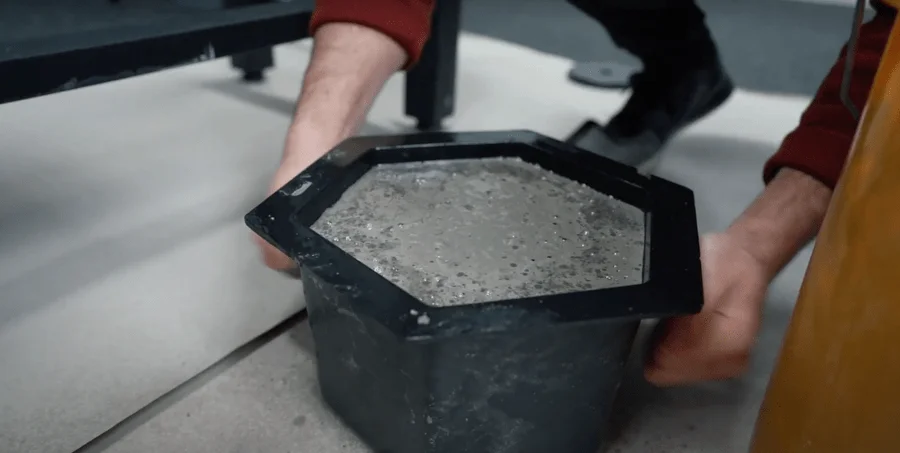
Step 5: Pour the Concrete
There are a few tricks we have learned while making our concrete dumbbells that will help you to be successful in this endeavor.
First, make sure you have your mold setting on a scale, this will help to ensure accuracy with your weight on each side of the dumbbell.
Your final cured weight will be anywhere from 3-5 pounds less than your starting weight, so plan accordingly.
Step 6: Agitate the Mold
After your concrete is poured, make sure to agitate your mold by slowly moving it back and forth and lightly tapping on the sides. This will help any air that is trapped inside the concrete to rise to the surface causing your concrete to have a stronger more compact bond.
A quicker way to do this is by using an orbital sander or a percussion massager like the Hyperice Hypervolt we’ve reviewed.
Step 7: Add Reinforcement
In order to increase the strength of the concrete, we want to add tie wire one at a time that acts similarly to rebar in a concrete slab.
Simply fill your mold 1/3rd of the way up, agitate it, and then set your tie wire down inside.
Repeat this step for each 1/3rd of the mold as you are pouring your concrete for heavier weights.
For lighter dumbbells, use your best judgment, but we recommend even with something as small as a 10lb weight using at least one tie wire.
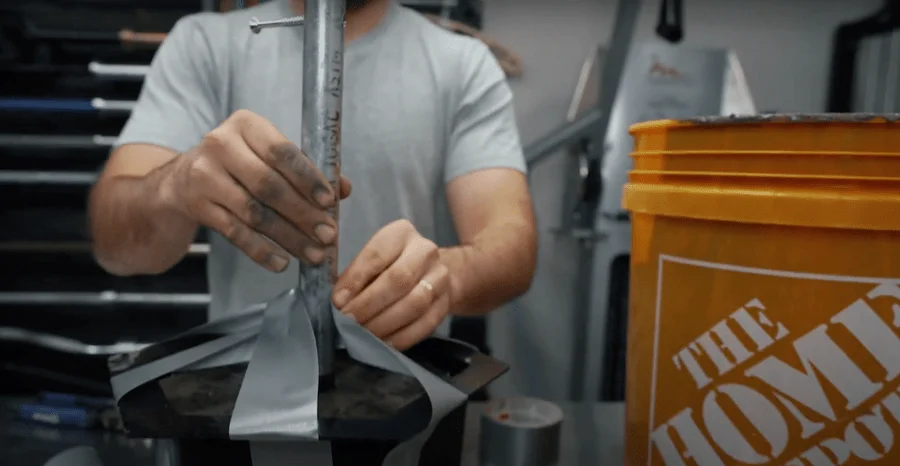
Step 8: Insert and Secure the Dumbbell Handle
Now that you have your concrete poured to your desired weight, it’s time to insert your handle.
If you’re using the Stix and Stone Mold, it has a nipple in the center of the mold that makes it a little easier to find your center point. If you are using small painter’s buckets we recommend using a tape measure to help you find the center point for your handle. This will ensure your concrete dumbbells are well balanced on both sides.
In order to keep your handle secured while the concrete is curing, we suggest using something like duct tape to keep it from falling over.
Step 9: Let the Concrete Cure
We suggest waiting at least 48 hours for the concrete to fully harden before working on the other end of the dumbbell. The longer you let it sit, the harder it will get. After 28 days, concrete is said to have reached its fully cured state.
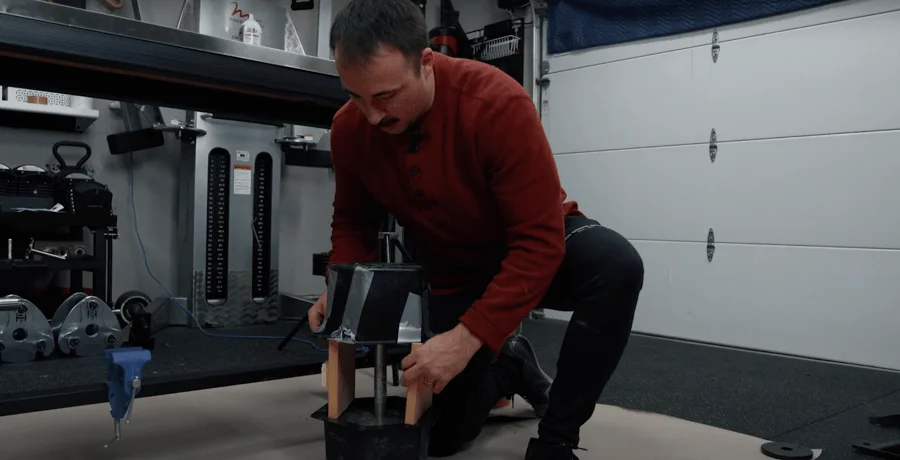
Step 10: Repeat the Steps for the Other Side
The only thing that adds more difficulty to the process for the other head of the dumbbell is balancing the now cured side.
There are a couple of ways to accomplish this, but the best way we’ve found is by taking a few of pieces of wood from the pallets that all the equipment we review gets delivered on and stapling them together. These help to hold the dumbbell in place during curing.
Pro Tip – Be as precise as possible with both of your wooden blocks; this will help your handle to stay vertical while your second mold is curing.
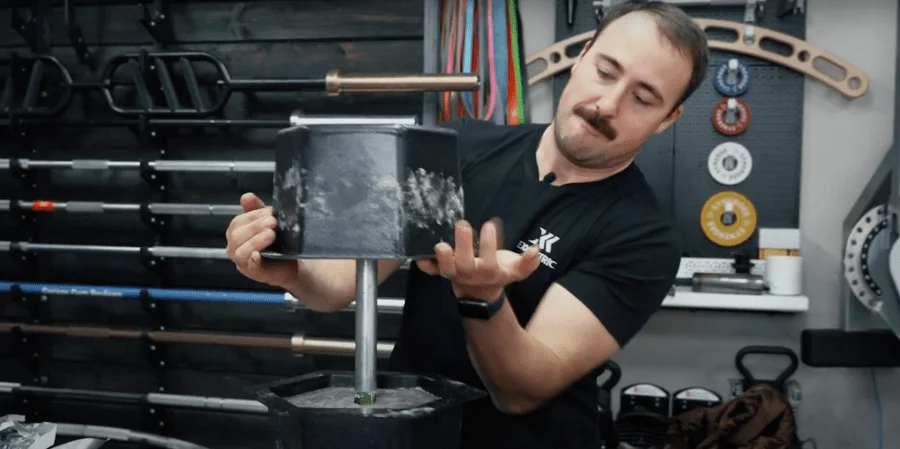
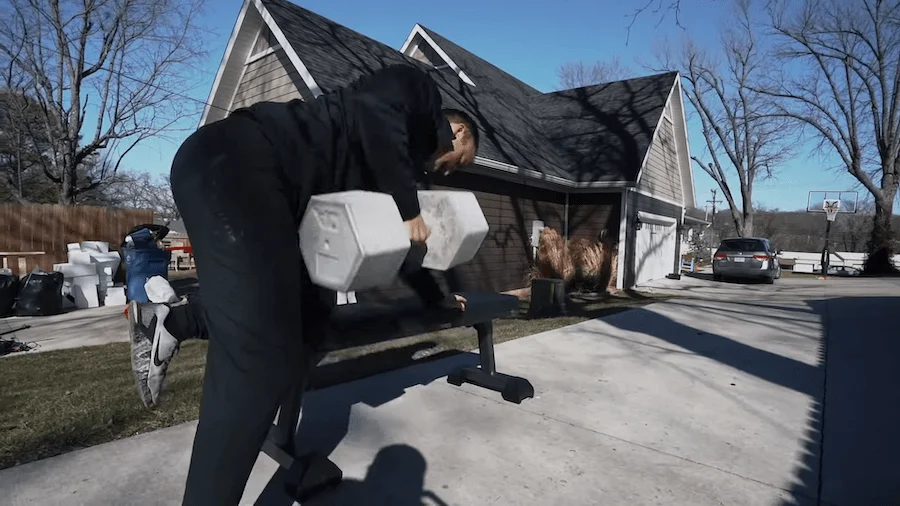
Step 11: Release and Lift
When you’re taking your dumbbells out of the mold, in most cases, you will have to create a pocket of air in order for the mold to release. Do this simply by tapping on one side of the mold until it starts to loosen up. Then remove your mold and gander at your beautiful masterpiece.
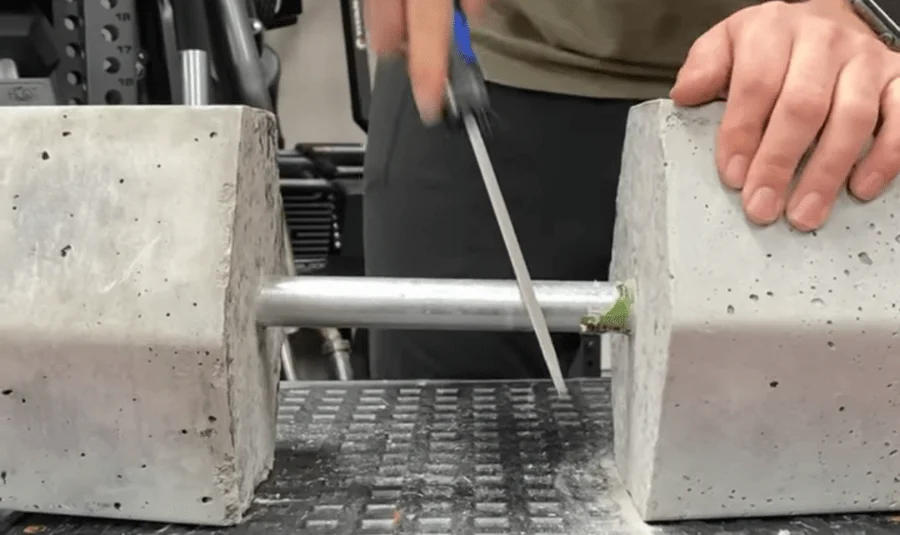
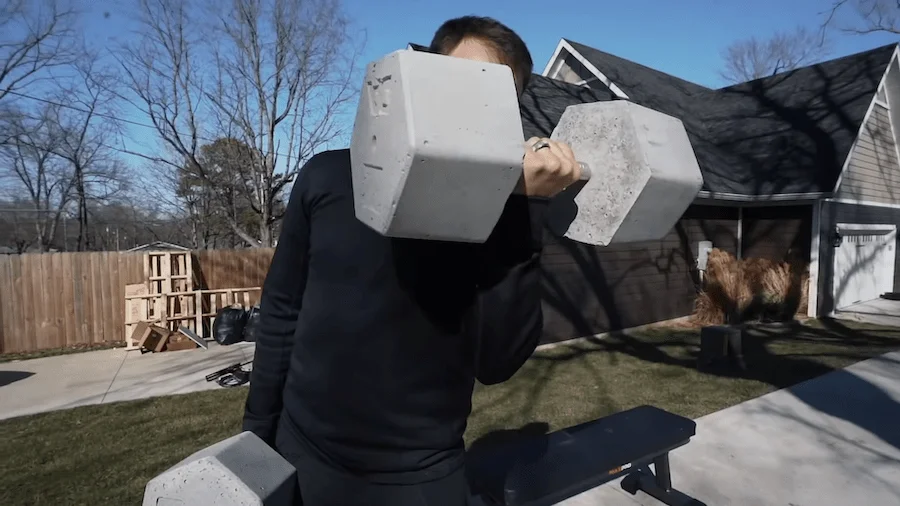
Optional Step 12: Knurl the Handle
If you want to give your bar a little grip we have a few options for you.
For the most similar to a barbell, we decided to use a metal file on ours going in a circular pattern around the bar to create barbell knurling.Although this worked well, we all agreed that there are some easier options out there.
A couple of other options are buying hockey tape, skateboard grip tape or you can even purchase a knurling tool off of Amazon for under $30.
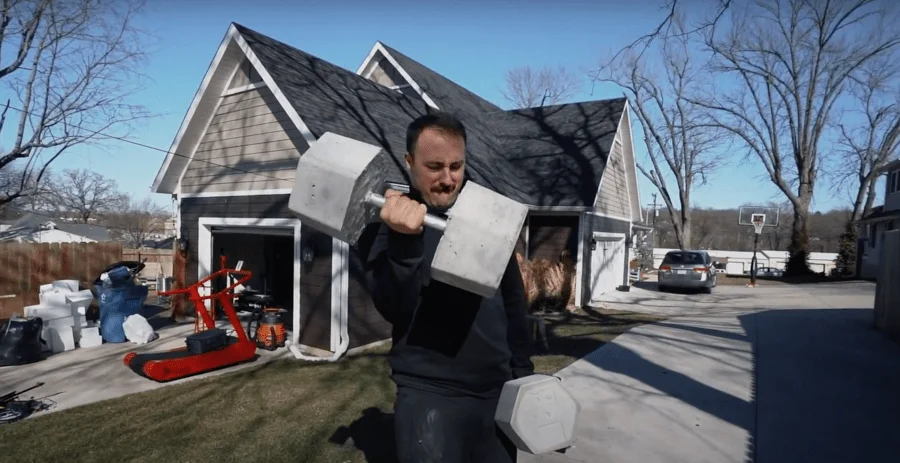
Now that your dumbbell set is complete it’s time to enjoy the fruits of your labor. You want your dumbbells to have a long life, so we recommend always lifting on mats or rubber flooring so if you have to drop them they will be protected.
Pro Tip – You can coat your dumbbell in a Plastidip, flex seal, or a truck bed liner to help with protecting your dumbbells from cracks and chips when dropped. It will also make them look pretty cool and unique as well.
DIY Concrete Dumbbell FAQ
How do I make heavy DIY dumbbells?
Concrete isn’t the densest material. In order to increase the weight without increasing the size, we suggest using lead shot or rebar in the mold.
Do I have to buy molds?
No. The Stix and Stone Molds we used simply make the process easier, but you could easily use cans or small painter’s buckets instead.
Are concrete dumbbells durable?
Concrete is a durable material if treated properly. I wouldn’t suggest dropping these from overhead, but we did drop test them on rubber matting and didn’t notice any issues.
Could I use this guide to make DIY kettlebells?
Yes, you could heat up a PVC pipe and make it round securing it in the concrete mold to simulate some decent quality kettlebells. Although this isn’t an ideal design, it would certainly be better than nothing.