In all my years working as a certified personal trainer in the fitness industry and on my own fitness, I’ve noticed something curious: A lot of people have an “out of sight, out of mind” mindset when it comes to how to begin training. At least, that’s my hypothesis for why so many people train their quads and chest all week but forget about (or avoid) their hamstrings and back.
15 Best Back Exercises
Working out with one of the best Olympic barbells and weight plates is the best way to ensure you’ll add muscle mass to your back and increase strength. Below are the best barbell back exercises and how to do them.
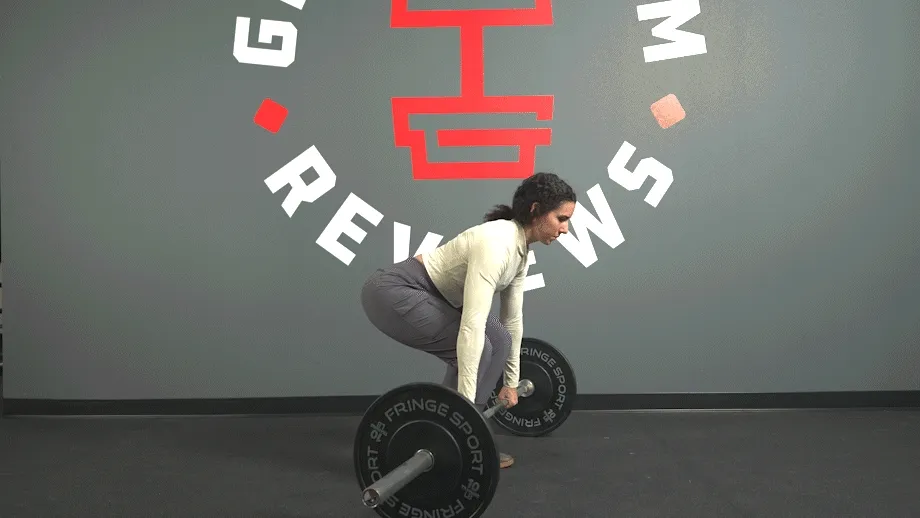
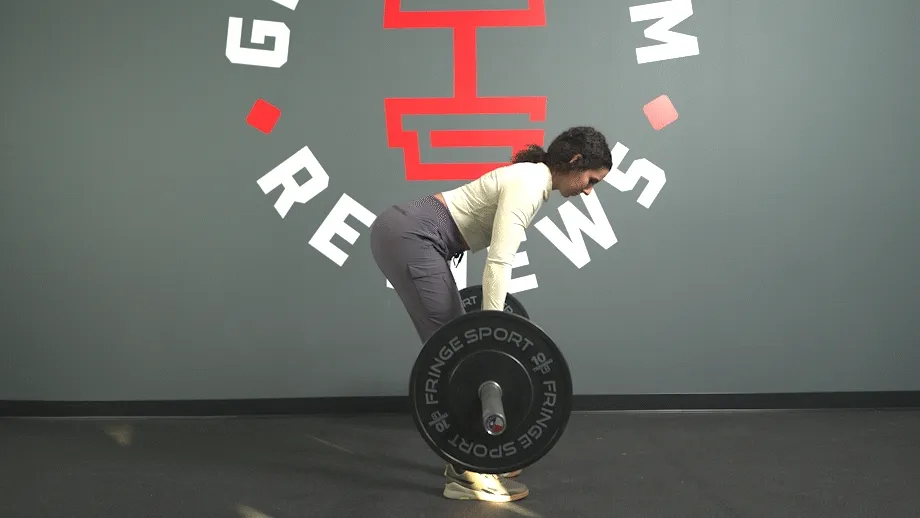
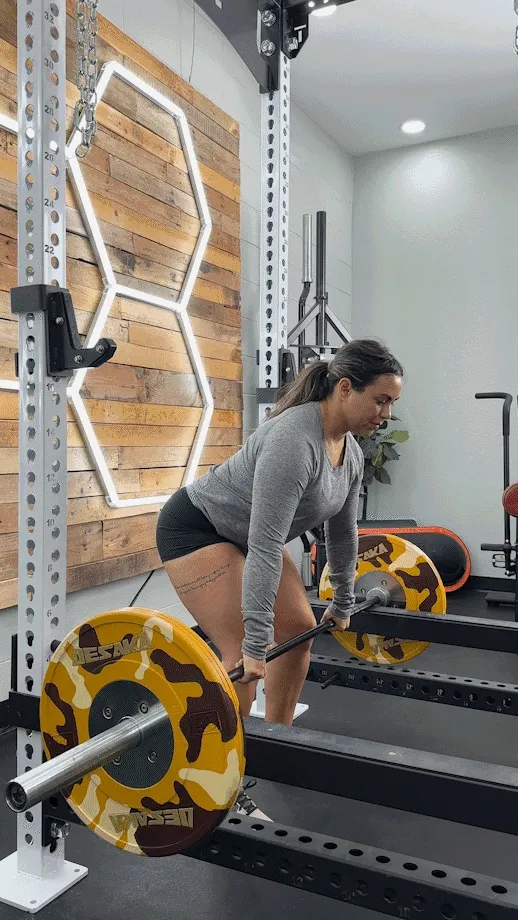
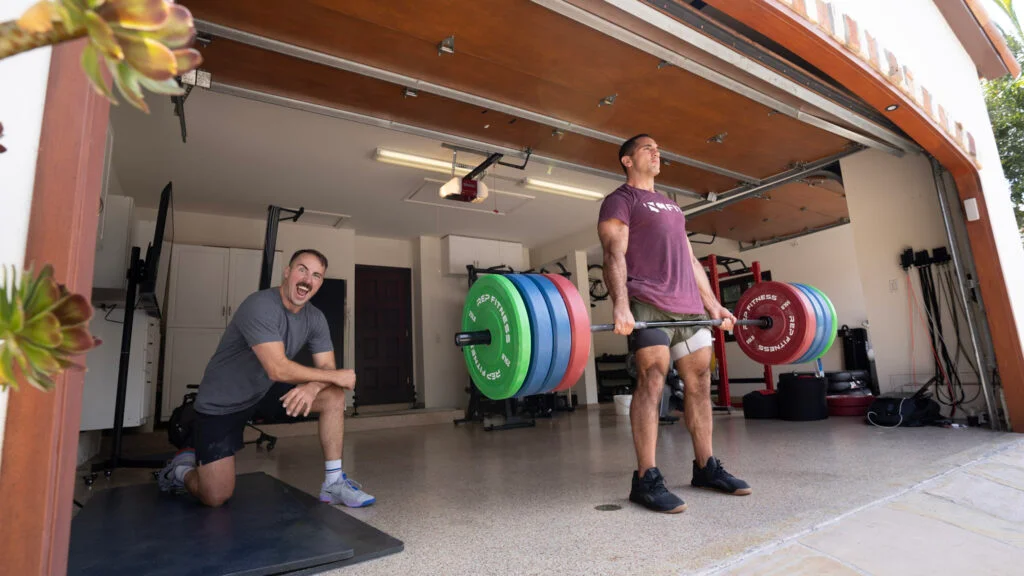
Conventional Deadlift
This is not only one of the best back exercises, but one of the best barbell exercises in general. It’s a compound exercise, so in reality, you’re utilizing more than just your back, but nonetheless, deadlifts lead to a strong back.
Muscles worked: Traps, delts, rhomboids, erectors, lats, glutes, hamstrings, calves, biceps, and core
Benefits: Deadlifts strengthen your entire posterior chain, which is a fancy way of saying all of the muscles on the backside of your body. This includes everything from your calves to your traps. Specifically, deadlifts increase strength in the hamstrings, glutes, and back—yes, even your upper back.
How to do it:
- Load one of the best powerlifting barbells with weight plates on the floor. Use standard-sized Olympic plates for the best deadlift setup. Put on one of the best weightlifting belts if you’re going heavy (and you know how to wear one).
- Walk up to the barbell like you’re about to absolutely hulk-smash it. Position your feet so that the bar hovers over your midfoot and sits close to your shins. Your feet should be stacked beneath your hips. Hinge at your hips and grip the barbell with your hands just outside your legs.
- Drive through your heels and engage your glutes and hamstrings to pull the weight off of the ground. Keep your spine in the neutral position (no arching or rounding) and push your hips forward until you reach full hip extension.
- With control and maintaining your neutral spine, lower the barbell back to the ground by hinging at your hips, then your knees, to create one fluid motion.
- The rep is finished once the weight plates touch the ground; you can either do touch-and-go reps or reset entirely.
RELATED: Best Bumper Plates Guide
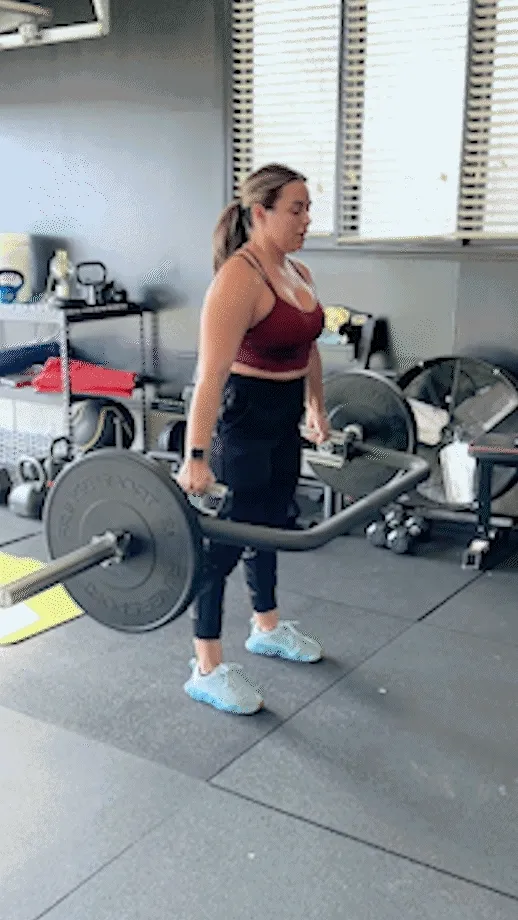
Trap-Bar Deadlift
Trap bar deadlifts are very similar to conventional deadlifts, but because of the use of a trap bar (also called a hex bar) instead of an Olympic barbell, the positioning and setup are somewhat different.
Muscles worked: Traps, delts, rhomboids, erectors, lats, glutes, hamstrings, calves, biceps, and core
Benefits: The trap-bar deadlift is a deadlift alternative and a compound exercise with an emphasis on the hamstrings, glutes, and lower back. The nature of the trap bar means your grip is higher (if using high handles) and wider than it is during conventional deadlifts, and this results in greater knee movement in comparison. It also means the load is displaced more across your scapula and lats, versus more centered on a barbell deadlift.
How to do it:
- Grab one of the best trap bars and load plates on each side. Stick with Olympic-sized plates.
- Step inside the hexagon of the trap bar. Make sure you’re standing in the center, and plant your feet shoulder-width apart. Bend down to grab the trap bar handles, making sure your back stays flat (don’t arch or round your spine).
- Drive through your heels to stand up with the weight. Squeeze your glutes and fully extend your hips, but be careful not to hyperextend your back.
- Lower the hex bar back to the ground, squeezing your shoulder blades together and engaging your core to prevent your back from rounding.
- Continue with touch-and-go reps or let go and reset if you’re pulling heavy weight.
RELATED: Hip Hinge Exercises
Barbell Bent-Over Row
Bent over rows are one of the best back-building exercises you can do. You even get lower body activation because you’ll maintain a hinged position throughout the exercise.
Muscles worked: Lats, biceps, traps, delts, rhomboids, erectors, hamstrings, and core
Benefits: Bent-over rows increase strength and muscle mass in your upper and mid-back. Developing those upper and mid-back muscles transfers to other movements, particularly pull-ups and chin-ups. Upper back strength is also important for manhandling the bar when it comes to power cleans and snatches, as well as maintaining your grip on the bar during heavy deadlifts.
How to do it:
- Load a barbell on the ground with Olympic weight plates.
- Stand with your feet beneath the barbell as if you’re setting up for a deadlift. Grab the bar, ideally with a double overhand grip for this lift, with your hands shoulder-width apart and palms facing down. You should be in a hip-hinge position with your back straight.
- Think about squeezing your shoulder blades together. Pull the barbell toward your torso and try to tap it to your sternum. Your elbows should travel backward and point to the sky behind you. Palms remain facing down.
- Extend your arms to lower the barbell back to the starting position.
- Start a new rep when your elbows reach full extension.
RELATED: CrossFit Barbell Guide
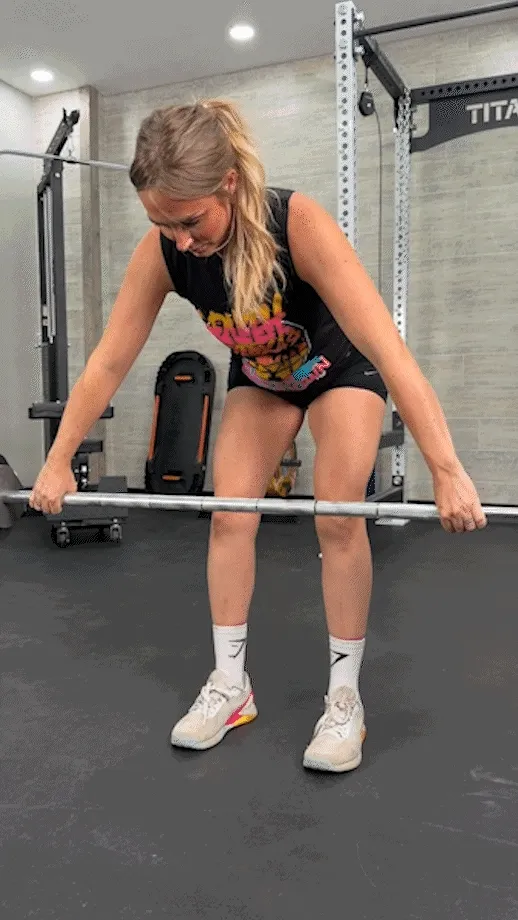
Wide-Grip Row
This back exercise is just like the regular barbell row, except you use a wide grip instead of a standard grip.
Muscles worked: Lats, biceps, delts, rhomboids, erectors, hamstrings, and core.
Benefits: Wide-grip rows are great for physique athletes who want to develop a wide, V-shaped back. By placing your hands farther apart on the bar, you require your lats to do more work than they would on a standard-grip barbell row. In addition to good looks, wide-grip rows help with pull-up strength.
How to do it:
- Place your barbell on the ground and load it with Olympic weight plates.
- Bend down and grip the bar with your hands wider than shoulder-width. For those who know CrossFit or weightlifting terminology, use your snatch grip. The bar should rest right around the crease of your hips while standing. Hinge at the hips and keep your spine neutral.
- Squeeze your shoulder blades together to pull the barbell perpendicular to your torso. It should tap lightly somewhere between your bellybutton and your sternum, depending on your grip and stance.
- Slowly extend your arms to lower the barbell.
- The rep is complete when your elbows reach full extension.
RELATED: Best Deltoid Exercises
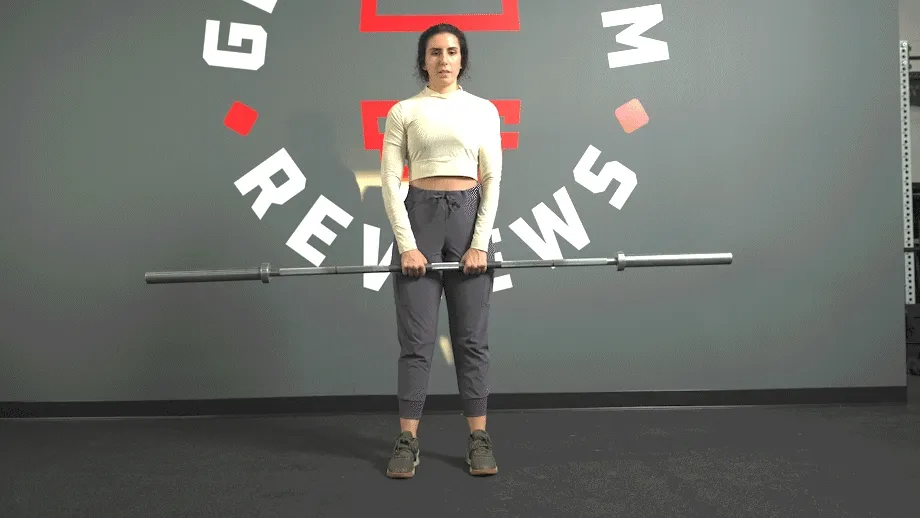
High Pull
Also called the upright row, the high pull is a vertical pulling back exercise, in contrast to bent-over rows and wide-grip rows, which are horizontal pulling exercises.
Muscles worked: Rhomboids, delts, traps, biceps, triceps, lats, glutes, quads, and core
Benefits: High pulls train your upper back, specifically the traps and rhomboids, as well as the middle head of your deltoids and your biceps. They’re great for developing the strength needed for heavy power cleans and snatches.
How to do it:
- Load your barbell, keeping in mind you likely can’t lift as much on upright rows as you can on bent-over rows.
- Grab the bar with a standard or narrow grip (your preference; narrow grip isolates the traps more) and stand up with your arms extended. Keep a slight bend in your knees and hips.
- Pull the barbell up toward your chin, leading with your elbows. Keep the bar close to your body. The height you’re able to pull the bar will depend on your mobility, but anywhere between your sternum and chin is good.
- lowly lower your arms to return the barbell to the starting position.
- The rep is complete when your arms fully extend.
RELATED: Trap Exercises
Rack Pull
Rack pulls are similar to conventional deadlifts, but there’s a key difference: Pulling the barbell from an elevated position means your body isn’t moving through as large of a range of motion. This means you don’t get to utilize the power from your hamstrings and glutes as much, so the load is almost entirely displaced onto your back.
We even have an entire guide on how to rack pull if you want to learn more.
Muscles worked: Erectors, lats, traps, glutes, hamstrings, and core
Benefits: It might sound dangerous or risky to place heavy loads on your back, but like all exercises, rack pulls are safe if you do them right and with an appropriate weight. And if you do, the benefits are many—rack pulls are arguably the best exercise for isolating your back muscles from your leg muscles, which can lead to greater strength and muscle increases. Rack pulls are often used to help athletes overcome a deadlift plateau and improve their lockout.
How to do it:
- You’ll need a power rack in addition to your barbell and weight plates. You can also use jerk blocks or stacks of 45-pound bumper plates, but a power rack works best. Set up the bar so it rests at your sticking point in the deadlift. For most people, this is just below or just above the knee.
- Stand in front of the bar and assume your normal deadlift stance. Grip the bar and plant your feet.
- Take a deep breath, tighten your core, and pull until you reach full hip extension.
- Don’t just slam the bar back onto the safety bars. Lower the barbell back down with control to get the most out of the exercise.
- You can reset in between each rack pull rep. It’s probably a good idea if you’re going heavy.
Expert tip: If you don’t have a barbell and a set of weight plates—or you just want to add some variety to your back workout routine—try these dumbbell back exercises. Dumbbells are a super-effective tool for adding muscle to your back, as they often allow for greater muscle contraction and isolation than a barbell.
RELATED: Best Adjustable Dumbbells
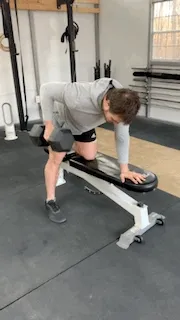
Single-Arm Row
One-arm dumbbell rows are a great addition to any back workout. It’s a classic movement that’ll never go out of style: These are a mainstay in bodybuilding routines and a fantastic accessory for CrossFit, weightlifting, and powerlifting routines.
Muscles worked: Lats, biceps, traps, delts, and core
Benefits: A well-executed single-arm row is one of the best back exercises for hypertrophy—aka muscle growth. Not only that, single-arm rows can reveal muscle imbalances and correct them. They’re also great for increasing grip strength and improving posture.
RELATED: Best Gymnastic Grips CrossFit
How to do it:
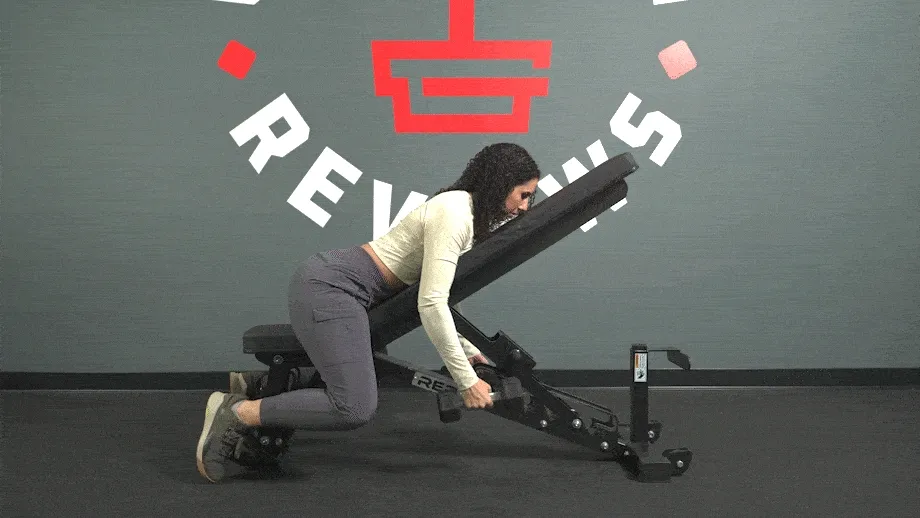
- Grab one of the best weight benches or a low box for this. I recommend a bench because the padding is more comfortable for the knee you’re placing on it. Set up your bench and place a dumbbell on the floor next to it. (You can do single-arm rows without a support, but we recommend it because it allows you to focus on the contraction of the back muscles rather than supporting yourself in the tripod position).
- Place your right knee and hand on the bench. Shift your weight to let the bench support you. Plant your left foot and grab the dumbbell with your left hand. Tighten your core so your back stays flat.
- Pull the dumbbell toward your body, taking care to row backward, not upward—pull with your back, not your shoulders or traps. It might be helpful to think of yourself starting a lawnmower. You should feel most of the tension in your lats and the muscles in between your shoulder blades.
- Give your shoulder blades a good squeeze at the top and then carefully lower the dumbbell. You can maximize your results from this (and any) exercise by taking the eccentric slowly.
- Once you complete all the reps on one side, switch to the other.
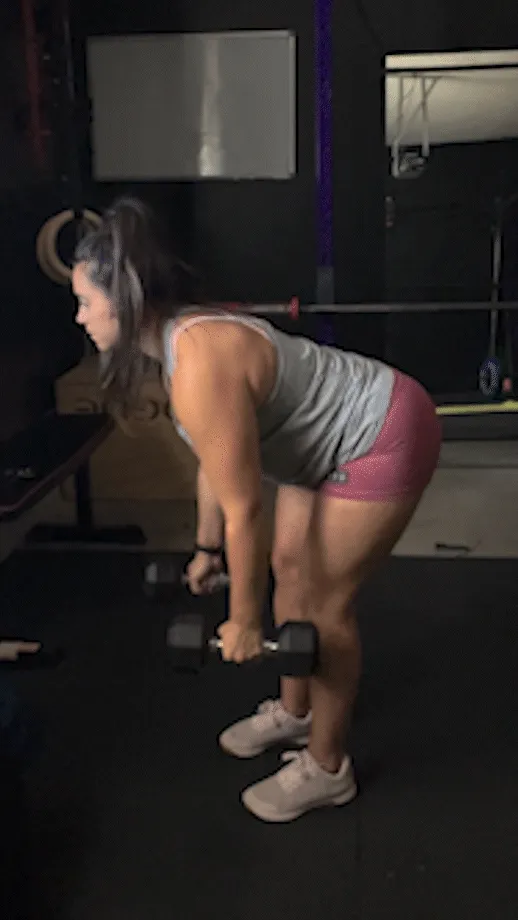
Dumbbell Bent-Over Row
This is similar to the single-arm row, but instead of using a support to row with one arm, you’ll just hinge at the hips to row with both arms.
Muscles worked: Lats, biceps, traps, delts, hamstrings, glutes, and core
Benefits: Bent-over dumbbell rows have the same benefits as barbell bent-over rows, but using dumbbells instead of a barbell adds an element of instability, which can lead to greater recruitment of muscle fibers. In other words, your muscles have to work harder to move the same amount of weight, and that challenge can increase muscle hypertrophy.
How to do it:
- Choose two dumbbells of equal weight and set them on the floor a couple feet apart. Stand in between the dumbbells; you’ll want to keep your stance about shoulder-width apart. Grab the dumbbells and hold them by your sides with your arms extended. You can also sub in kettlebells for this exercise.
- With your arms at your sides, send your hips backward and bend over so your torso becomes almost parallel to the floor. Plant your feet firmly and keep a soft bend in your knees.
- Squeeze your shoulder blades together to row the dumbbells toward your torso. Keep pulling until your elbows reach or surpass your sides.
- Extend your elbows to lower the dumbbells back to the starting position.
- To protect your equipment and floor, don’t drop the dumbbells when you finish your set. Bend over to place them on the ground.
RELATED: Best Kettlebells
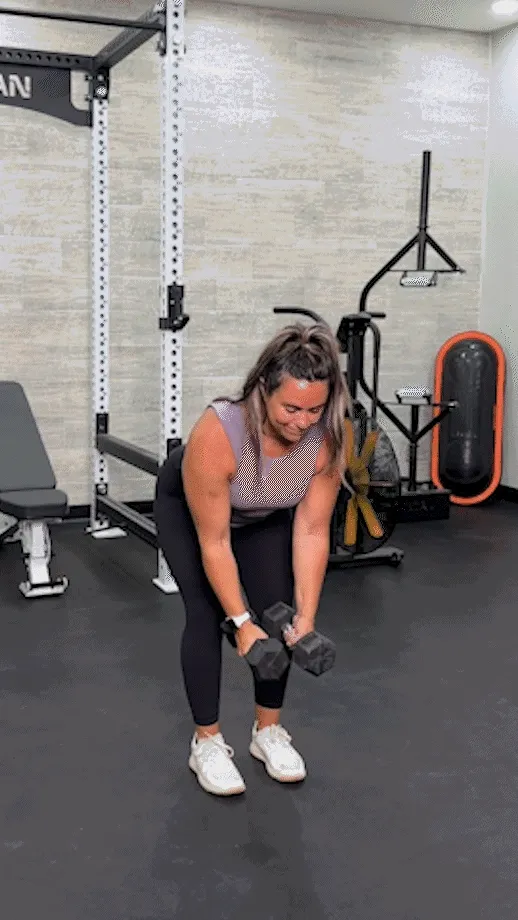
Reverse Dumbbell Fly
Also called the rear delt fly, this exercise targets your posterior shoulders and upper back. And you’ll feel it, too. The times are few and far between when I don’t find myself sore from reverse dumbbell flys, likely due to the intense squeeze in the rhomboids and trapezius muscles.
Muscles worked: Delts, rhomboids, and biceps
Benefits: Reverse flys work all of the muscles involved in contracting and relaxing your scapula, which makes this a phenomenal move for improving posture. It’s also great for correcting muscle imbalances in people who are chest-dominant or lat-dominant. And, if you’re after a well-balanced physique, rear delt flys can help.
How to do it:
- Stand with a soft bend in your knees and hold the dumbbells by your sides. Hinge at the hips and bend forward as if you’re about to do a bent-over row. The starting position is the same, except you’ll assume a soft bend in your elbows.
- Engage your core and, with an exhale, raise your arms out to the sides. Squeeze your shoulder blades together and lift through your full range of motion. If you have good mobility, your hands will surpass the height of your shoulders.
- Inhale as you lower the weight. Keep your spine neutral and avoid hunching your shoulders.
- Return to standing when you finish your set and place your dumbbells back on the ground.
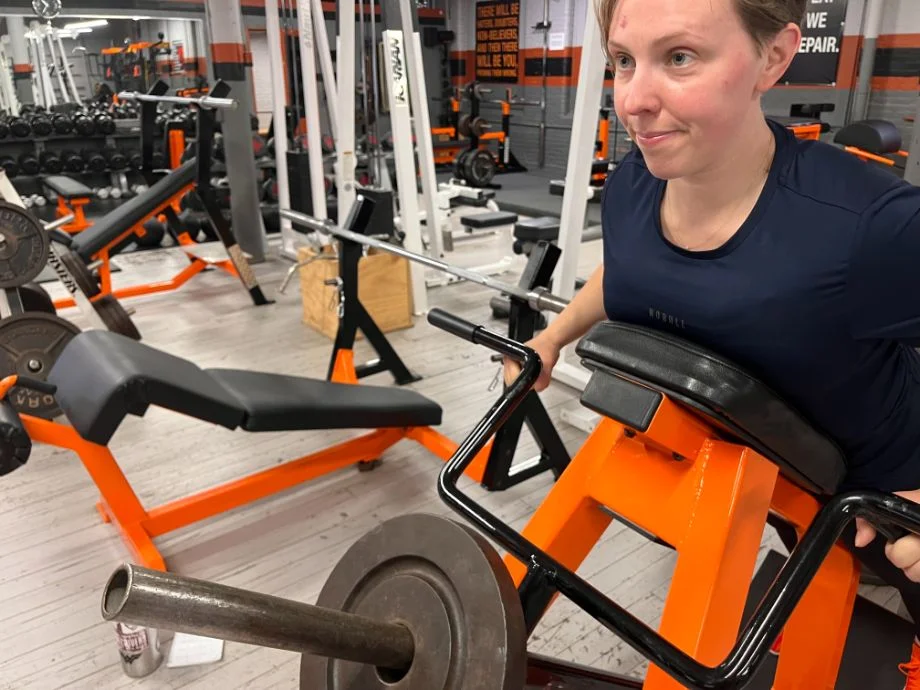
Incline Row
The incline row is also called the chest-supported row, and it’s a version of the dumbbell row that uses an incline bench to support your bodyweight during the movement, thus allowing you to focus on your back muscles and nothing else.
Muscles worked: Lats, erectors, serratus, and rhomboids
Benefits: Compared to bent-over rows and other row variations, the main benefit of the incline row is the opportunity to really hone in on the contraction of your back muscles. Thanks to the support of the bench, your core, hamstrings, and glutes are spared of the responsibility of holding your body up.
How to do it:
- Set up an adjustable bench at a 45-degree incline. Choose your dumbbells and set them down, one on each side of the bench.
- Sit on the bench facing the incline. Lean into the bench and allow it to support your body weight. Grab the dumbbells and hold them with your arms extended.
- Just like any other row variation, squeeze your shoulder blades together and draw your elbows back to pull the dumbbells toward your body. Pull until the dumbbells reach the height of the bench where your chest lies.
- Lower the dumbbells with control.
- Repeat for reps, and set the dumbbells down on the floor when you’re done.
RELATED: REP Blackwing Adjustable Bench Review
Pull-Up
The king of all back exercises. The epitome of bodyweight strength training. And, for a lot of people, one of the toughest exercises in the game. Seriously, the pull-up can feel impossible to master, but it’s well worth your efforts. If you’re really serious about getting your first pull-up, we designed a beginner-friendly, four-week pull-up progression plan.
Muscles worked: Lats, biceps, rhomboids, delts, traps, pecs, serratus, and teres
Benefits: If you want a stronger back, pull-ups are a good place to start. Not only are they great for increasing upper body strength, but they build muscle in all the right places for the V-shaped torso that bodybuilders chase after.
How to do it:
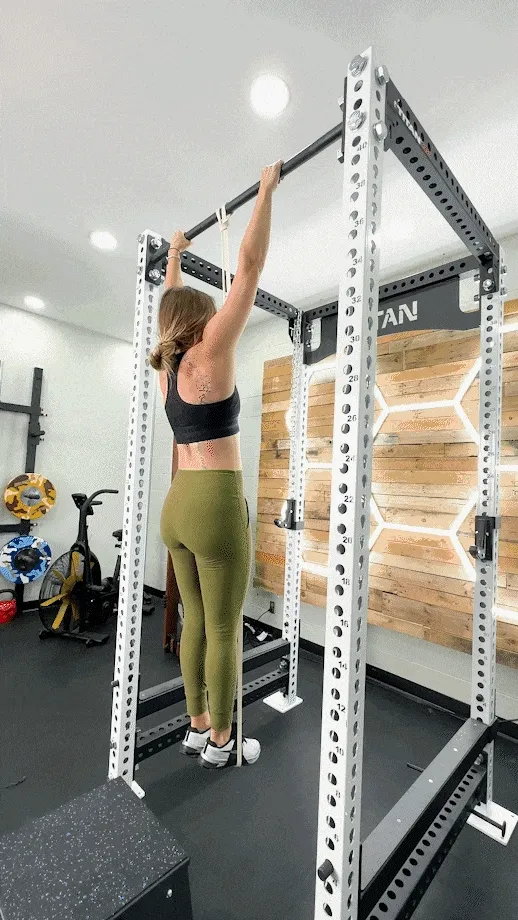
- Stand beneath a pull-up bar. Use a box or stool if you can’t reach.
- Jump up toward the bar and grab it with a double-overhand grip, with your hands slightly wider than your shoulders. Try to wrap your hands all the way around the bar.
- Think about drawing your elbows toward your obliques. Pull yourself up to the bar by contracting your lats and squeezing your shoulder blades back and down. Avoid rounding your shoulders. Pull until your chin surpasses the height of the bar.
- Don’t just flop back down—control the descent and remain on the bar until you reach full extension of the elbows and shoulders.
- Drop down from the bar or start another rep after reaching full extension.
Chin-Up
While chin-ups seem very similar to pull-ups, they work the body much differently. For instance, pull-ups emphasize lat recruitment more, while chin-ups emphasize biceps recruitment more. They’re essentially pull-ups with an underhand grip instead of an overhand grip.
Muscles worked: Biceps, forearms, lats, delts, rhomboids, traps, and pecs
Benefits: Like pull-ups, chin-ups are great for developing strength throughout your entire upper body and contribute to muscle growth in your back and biceps.
How to do it:
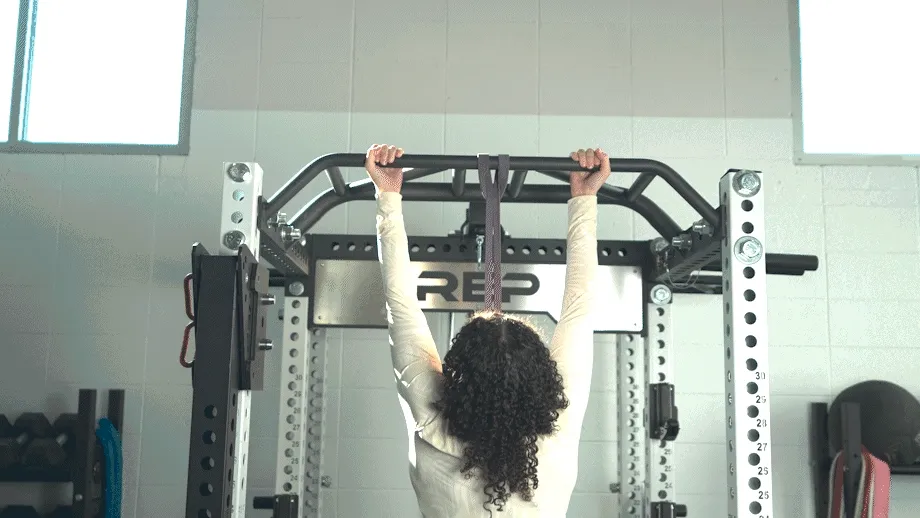
- Stand beneath a pull-up bar, using a stool if necessary.
- Grab the bar with a double underhand grip about shoulder-width apart. Hang from the bar with your arms straight.
- Pull your body upward until your chin is above the bar.
- Lower back down with control.
- The rep is complete when your arms become straight again.
RELATED: Dips vs Pull-Ups
Ring Row
Ring rows are a great alternative to pull-ups for those who haven’t quite developed the requisite strength yet. Ring rows are also great in their own right, though, and can have a place in exercise routines even for advanced fitness folk.
Muscles worked: Lats, rhomboids, biceps, delts, and traps
Benefits: A horizontal bodyweight pulling exercise, ring rows have similar benefits to bent-over rows. However, they’re really a full-body exercise. When you do ring rows, your hamstrings and glutes engage to keep your body in a straight light. And your core does a lot of work to keep your spine in a neutral position.
How to do it:
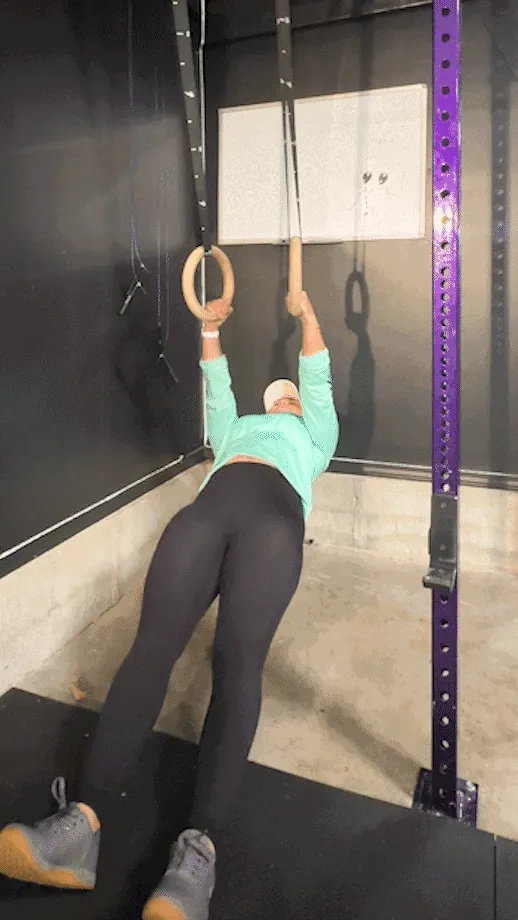
- Adjust a pair of gymnastics rings or a TRX system to an appropriate height. They should be high enough to where you hover off of the ground when holding the handles with your arms fully extended. The higher the rings, the easier the exercise will be.
- Make a straight line with your body from your feet to your head.
- Pull your body up to the rings, ideally touching your torso to the rings. Draw your elbows straight back and keep your core tight. Avoid the common mistake of protruding your neck.
- Extend your elbows to lower your body back to the starting position.
- The rep is complete when you reach full elbow extension. Sit on the floor before releasing your grip from the rings or TRX.
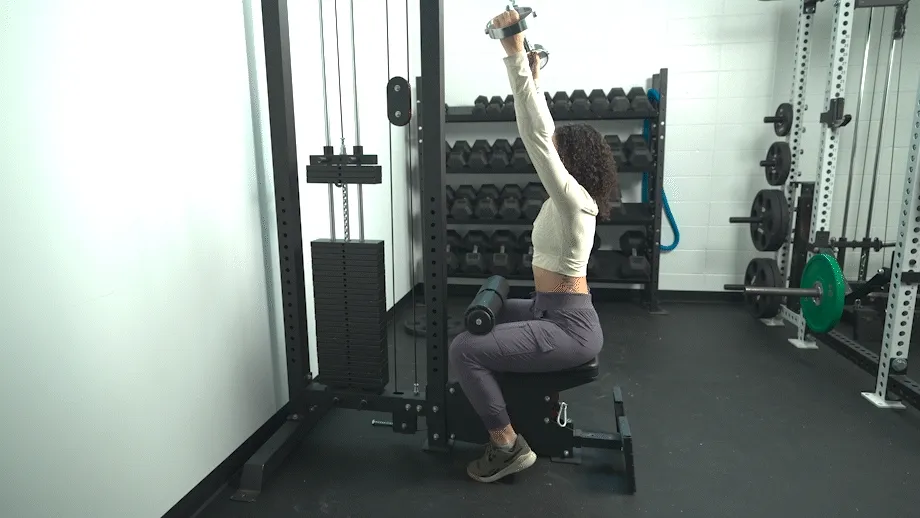
Lat Pulldown
These are typically done with a cable machine, but you can also do them with resistance bands or an individual lat pulldown tower that attaches to your existing power rack, such as the Rogue Monster Lat Pull Down tower. If you’re using resistance bands, you’d loop them around a power rack and sit on the floor.
Muscles worked: Lats, biceps, rear delts, rhomboids, and traps
Benefits: Lat pulldowns strengthen and shape the latissimus dorsi—the long muscles that run from the back of your rib cage just below your armpit to the back side of your hip bones. I like to call those your “pull-up muscles.” However, because the pulldown exercise is done with a cable and you’re seated for the exercise, you can move a lot more weight than you probably can on pull-ups.
How to do it:
- Assuming you have a lat pulldown attachment, adjust the seat to a comfortable height. You should be able to drive your feet into the ground while pulling.
- Grab the attachment with a wide grip. Sit tall, look forward, and press your feet into the ground.
- Squeeze your shoulder blades back and down, drawing your elbows toward your sides. Pull until the bar lightly touches your chest, just above your sternum.
- Slowly return to the starting position by extending your arms.
- When you finish your set, make sure there’s no slack in the cable before getting up.
RELATED: Best Resistance Bands
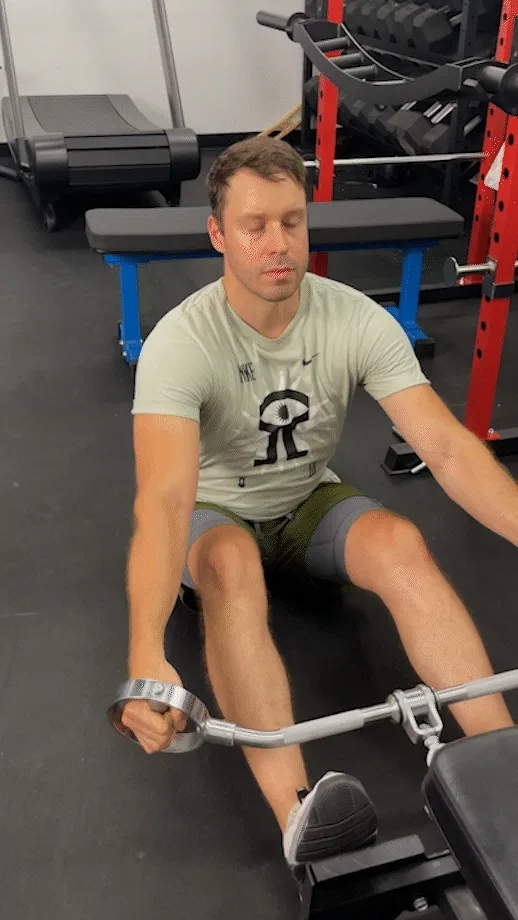
Seated Cable Row
This exercise isn’t the most conducive to home gyms, since most home gym owners don’t have the space for a full-out cable machine or the money for the sophisticated machine we talk about in our Tonal Smart Home Gym review. (Most home gym owners are more likely to add a lat pull-down power rack attachment to an existing rig.) However, we thought the cable row was still worth mentioning because it’s such a great back exercise.
Muscles worked: Lats, rhomboids, traps, and biceps
Benefits: The best thing about cable rows is that you can isolate your back muscles since you’re seated. Unlike other back exercises that require you to engage other muscles—like your entire lower body—this one’s all about the back.
How to do it:
- Clip a neutral-grip attachment onto the cable machine and select your weight.
- Hold the bar with a neutral grip. Sit up tall with your back straight, your feet on the footplate and your knees bent.
- Pull the handle toward you in a straight line, tapping your sternum with it. Squeeze to ensure full muscle contraction. You should feel this exercise in your upper and middle back, and maybe a little bit in your rear deltoids.
- Return the handle forward without leaning forward. Keep your back flat.
- Lean in to remove any slack from the cable before getting up.
How To Program the Best Back Workouts
Ultimately, what constitutes a good back workout depends on your goals. To create a good back workout to build strength, answer these questions and plan accordingly:
- How many times per week do you train back? If only one, you’ll want to include exercises for your lower back, mid-back, and upper back all in that one workout. If two or more, you can split those exercises up and do them on separate days.
- Are you aiming for hypertrophy or strength? A hypertrophy workout for your back will have more isolation exercises with higher rep schemes, whereas a strength workout will include mostly compound exercises such as deadlifts and pull-ups.
Then, make sure to include the three types of back exercises:
- Deadlift variations: These require you to hinge at the hips and hold onto weight, which results in a challenge to your lower, upper, and mid-back all at the same time.
- Horizontal pulling: These involve moving resistance perpendicular to your body. An example is the bent-over row.
- Vertical pulling: These involve moving resistance parallel to your body, with an example being the upright row (high pull) or pull-up.
Sample Back Workout, by a Certified Personal Trainer
Here’s an example of a back workout for someone who wants to get stronger and trains their back once a week:
| Exercise | Sets | Reps |
| Deadlift | 5 | 3 |
| Rack Pull | 5 | 3 |
| Wide-grip barbell row | 3 | 5 |
| Dumbbell bent-over row | 3 | 5 |
| High pull | 3 | 8 |
| Pull-up | 3 | 10 |
Notice that the workout starts with the exercise the person can most likely move the most weight on, and transitions to the exercise the person is likely to move the least weight on, or even assistance with. The exercise selection includes movements that target the upper, lower, and mid-back muscles. Don’t forget your warm-up! Include bodyweight back priming exercises like Supermans and resistance band pull-aparts.
Here are more tips on how to program your own workout at home.
Benefits of Back Exercises
All exercise comes with many benefits. Back exercises in particular are not only great for building muscle and a great physique, but also for improving your overall health and fitness. Here’s a quick look at the main benefits of back exercises.
Helps Improve Posture
How often do you find yourself slumped in the shoulders or with an achy neck? During exercise, do you ever catch yourself with an excessive arch in your back or a protruding neck? These posture problems can be solved in part by strengthening your back and learning how to retract and compress your scapulae, though it’s important to remember not to forget about other important components of improving posture (*ahem* mobility work).
Adding in some at-home or at-work stretches may help, too.
Helps Increase Core Strength
Core and abs are not synonymous. Your core consists of your entire trunk, which includes your abdominal muscles and back muscles. Strengthening your back muscles is as important for fitness as strengthening your ab muscles. Both are required for stability during compound movements like squats and overhead press. The stronger your back, the stronger you’ll be during those exercises and many others.
May Reduce Risk of Injury
A strong back is an antidote to an injured back. While deadlifts and other back exercises sometimes get a bad rap for causing back pain and injuries, that couldn’t be further from the truth. When done correctly—and with a weight that’s appropriate for your fitness level—back exercises are the best preventative for back pain.
RELATED: Dead Bug Exercise
May Reduce Lower-Back Pain
The back exercises listed above can help you strengthen your back by strengthening your spine, shoulders, and core, as well as relieving the strain of lower-back stiffness. These acts, when paired with regular stretching regimens and dynamic motions, may help to reduce lower-back stiffness if done correctly.
I asked GGR Senior Staff Writer Lauren Strong, CPT, for her favorite back stretches.
“Some of my go-to movements for mobilizing the back include the cat-cow, upward dogs (aka cobra pose), 90/90 stretch, standing hip marching, or seated good mornings—none of which are static stretches. Back pain (especially low back) is often related to tightness or weakness from the glutes, hamstrings, or upper back. That said, choosing the right exercise for you may require knowing your weak point! For example, a standing hip march can help activate your hip flexors and glutes (great if you’re someone who sits at a desk for work) while an up-dog or cobra pose can help activate your upper back and open your chest (excellent for folks who are working on posture or tend to lean forward in front of the computer). Both exercises can reduce back tension by activating an opposing muscle, which is called reciprocal inhibition1.”
Here are Lauren’s favorites, plus a few that should be on everyone’s list:
- Cat-cow
- Upward dog/cobra pose
- 90/90 stretch
- Standing hip march
- Seated good morning
- Pelvic tilt
- Child’s pose
- Windshield wipers
- Knees-to-chest stretch
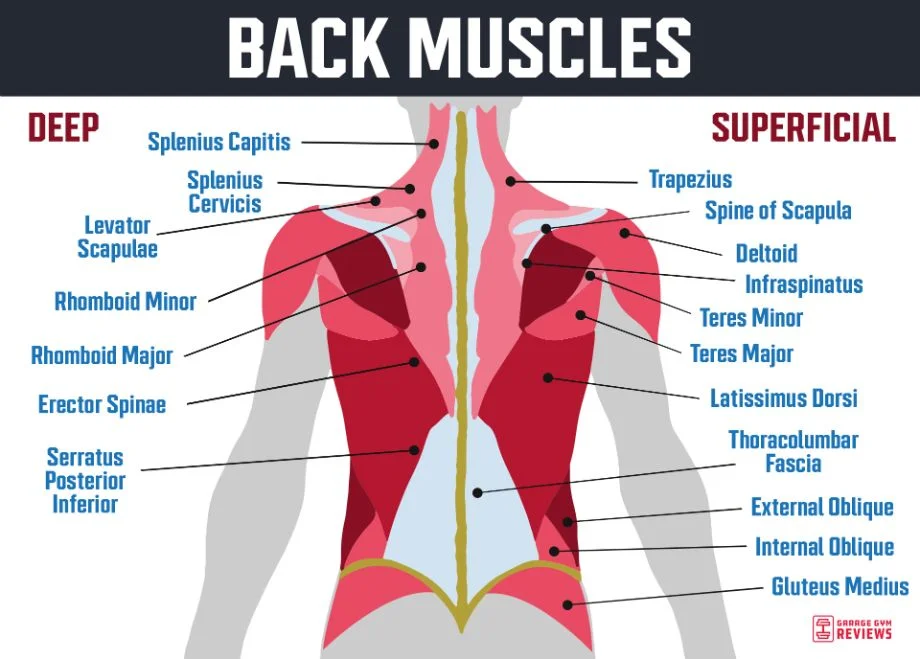
Anatomy of the Back Muscles
Best Back Exercises: Final Thoughts
As you can see, there are plenty of different back exercises to choose from—this is far from a comprehensive list. Here are some key takeaways on the best back-building exercises:
- You can do some of the best back exercises with a barbell and weight plates, dumbbells, or other equipment.
- Back exercises can prevent pain and injury when done correctly.
- Training your back one or two times per week is sufficient for most people and an excellent way to improve your fitness.
Best Back Exercises: FAQs
What is the best exercise for strengthening your back?
We listed all of the best back exercises in this guide—add some or all of these to your training rotation and you’ll see improvements in strength and muscle definition in no time.
To recap, here are the best back exercises:
– Conventional deadlift
– Trap bar deadlift
– Barbell bent-over row
– Wide-grip row
– Rack pulls
– Single-arm dumbbell row
– Dumbbell bent-over row
– Reverse dumbbell fly
– Incline row
– Pull-ups
– Chin-ups
– Ring rows
– Lat pull-downs
– Seated cable row
How do I train all parts of my back?
Train all parts of your back by doing exercises for your lower back muscles, upper back muscles, and mid-back muscles. You can do a couple of each throughout the week, or dedicate an entire day to your back and hit all three muscle groups.
What are the best exercises for lower back pain?
You should talk to your doctor or physical therapist about exercises that can help your back pain, as what’s safe for one person may not be safe for the next. All back exercises are safe and beneficial if performed with good technique and with an appropriate amount of weight.
Dr. Mike Masi, a physical therapist on our Garage Gym Reviews expert panel, says stretching exercises and yoga poses are a good place to start for people with lower back pain. “It’s important to get a physical evaluation before trying weighted back exercises if you have lower back pain,” he says. “Working with a movement professional is the best way to figure out the best back exercises for your situation.”
How often should I train my back?
Training frequency for any muscle group depends on a lot of factors, including your current fitness level, training age (how long you’ve been training), time constraints, fitness goals, and more. Even two people training for the same goal may not train their back the same amount. In general, at least one back day per week should be sufficient.
For bodybuilders, two days per week is pretty average. Some people may not need or want to isolate back exercises and instead prefer to sprinkle them in throughout the week, in which case you’d technically be training your back several days a week. The overall volume is more important than the frequency for most people.
What is the most effective back exercise?
There are plenty of effective back exercises. Some of the most popular back exercises include deadlift, pull-ups, lat pulldown, inverted row, dumbbell rows, and much much more!
References
- Jawade S, Chitale N Jr, Phansopkar P. The Effect of Reciprocal Inhibition Techniques on Pain, Range of Motion, and Functional Activities in Patients With Upper Trapezitis. Cureus. 2023 Feb 1;15(2):e34487. doi: 10.7759/cureus.34487. PMID: 36874329; PMCID: PMC9982756.