

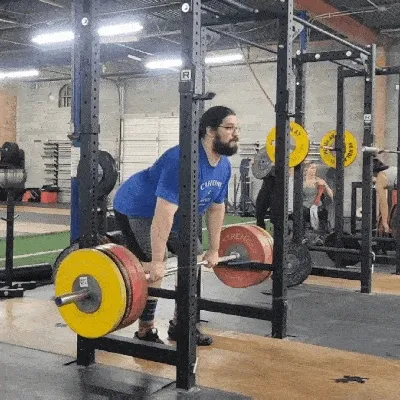
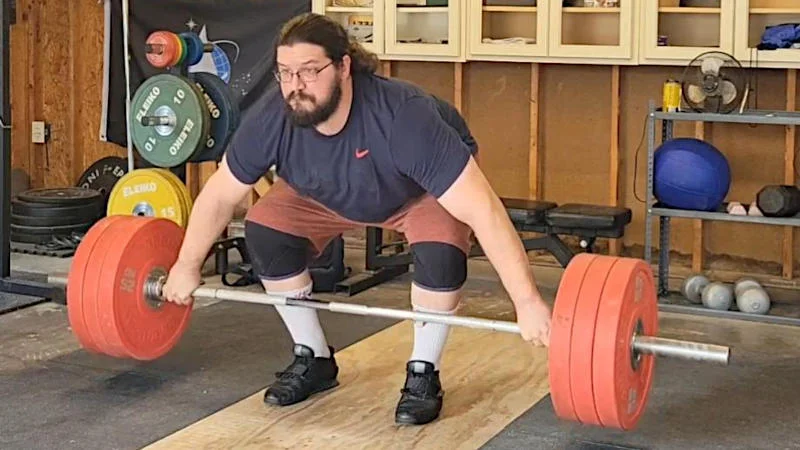
The deadlift is one of the best, most functional exercises at your disposal in the gym, so it can be very frustrating to feel like you’re hitting the same brick wall over and over again whenever you try pushing past your current deadlift PR.
You’ve tried supplementing with deadlift alternatives. You’ve made sure you’re eating right and getting a good night’s sleep. Try as you might, though, it’s all for naught…and you’re at your wits’ end. Something’s gotta give.
Well, fitness friend, we’re here to teach you how to rack pull.
Using the rack pull effectively can take your deadlift from dead in the water to drop dead gorgeous. Today, we’re breaking down rack pulls; specifically, how to rack pull with excellent form and how to avoid the most common mistakes associated with the exercise.
Get ready to knock ‘em dead and get those gains!
Behind The Rack Pull
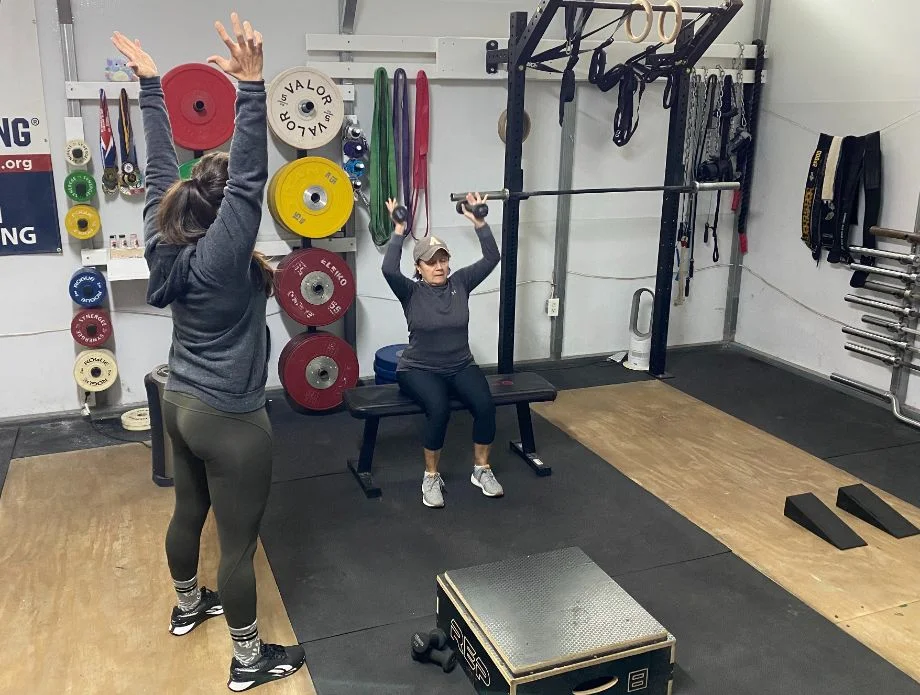
Rack pulls are a deadlift variation that uses a partial range of motion (often performed from knee height) to target the same muscles as the conventional deadlift. They can help build strength, size, and power, making them an invaluable tool for improving your deadlift technique and pushing through any sticking points.
Equipment needed: Olympic barbell, power rack, weight plates
Primary muscles worked: Glutes, hamstrings, spinal erectors, traps, lats
Difficulty level: Intermediate
Key benefits: Strengthens the posterior chain, increases grip and lockout strength, allows for heavier loads, improves deadlift technique
How To Do Rack Pulls
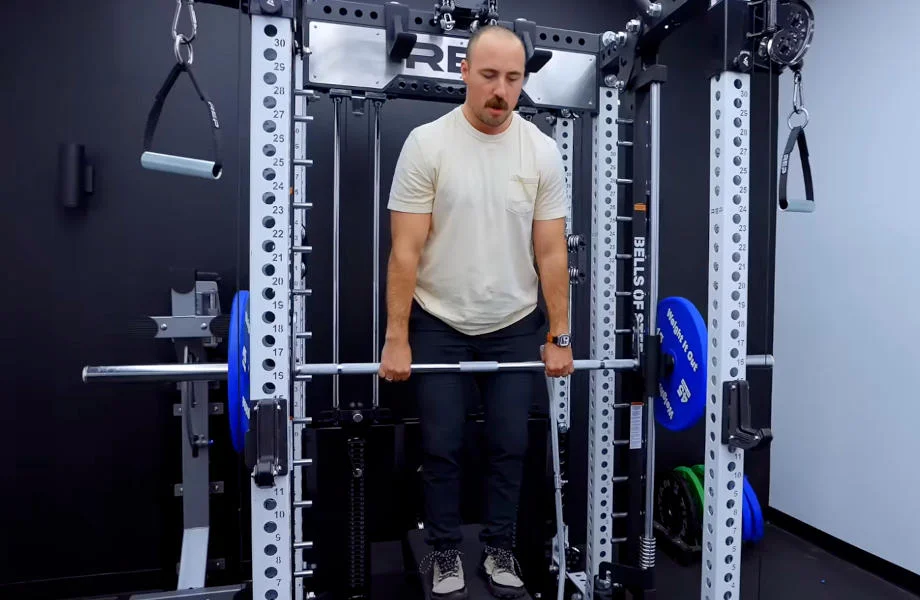
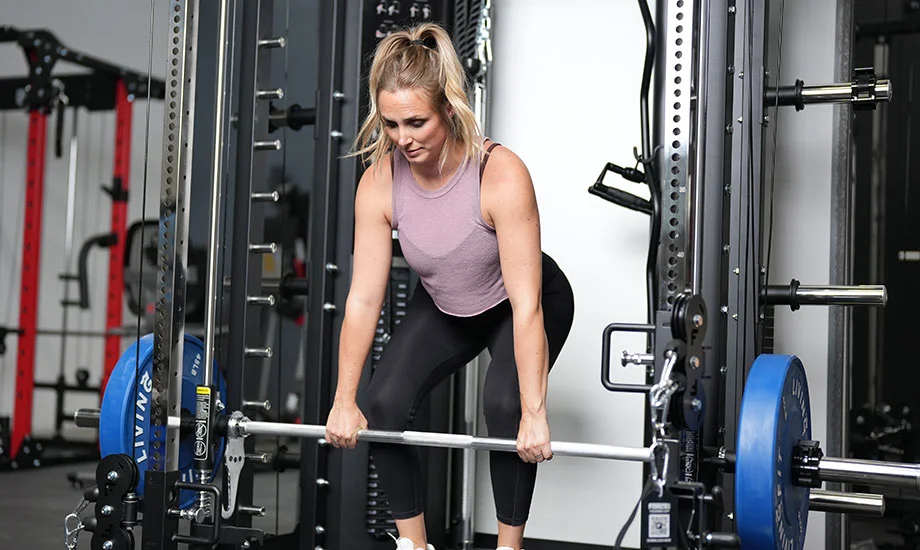
- The Setup: Set the safeties of your squat rack or power rack to knee height or slightly above, depending on your desired range of motion. Load your barbell and set it down on the spotter arms.
- Get a Proper Stance: Stand with your feet shoulder-width apart, your shins close to the bar, and your toes pointed forward as you would with the standard deadlift.
- Hip Hinge: Bend your knees and hinge at the hips, gripping the bar with a mixed or overhand grip.
- Take a Breath: Inhale and brace your core as you start the lift to help protect your spine.
- Pull the Bar: Push through your heels and lift the bar. Keep your back straight, core tight, and shoulders pinned back and down throughout the movement.
- Stand Up Strong: Drive your hips forward as you stand up straight, squeezing your glutes and keeping the bar close to your body.
- Control the Descent: Pause at the peak position, then slowly return to the starting position. Repeat for the desired number of reps.
RELATED: How To Deadlift Heavier
Rack Pulls Vs Deadlifts
While they’re undoubtedly related, rack pulls and deadlifts have some distinct differences that make them unique. Here’s a high-level overview of both exercises:
| Rack Pulls | Deadlifts | |
| Primary Muscles Worked | Glutes, hamstrings, erector spinae, traps, lats | Glutes, hamstrings, erector spinae, quads, lats, traps |
| Who Should Do It | • Anyone struggling with the lockout portion of the deadlift • Both intermediate and advanced lifters • Those looking to overload their posterior chain | • Lifters who want full-body engagement • Athletes training for strength, power, or performance • Anyone who wants to learn one of the foundational compound movements |
| Key Advantages | • Enhances lockout and grip strength • Allows for heavier loads than traditional deadlifts • Targets sticking points | • Full-body strength development • Efficiently builds muscle and power • Improves coordination and hip-hinge mechanics |
| Potential Drawbacks | • Less carryover from the floor • Increased injury risk from using heavier loads • Reduced range of motion limits muscle-building potential | • Can be quite taxing on the central nervous system • Greater technical requirements • Increased injury risk from poor mechanics |
RELATED: Romanian Deadlift Vs Deadlift
Rack Pull Form Tips From an Olympic Weightlifter
The rack pull seems unassuming since it uses a shorter range of motion, but don’t let it fool you. Rack pulls can still be very challenging, so you should approach the rack pull with the same focus as you would for the regular deadlift, making sure your form is picture perfect.
We’ve called upon resident technique guru and Senior Staff Writer Caine Wilkes, OLY, CNC, USAW-L1 to provide some Olympian-backed pointers on how to perform rack pulls safely and successfully.
Keep Your Back Straight
Rounding your back to reach down for the bar is a big no no. Just as you would during your regular deadlift, keeping a flat back and neutral spine is paramount and can reduce your risk of injury. It helps ensure that your back muscles properly support the spine and can save you from injuries like sprains, strains, and disc herniations.
Plus, you are physically able to employ more strength during the lift with this positioning. Maximize the effect of the lift and minimize your risk of injury by making sure that back stays straight from start to finish.
Engage Your Core
Keeping a tight core can provide support to the lower back region, helping reduce your risk of injury. One way to remind yourself to hold tension in the abdominal muscles is to take that big breath before initiating the lift.
“Whenever you’re doing a deadlift or pull, a strong core is vital in maintaining proper positions as well as reducing your risk of injury,” Caine explains. “A braced torso is a stronger torso, allowing your legs and posterior chain to drive the weight up during a rack pull.”
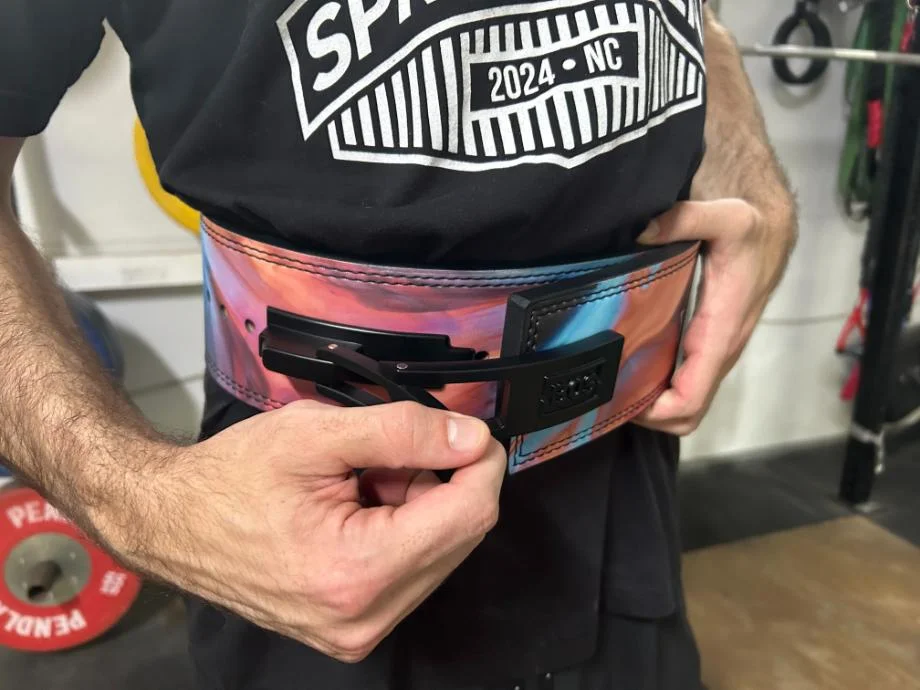
Wearing a weightlifting belt can help remind you of this, as well, as you’ll need to push against it to use it properly, which, therefore, can better maintain tension in the core.
Keep the Bar Close
Swinging the bar away from the body can place undue stress on your lower back, among other muscle groups that are activated during the rack pull.
“Keeping the bar near you helps keep your center of gravity close,” Caine says. “Letting the bar swing out can lean you forward, making the lift harder and putting unnecessary strain on your back. Engage your lats at the start of a rack pull to maintain a closer and straighter bar path.”
If you’re initiating the lift at the knee or above, you’re less likely to swing out accidentally than you would if you were avoiding clonking your kneecaps on the way up. Regardless of where you start the lift, keep the bar close to your body and work to maintain a straight bar path.
Drive Through Your Full Foot
You would not be able to lift anywhere near as much weight during the deadlift if you relied solely on your arms. Although you do need some arm and grip strength to maintain control of the bar, the real power comes from pushing through your full foot and engaging your glutes and hamstrings. Accordingly, the same power sources are relied upon in the rack pull, as well.
Move With Control
We’ll give you a pass if you’ve controlled the ascent of a heavy rack pull and need to let it drop once you’re in the standing position. Generally speaking, however, you want to move slowly and control the bar at all times.
Don’t explode out of the starting position or slouch back to the starting position after the rep. Trying to cycle reps using jerky movements oftentimes does little more than increase your risk of injury.
“Even though the movement is cut short compared to your typical deadlift, a rack pull should still be performed with controlled, deliberate movement,” Caine says. “Control the bar back to the starting point on your power rack, especially if you’re doing reps. Rushing through reps can easily get you out of position, making the pull tougher and increasing your risk of injury.”
RELATED: The Complete Guide to Barbell Safety
Common Rack Pull Mistakes
Following our trainer tips above can be a great way to avoid making mistakes when doing a set of rack pulls. Here are some of the most common mistakes beginners tend to make when they’re not yet familiar with proper rack pull techniques.
Rounding the Back
Rounding the back is a cardinal sin when it comes to deadlifts and rack pulls. It weakens your position, reduces the amount of power you’re able to produce, and, worst of all, can increase your risk of injury.
Save yourself from a slew of nasty setbacks by checking in with your form on each rep and making sure that your back stays flat and straight at all times. The rising and falling movement comes from hinging at the hips and extending the knees—not slouching.
Overextending at Lockout
Sometimes, we get a little overzealous after successfully standing up straight during the rack pull. Feeling like an absolute boss, we can overextend the lower back, lean in an unnatural way, or lock out our knees.
Overextension can cause unnecessary stress on the muscles of the posterior chain and could contribute to injury. When you hit the peak of the movement, stand up straight naturally and refrain from overcompensating; flat back, tight core, shoulder blades pinned, glutes squeezed, weight in your heels.
Pulling Too Quickly
It’s common to try squeezing in your strength training between getting out of work and picking up the kids from soccer practice, but rushing through your rack pulls is a bad idea.
Pulling too quickly or trying to rapidly cycle your reps nearly guarantees that you lose that ever-essential form somewhere during the set, which can lead to unnecessary stress on your muscles and an increased risk of injury.
Lift slowly and deliberately, control the bar during the ascent and descent, and reset your positioning between reps to ensure you’re keeping good form at every stage of the rack pull.
Going Too Heavy
It’s easy to underestimate the rack pull because it doesn’t involve the full range of motion you’d use for a standard deadlift. However, the rack pull is a demanding exercise that places a lot of stress on your posterior chain.
Start with fewer weight plates on the bar and really get comfortable with the movement before trying to move onto heavier loads. As you build a strong foundation and become familiar with the exercise, you should be able to perform rack pulls and move heavier loads with less risk of injury.
Setting the Safeties Too High (or Too Low)
The rack pull uses a shorter range of motion, but you can shorten it too much and get minimal activation, if any, if you set your safeties too high. Likewise, setting the safeties too low can make the rack pull too reminiscent of the deadlift and, therefore, detract from its usefulness.
Keeping the rack’s spotter arms close to the knee, approximately 2 or 3 inches above or below, is often sufficient to reap the benefits of the rack pull during your set.
RELATED: Common Lifting Mistakes
Rack Pull Variations
Just as there are numerous deadlift variations available, there are many rack pull variations, too.
Block Pull
Are you trying to get in a set of rack pulls, but you don’t have a squat rack or power rack? Do you happen to have a set of blocks or a few spare bumper plates handy?
The block pull is a common variation because it is identical to the standard rack pull, swapping out the safeties of a rack for any sturdy objects you have available that could provide the height you need to achieve the correct starting position.
When to do it: When you want to target the lockout portion of your deadlift but don’t have access to a squat rack.
Isometric Rack Pull
The isometric rack pull can be a nifty trick that takes the movement of the rack pull and changes the stimulus immensely. Instead of loading weight plates onto your barbell and lifting the bar to the lockout position, you set an additional set of pegs into your rack and lift an empty barbell into them with all your strength.
Isometric exercises like this rack pull variation create sustained tension that can be effective for improving weak positions in your deadlift.
When to do it: When you want to build strength at a specific sticking point without adding more load.
Banded Rack Pull
Many fitness enthusiasts are already aware of the benefits of resistance bands and the seemingly endless versatility you can get from these portable, inexpensive pieces of gym equipment. To perform banded rack pulls, simply wrap a resistance band underneath the rack and safely secure it at each end of the barbell. You will need two identical resistance bands to achieve the right effect.
Adding a resistance band to your rack pull alters the stimulus, as well, by adding in dynamic tension that makes the lift more difficult the closer you get to the lockout position. By practicing rack pulls with a resistance band around the barbell, you can feel a world of difference once the bands are removed, and you can be better equipped to break through that plateau in no time!
When to do it: As an accessory to overload the lockout and break through strength plateaus via accommodating resistance.
RELATED: How Effective Are Resistance Bands?
Useful Rack Pull Equipment Accessories
So, you’re a rack pull aficionado now, and you’re looking to next level your next workout.
No problem. We’ve got some great recommendations for gear that can help you kick things up a notch during your next sesh. Bam!
Weightlifting Belt
A clinical trial published in the journal Medicine & Science in Sports & Exercise1 determined that “he use of a lifting belt increases [intra-abdominal pressure], which may reduce disc compressive force and improve lifting safety” during compound barbell lifts like the deadlift and, you guessed it, the rack pull.
Lifting belts can help decrease your risk of injury and often allow you to lift heavier weights due to the improved support. As you progress along your fitness journey, it’s worth trying out a weightlifting belt and seeing if it’s a good fit for you and your fitness goals.
Lifting Straps
As you become more fatigued and your grip approaches failure, lifting straps are there to help bail you out by wrapping around the bar and maintaining a secure connection if your grip slips.
You by no means want to rely on lifting straps and totally neglect building grip strength and pulling strength, but they can be useful during those final sets when the loads are approaching their heaviest and your grip is wearing thin.
Deadlift Shoes
If you’re already accustomed to wearing deadlift shoes for the traditional deadlift, you’ll probably also want to use them for rack pulls, since the movement is so similar (albeit with a shorter range of motion).
The deadlift shoe has a flat, hardened sole that can give you more contact with the ground, thus improving your balance during the lift and decreasing the perceived amount of effort.
Of course, there’s no law against performing deadlifts or rack pulls in regular sneakers, but deadlift shoes can potentially provide an edge over their garden variety counterparts.
FAQs: How to Rack Pull
What is the point of rack pulls?
Rack pulls are used to build strength in specific portions of the deadlift, especially the lockout. By shortening the range of motion, they can allow you to lift a heavier load, target sticking points, and improve your overall deadlift performance.
Are rack pulls harder than deadlifts?
Rack pulls can be challenging, but they are generally considered easier than deadlifts due to the shorter range of motion.
Are rack pulls worth doing?
Whether or not rack pulls fit into your regimen can depend on your fitness level and personal fitness goals. Casual gym-goers, all-purpose athletes, and novice lifters may be satisfied with their current deadlifting abilities and, therefore, may not see a need to spend time on rack pulls.
On the other hand, rack pulls can be very valuable for those who want to really push their deadlift boundaries, including competition weightlifters, powerlifters, bodybuilding contestants, and other strength athletes.
Are rack pulls just as good as deadlifts?
The rack pull is a great exercise, but it loses just about every category in a side-by-side comparison with the good old-fashioned deadlift. Because of the reduced range of motion required to perform rack pulls, it just can’t measure up.
Deadlifts involve a greater range of motion, which, in turn, requires greater lower body strength, more core involvement, and superior mobility and flexibility. Rack pulls can be a valuable tool for improving your deadlift, but its uses are more specialized compared to the highly functional regular deadlift.
Do rack pulls build mass?
It’s well-known that deadlifts can help build muscle, especially in the posterior chain, but do rack pulls provide the same activation? Can we achieve hypertrophy by performing rack pulls? You bet!
Because rack pulls are, essentially, a partial deadlift, you can still receive good activation in the same muscle groups you use during the standard deadlift, thus encouraging hypertrophy. To maximize your muscle growth potential, be sure you’re lifting heavy weights and working within a rep scheme that’s conducive to your goals.
References
1. Harman EA, Rosenstein RM, Frykman PN, Nigro GA. Effects of a belt on intra-abdominal pressure during weight lifting. Med Sci Sports Exerc. 1989;21(2):186-190.