Each Week Helps You Develop Skills To Achieve Your First Pull-Up
Medical disclaimer: This article is intended for educational and informational purposes only. It is not a substitute for health or medical advice. For medical advice, contact an appropriate healthcare provider.
The pull-up can feel like an elusive bodyweight exercise reserved only for elite performers. It’s as if there are two types of people: those who can do a pull-up and everyone else.
Luckily, that is not reality and there is actually a lot of gray area—it’s not black and white. In fact the pull-up can be broken down into tangible steps, rolled out over time, and progressed so that you can finally work your way up to your first pull-up.
As a certified personal trainer, I’ve used this pull-up progression method on myself and clients to achieve the gratifying results of pulling chest-to-bar.
What Is This Beginner Pull-Up Guide All About?
If your goal is to do a pull-up, then this progression is a solid place to start. As with anything related to strength and conditioning, not every protocol will work for every person. What I’ve seen work for myself (and my clients) might not work for you.
The purpose of this guide is to break down the pull-up into bite-sized pieces so you can strengthen the muscles responsible for a pull-up like your lats, traps, delts, and rhomboids (just to name a few).
It’s also worth noting that in this guide we’re focusing on strict overhand grip pull-ups—not the kipping pull-ups you see in CrossFit or underhand chin-ups.
5 Movements To Prepare For A Pull-Up Progression
We’ll get into the actual program a little later, but for now here are the five exercises that we’ll use to prepare you to pull your chin over the bar (and how to do each one):
1. Inverted Row
Why should you do an inverted row?
Inverted rows provide a method to mimic the pull-up movement without the full weight of your body. An inverted row can help you get accustomed to the movement pattern and how to recruit from your back muscles rather than your biceps. Inverted rows are also scalable in so many ways; to adjust the difficulty, you can easily change the bar height, your body angle, and/or how much you leverage your legs.
How to do an inverted row:
- Situate a barbell at your approximate hip height (this is scalable) in a squat rack or Smith machine.
- Sit on the floor with your legs bent and feet flat and your hips directly under the barbell.
- Using an overhand grip, grab the barbell shoulder width apart. Adjust the angle of your legs to scale the difficulty. (The straighter your legs, the harder it will be.)
- Holding the bar tightly, pull your shoulder blades down and back (as if you could tuck them into your back pockets) and squeeze your upper back muscles.
- Keeping your chest up, begin to pull your chest toward the barbell using the strength of your back muscles, not just your arms.
- When your chest reaches (or nearly reaches) the bar, pause for 2 seconds before slowly lowering your body back to the ground.
- Be sure your shoulder blades are pulled down before resetting for the next repetition.

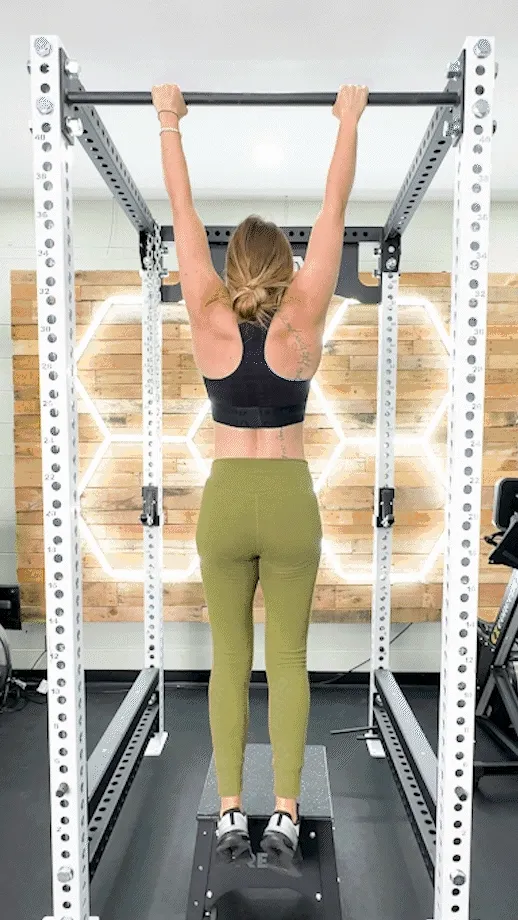
2. Dead Hang
Why should you do a dead hang?
A dead hang lays the foundation of pull-up strength: The ability to grip the bar and support your own bodyweight. Contrary to how this movement sounds, it’s an active position—meaning that it’s not about hanging slack or deadweight—it’s about the activation of your lats, rhomboids, delts, and traps in addition to grip strength.
How to do a dead hang:
- Grab a pull-up bar with an overhand grip and your hands shoulder width apart.
- With straight arms, relax into a hang position.
- Without bending your arms, pull your shoulder blades (scapula) down and back and engage your upper back muscles—this will bring your head up away from your shoulders and make your chest rise.
- Hold for time.
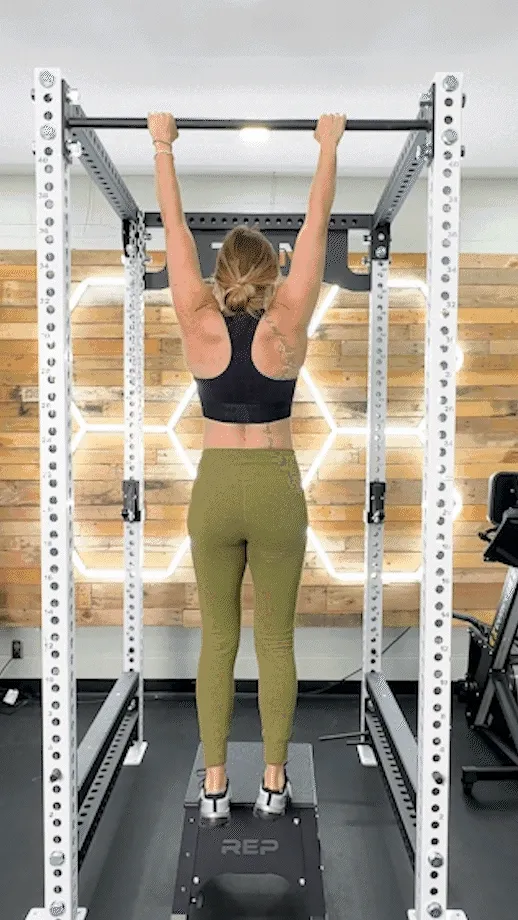
3. Scapular Pull-Up
Why should you do a scapular pull-up?
The scapular pull-up is the next step after getting comfortable with the dead hang. The scapular pull-up is a method to increase your body awareness around the starting position of a proper pull-up and increase the strength of your lats and lower traps. It is very similar to the dead hang, except instead of holding the top position for time you perform it for reps.
Additionally, as you progress, scapular pull-ups make a terrific warm-up for pulling movements and calisthenics.
How to do a scapular pull-up:
- Grab a pull-up bar with an overhand grip and your hands shoulder width apart.
- With straight arms, relax into a hang position.
- Without bending your arms, pull your shoulder blades (scapula) down and back and engage your upper back muscles—this will bring your head up away from your shoulders and make your chest rise.
- Hold for 2 seconds, then slowly lower back into the relaxed hang position.
- Retract your scapula again and repeat for the desired number of reps.
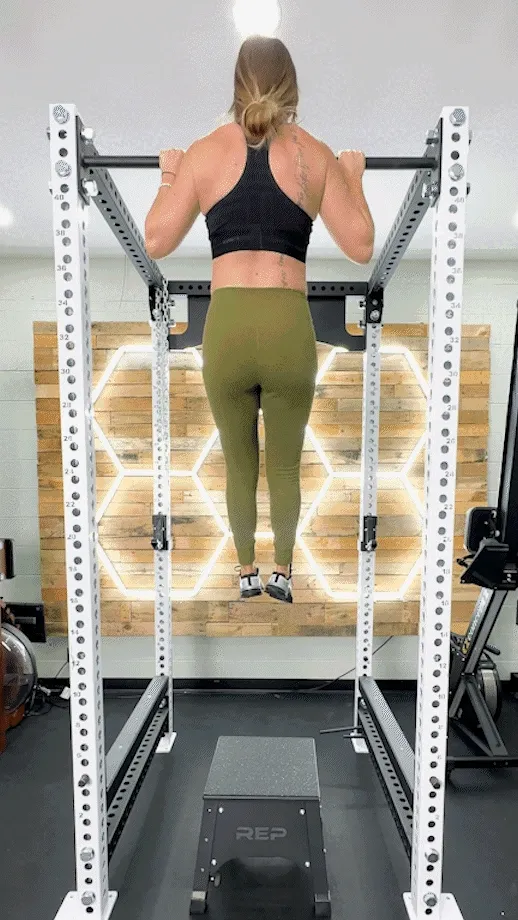
4. Negative Pull-Ups (Eccentric Only)
Why should you do a negative pull-up?
Negative pull-ups are an ideal way to practice the movement pattern without needing the strength to pull your entire body weight up to the bar. Negatives also help build grip and core strength that can translate to stronger barbell lifts like the squat, bench press, and deadlift.
How to do a negative pull-up:
- Stand on a chair or plyo box and grab the pull-up bar with an overhand grip, slightly wider than shoulder width apart.
- Pull yourself up until your chin is over the bar. This is your starting position. (If you don’t have something to stand on, you can jump and use your momentum to pull your chin above the bar instead.)
- From the starting position, slowly lower your body until your arms are straight.
- Once your arms are fully extended, let go of the bar and drop to the ground.
- Return to the starting position and repeat for reps.
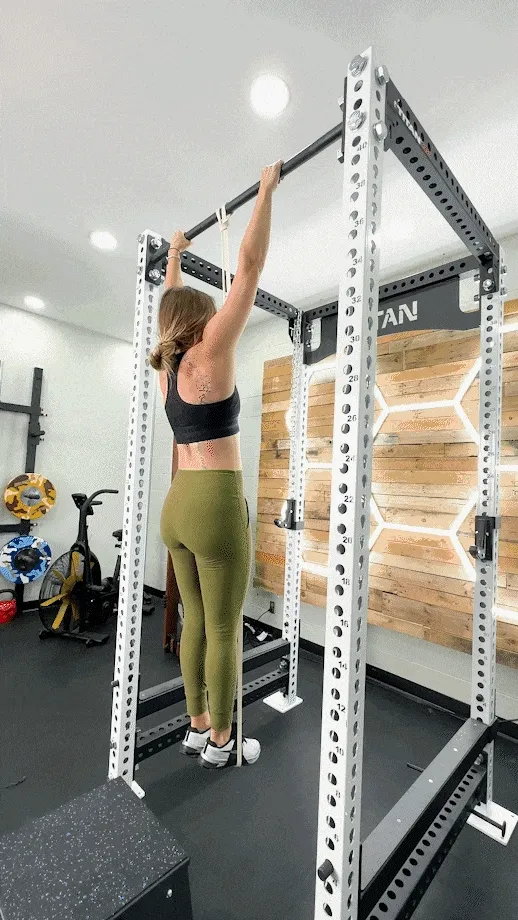
5. Banded Pull-Up
Why should you do a banded pull-up?
Using a loop resistance band (like a Rogue Monster band) helps reduce the weight you have to lift to bring your chin over the bar for a strict pull-up. In other words, adding bands allows you to practice the full range of motion at a reduced weight.
How to do a banded pull-up:
- Secure a long loop resistance band around a pull-up bar.
- Place one foot (or knee, for a shorter band) in the bottom of the band, straighten your leg to stretch the loop band. Keep your free leg close to the banded leg.
- Grab the pull-up bar with an overhand grip, slightly wider than shoulder width apart.
- Using assistance from the band, pull with the strength of your lats and rhomboids to bring your chest toward the bar.
- Keep your chest up and your shoulders down away from ears to avoid rounding your upper back as you bring your chin over the bar.
- Lower your body slowly until your arms are fully extended.
- Repeat for reps.
The 30-Day Pull-Up Progression Plan
With the descriptions of the five exercises above, you are now armed with the knowledge you need to level-up your pull-up. This progression plan is specific to pull-ups and can be added to your regular fitness routine.
Week One
This first week consists of just two movements: inverted row and dead hang. You will practice these two movements four times in the first week. Don’t hesitate to stay here for another week if you need more practice before moving on to week two.
- Inverted row: 3 sets of 10 reps
- Dead hang for time: 3 sets of 20 seconds
Week Two
The second week, your time on the dead hand will increase by 10 seconds. You will also add in scapular pull-ups to start initiating the starting position.
- Inverted row: 3 sets of 10 reps
- Dead hang for time: 3 sets of 30 seconds
- Scapular pull-up: 3 sets of 10 reps, performed slowly
Week Three
With two weeks of dead hang practice under your belt, the third week will focus more on activating (and strengthening) your lats. Notice the banded and negative pull-ups only have two total sets.
- Scapular pull-up: 3 sets of 10 reps, performed slowly
- Banded pull-up: 2 sets of 6 reps
- Negative pull-up: 2 sets of 2 reps
Week Four
The last week will be nearly the same as week three, with the addition of a few more sets and reps to negative and band-assisted pull-ups.
- Scapular pull-up: 3 sets of 10 reps, performed slowly
- Banded pull-up: 3 sets of 6 reps
- Negative pull-up: 3 sets of 3 reps
30-Day Pull-Up Progression Chart

What If I Finish the Program and Still Can’t Do a Pull-Up?
Try not to beat yourself up if you can’t get your chin over the bar after following this progression. A program is not a one-size-fits-all solution. It’s OK! This guide serves as a way to help you incorporate the fundamentals of this difficult bodyweight exercise into your routine so you can eventually get that perfect pull-up.
Methods to Increase Overall Strength for Back Muscles
The ability to perform a pull-up requires significant back strength, grip strength, and repetition. You may need more time developing your upper body strength before you achieve chest-to-bar status.
Lucky for you, we have an entire guide devoted to latissimus dorsi exercises so you can beef up your current strength training routine and make sure your back is ready for pull-ups. Here are some of my personal favorites:
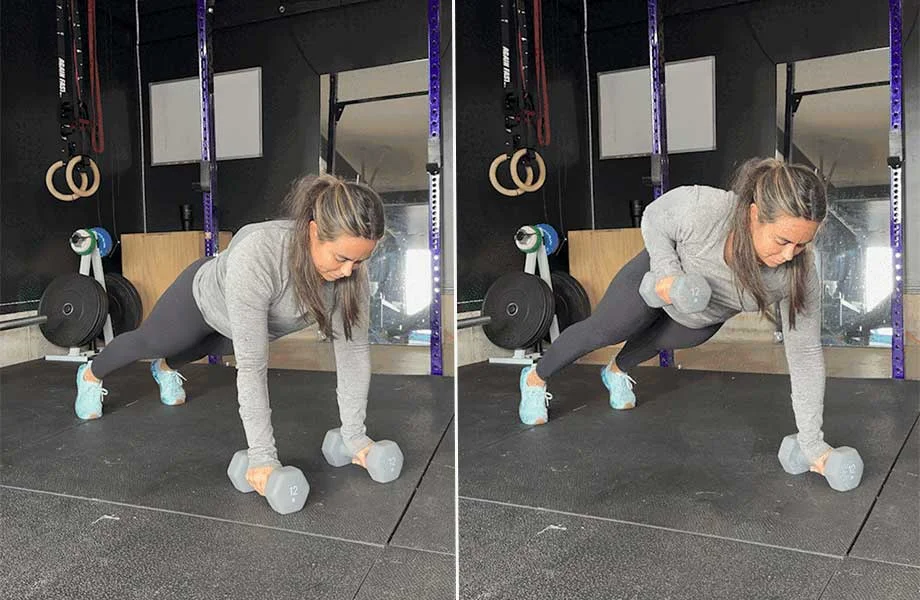
- Single-arm dumbbell row
- Bent-over barbell row
- Lat pulldown
- Dumbbell chest-supported row
- Landmine row
Other Pull-Up Variations You Can Try
If you are close to that first pull-up, but you’re not quite there, here are a few other methods you can layer into your pull-up workout journey:
- Jump start pull-up
- Isometric hold at the top position
- Chin up (aka palms facing your chin)
- Banded wide grip pull-ups
- Banded eccentric pull-ups
- Banded pull-ups to failure
- Suspension rows (using gymnastic rings or a suspension trainer)
Final Thoughts on Our Pull-Up Progression Plan
I suggest giving yourself plenty of grace on your journey to getting your first pull-up. It’s a difficult bodyweight exercise to master and you’ll have to keep practicing if you want to grow (or maintain) the ability to perform pull-ups.
To review, here is an overview of what it looks like to scale up to a full range of motion pull-up:
- Inverted rows: This gets you used to a vertical pull without the full weight of your body.
- Dead hang: Holding onto the bar and supporting your body weight builds grip strength.
- Scapular pull-up: Strengthens and stabilizes the shoulder blades in proper position.
- Negative pull-up: Strengthens your back and reinforces the movement pattern.
- Banded pull-up: Allows you to practice full range of motion with less overall weight.
Pull-Up Progression FAQs
What is the progression for pull-ups?
To progress into a full range of motion pull-up, you can start with general back strengthening exercises like dumbbell rows and lat pulldowns. Next up, inverted rows are the first step to start mimicking the movement pattern of a pull-up. After that it’s time to practice supporting your own body weight with dead hangs, scapular pull-ups, and negative pull-ups. Additionally, resistance band assisted pull-ups help you practice full range of motion while reducing the amount lifted.
How do I build strength to do pull-ups?
Whether you want to build up to a pull-up next month or it’s your goal for next year, you’ll need to practice vertical pulling movements like inverted rows, scapular pull-ups, and negative pull-ups. Additionally, your overall strength is also important because there are so many supporting muscles at work including your grip, biceps, triceps, shoulders, core, upper back, and even lower back.
Will pull-ups feel easier over time?
With practice and a balanced strength training program, pull-ups can get easier over time. However, it’s also possible that pull-ups will always feel like a challenging bodyweight exercise.
The fantastic thing about strength training and the principles of progressive overload is that you have the ability to keep making pull-ups challenging no matter how experienced you are by adding weight to your pull-ups, changing your grip, and slowing down your movement.
Why are pull-ups so hard?
There is no doubt pull-ups are one of the more challenging bodyweight exercises. They require strength from your entire back in addition to shoulder stability. If you’re really struggling with pull-ups you may need to spend time developing overall upper body strength and ensuring your shoulders are coordinating properly with each movement.
Will I get my first pull-up with this progression plan?
Honestly, you might not. But please don’t let that discourage you. Mastering the pull-up requires a fair amount of upper body strength and shoulder stability.
That said, if you’re struggling with the movements in this guide we have alternative methods to strengthen your back muscles that don’t require doing pull-ups.