Push-ups—a cornerstone of calisthenics and often touted as one of the better bodyweight compound exercises—are fantastic for strengthening and defining muscle groups in your upper body, such as your chest, triceps, anterior deltoids, and even abs. At the same time, they might also bring back daunting memories of struggling to pass physical fitness tests in your grade-school P.E. class.
Mastering push-ups can be a challenge. I—a certified strength and conditioning coach (CSCS)—will lead you through a beginner push-up program, step-by-step, that will impress your younger self and help you feel proud of your progress as you crush more sets and reps than ever before.
RELATED: Bodyweight Workouts
By adhering to this training program, you’ll gain confidence as you navigate through a range of effective push-up variations. Plus, you’ll benefit from invaluable expert tips and learn how to avoid common mistakes, ensuring a smooth and successful journey toward conquering push-ups.
Quick Overview: Beginner Push-Up Program
My 30-day push-up progression program is designed to build the foundational qualities necessary for executing perfect push-ups during your upper-body workouts. Regardless of my clients’ or athletes’ fitness levels, I consistently utilize push-up variations to enhance form and upper-body strength. Most movements are bodyweight exercises, so little to no equipment is needed outside of a pair of the best dumbbells or kettlebells.
Before beginning the beginner push-up program and after a thorough warm-up, attempt as many push-ups as possible with proper form. Record how many you perform. It’s OK if you can’t do a single push-up.
The Beginner Push-Up Program
The following program is a 30-day progression consisting of push-up variation training where you’ll tackle form, strength, range of motion, and volume. At the end of the four weeks, the goal is to have built the upper-body power needed to complete consecutive push-ups.
Each week features three days of push-up training. How you split that is up to you, but I recommend a rest day between training days.
How to Do A Push-Up
- Place your hands under your shoulders, shoulder-width apart, with straight arms.
- Straighten your legs, keeping your feet together, assuming a plank position.
- Ensure your body forms a straight line from head to heel.
- Lower your body by bending your elbows until your chest nearly touches the ground.
- Aim to keep your elbows at a 45-degree angle when lowering.
- Pause briefly, then push yourself back up to the starting position.
- Repeat for reps.
Week 1: Positional Strength
In week one, you’ll focus on assisted push-up variations designed to strengthen the key positions needed to execute a full push-up. By incorporating eccentric1 and bottom-start push-ups, you’ll develop strength for the descent (eccentric) and ascent (concentric) phases of the push-up.
Finally, you’ll engage in assisted push-ups, providing an opportunity to experience full-range push-ups while reducing the amount of body weight2 you move, aiding in progression and skill development.
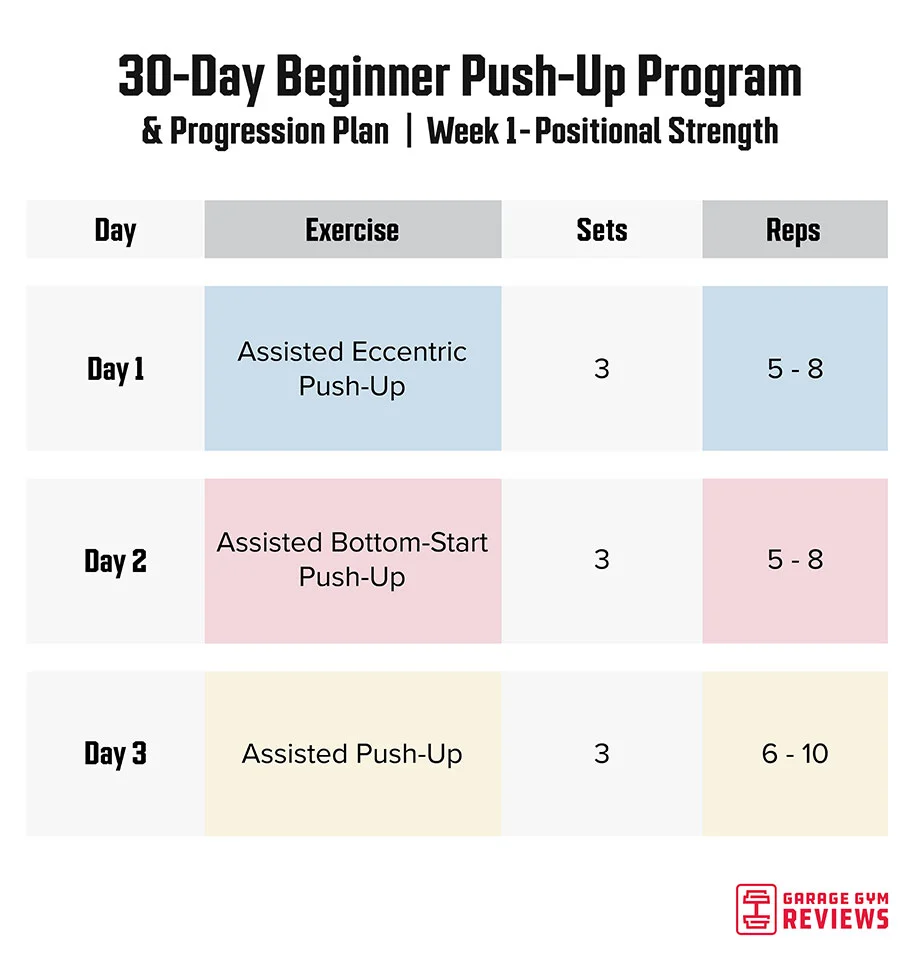
Day 1—Assisted Eccentric Push-Up: 3 sets of 5 to 8 reps
Start in a standard push-up position with both knees on the floor. Lower your body towards the ground for three seconds. Push back up to the start position.
Day 2—Assisted Bottom-Start Push-Up: 3 sets of 5 to 8 reps
Start in a standard push-up position with both knees on the floor. Lower your body to the ground to start the push-up. Press your hands into the floor and push your body up into the top position. Hold briefly, then lower yourself back down.
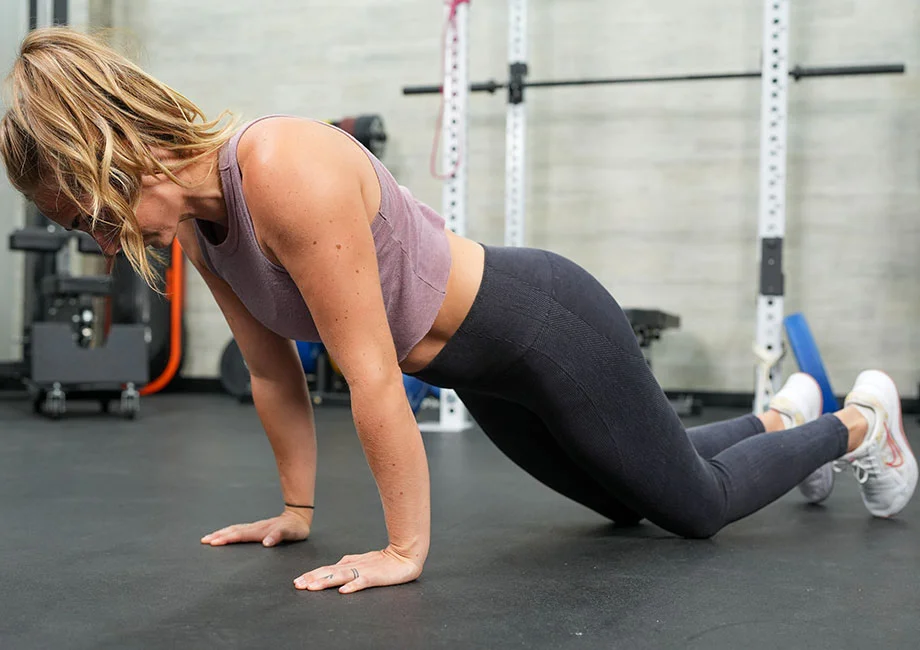
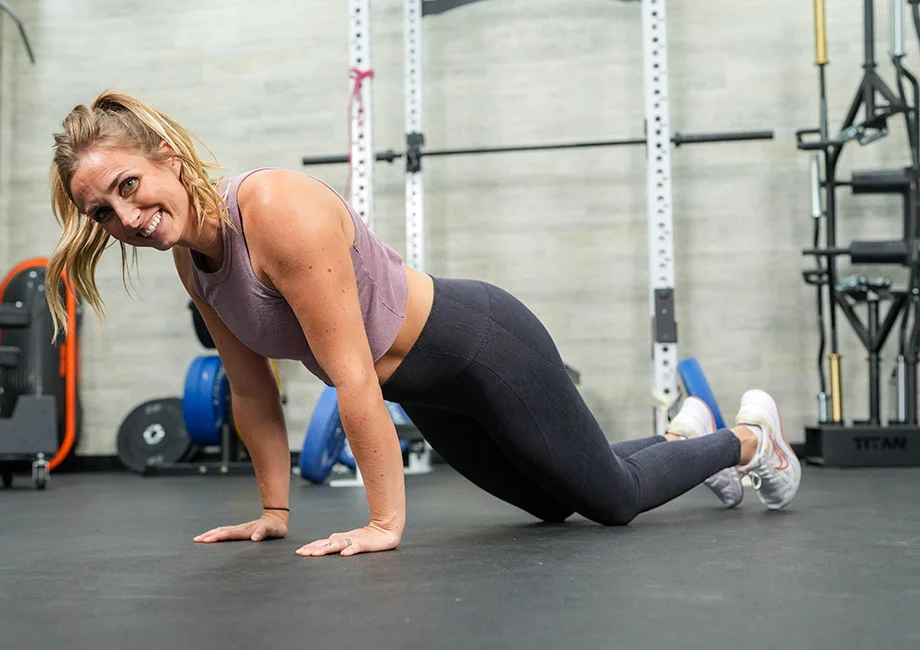
Day 3—Assisted Push-Up: 3 sets of 6 to 10 reps
Start by kneeling on the floor. Place your hands on the ground, slightly wider than shoulder-width apart. Keep your body in a straight line from your head to your knees. Lower your chest towards the ground by bending your elbows at a 45-degree angle. Once your chest is near the ground, push back up to the starting position by straightening your arms.
Week 2: Tempos and Pauses
In week two, you’ll use tempo and pause push-ups to extend the duration of your muscles experiencing time under tension3, effectively enhancing strength and stability in the early stages of your training. By utilizing this method, you’ll gradually build the foundation for more advanced movements.
To conclude week two, you’ll engage in incline push-ups with increased reps per set compared to week one’s assisted push-ups.

Day 1—Assisted Tempo Push-Up: 3 sets of 4 to 8 reps
Start in a standard push-up position with both knees on the floor. Lower your body toward the ground for five seconds. Pause at the bottom for three seconds. Push back up to the starting position for three seconds.
Day 2—Assisted Pause Push-Up: 3 sets of 6 to 10 reps
Start in a standard push-up position with both knees on the floor. Lower your body towards the ground with control. Pause at the bottom for two seconds. Push back up to the starting position.
Day 3—Incline Push-Up: 3 sets of 8 to 15 reps
Place your hands shoulder-width apart on an elevated surface, 12 to 16 inches off the floor, with your legs straight. Ensure your body forms a straight line through your head, lower back, and heels. Lower your body toward the elevated surface by bending your elbows until your chest nearly touches your hands. Aim to keep your elbows at a 45-degree angle when lowering. Pause briefly, then push yourself back up to the starting position.
Week 3: Triceps Strength and Increased Range of Motion
Week three begins with close-grip push-ups, which target and enhance the strength and hypertrophy of your triceps. Following this, you’ll attempt elevated push-ups with assistance. This variation challenges your chest, triceps, and anterior deltoids over an increased range of motion, intensifying the exercise while developing wrist strength and stability.
Finally, to conclude week three, you’ll perform decline push-ups, focusing on the upper chest and shoulders.
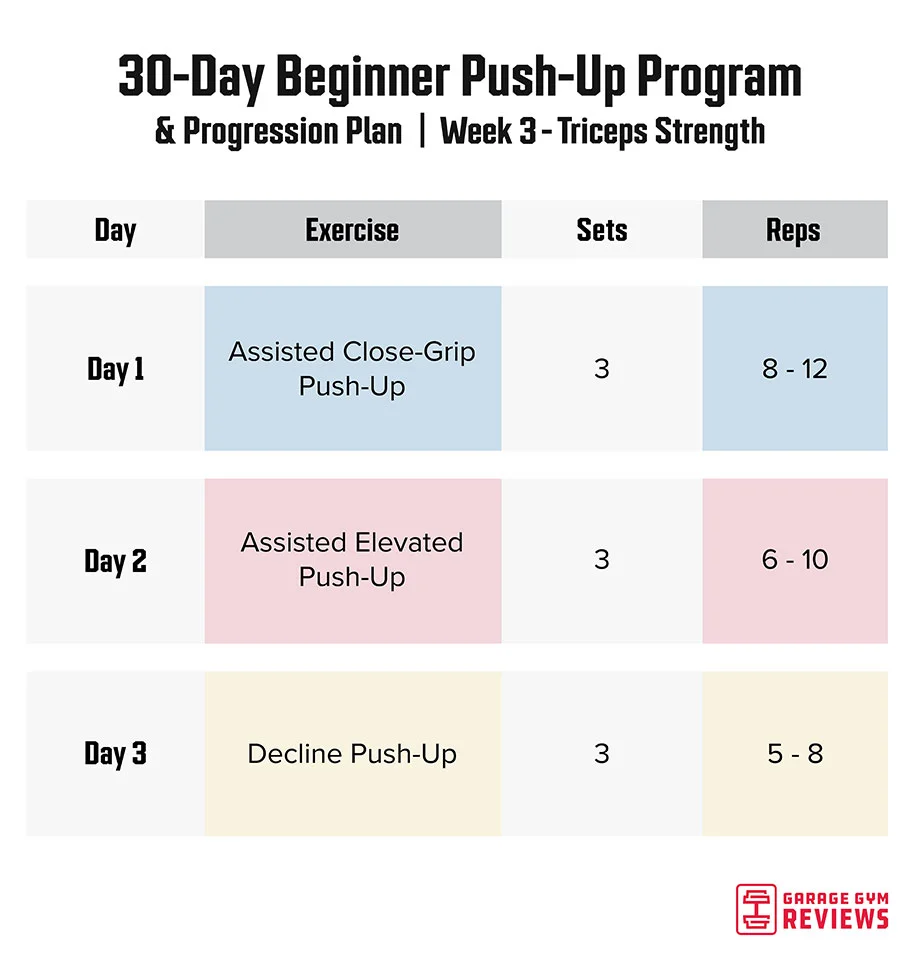
Day 1—Assisted Close-Grip Push-Up: 3 sets of 8 to 12 reps
Start in a standard push-up position with both knees on the floor. Place your hands closer together, inside of shoulder-width. Lower your body towards the ground with control. Maintain muscle tension at the bottom. Push back up to the starting position.
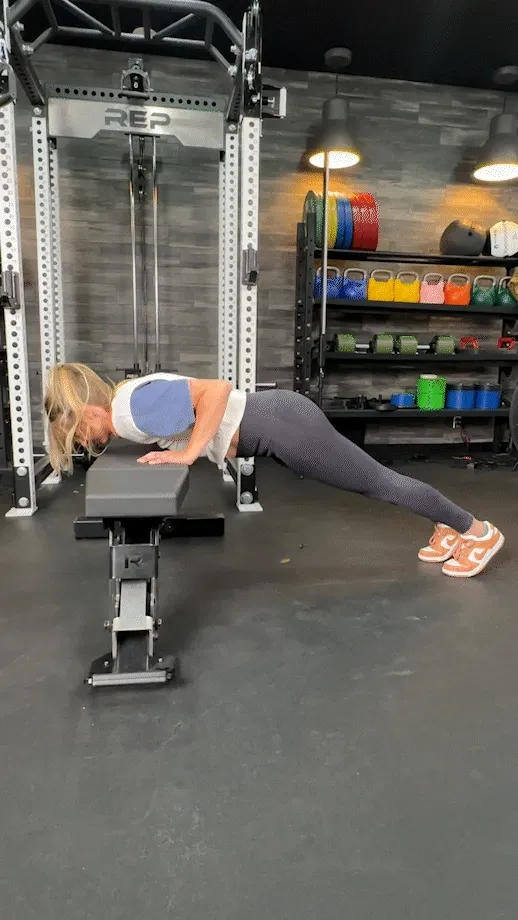
Day 2—Assisted Elevated Push-Up: 3 sets of 6 to 10 reps
Start by kneeling on the floor. Place your hands on the handle of kettlebells or dumbbells, slightly wider than shoulder-width apart. Keep your body straight from your head to your knees. Lower your chest towards the ground by bending your elbows at a 45-degree angle. Once your chest is near the ground, push back up to the starting position by straightening your arms.
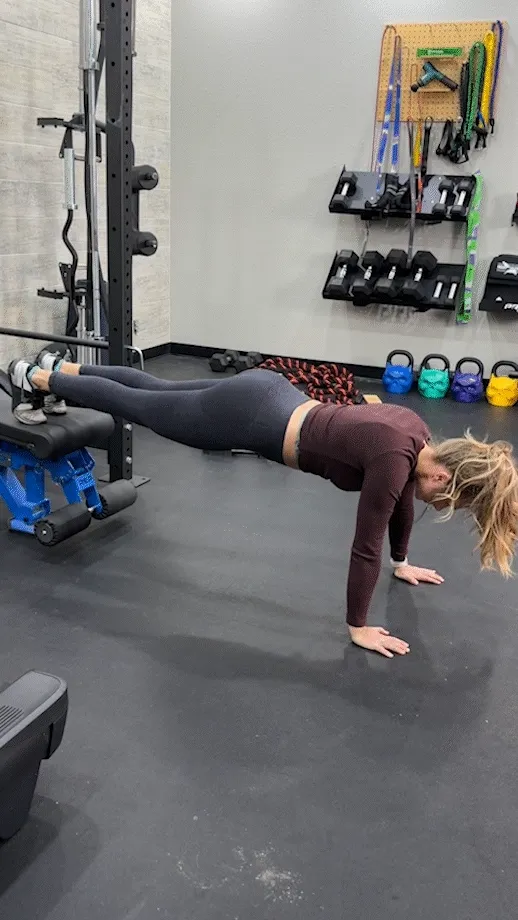
Day 3—Decline Push-Up: 3 sets of 5 to 8 reps
Place your hands under your shoulders, shoulder-width apart, with straight arms. Place your feet on a box or bench 12 to 16-inches off the floor with your legs straight. Ensure your body forms a straight line from head to heel. Lower your body toward the ground by bending your elbows until your chest nearly touches the floor. Aim to keep your elbows at a 45-degree angle when lowering. Pause briefly, then push yourself back up to the starting position.
Week 4: Test Week
Week four begins with T push-ups to engage your upper back muscles and enhance upper body strength, all necessary aspects of performing perfect push-ups. Midweek, you’ll focus on sets of half push-ups, providing an effective introduction to bearing your full body weight while gradually adjusting to the complete range of motion. You’ll test your progress by performing traditional push-ups to wrap up the week!
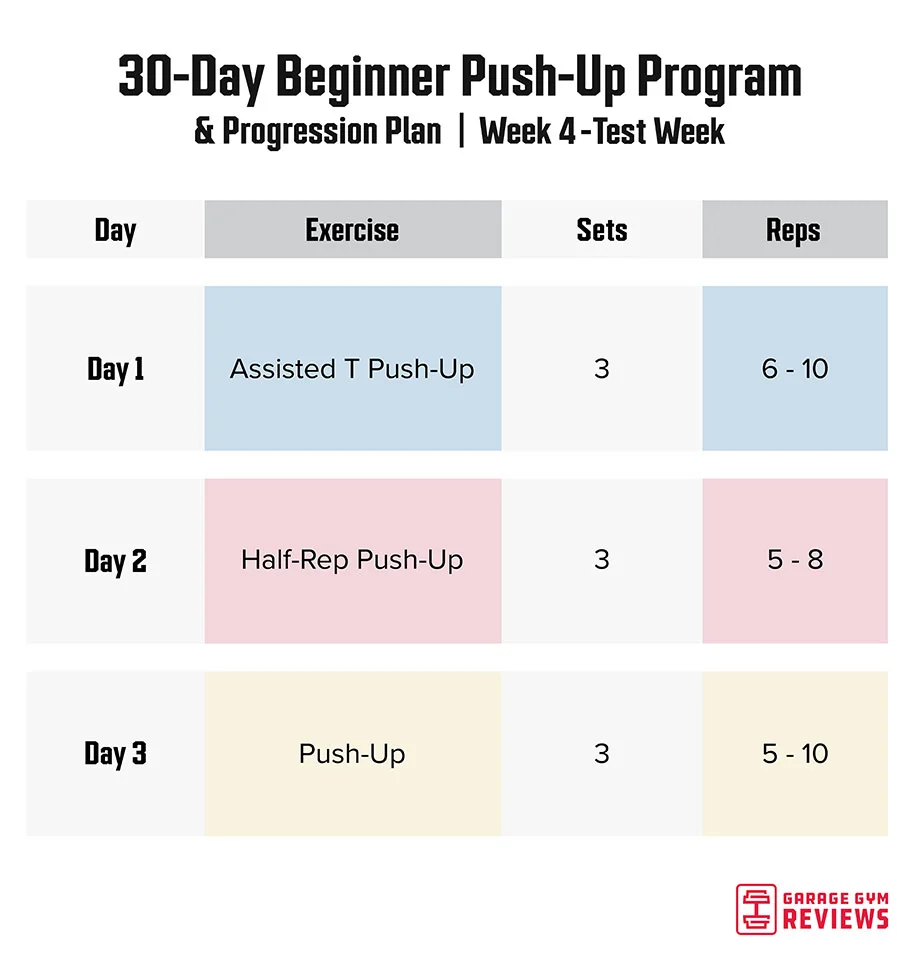
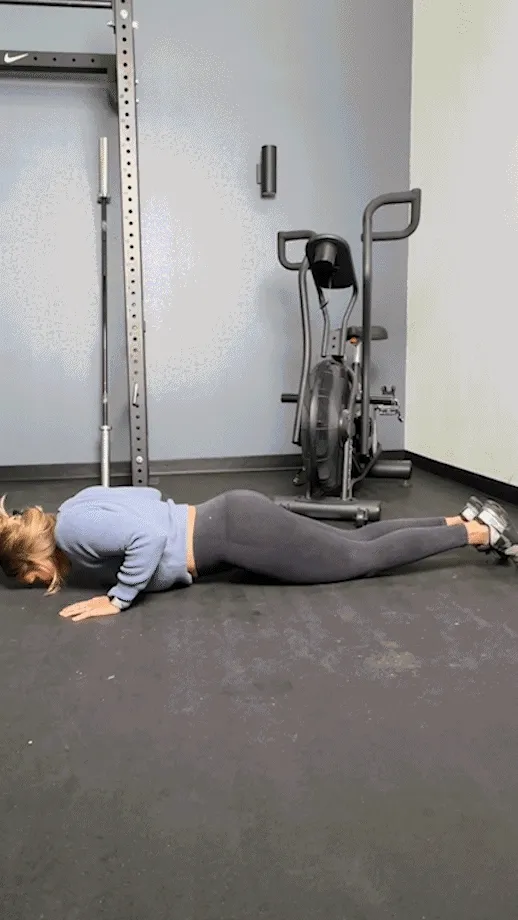
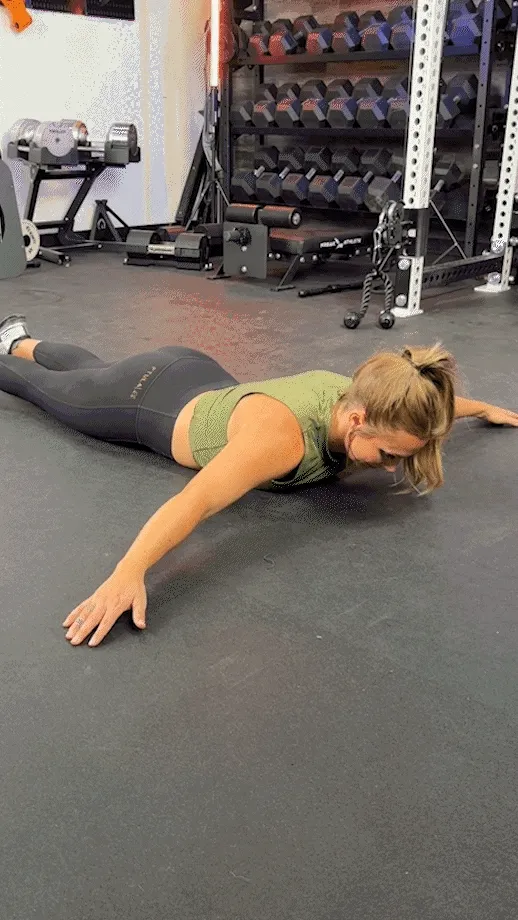
Day 1—Assisted T Push-Up: 3 sets of 6 to 10 reps
Position yourself facedown on the floor (prone position). Place your hands in a push-up position, slightly under the shoulders. Reach your arms to the side, creating a “T.” Lift your hands off the floor and squeeze the upper back muscles, holding a one-second pause at the top of the “T.” Squeeze the shoulder blades together, bringing the hands back under the shoulders. Push your hands onto the floor and perform a push-up. Return to the start position with control.
Day 2—Half-Rep Push-Up: 3 sets of 5 to 8 reps
Place your hands under your shoulders, shoulder-width apart, with straight arms. Straighten your legs, keeping your feet together, assuming a plank position. Ensure your body forms a straight line from head to heel. Lower your body by bending your elbows until your chest reaches halfway toward the ground. Aim to keep your elbows at a 45-degree angle when lowering. Pause briefly, then push yourself back up to the starting position.
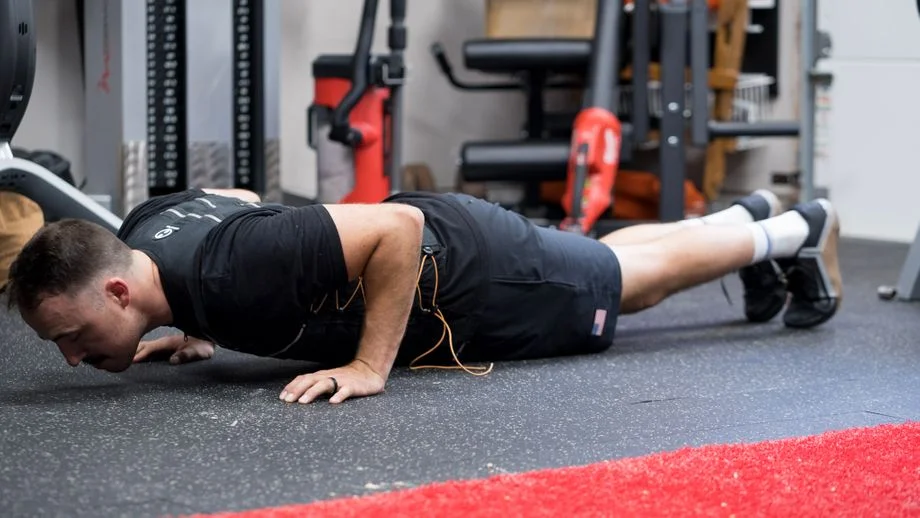
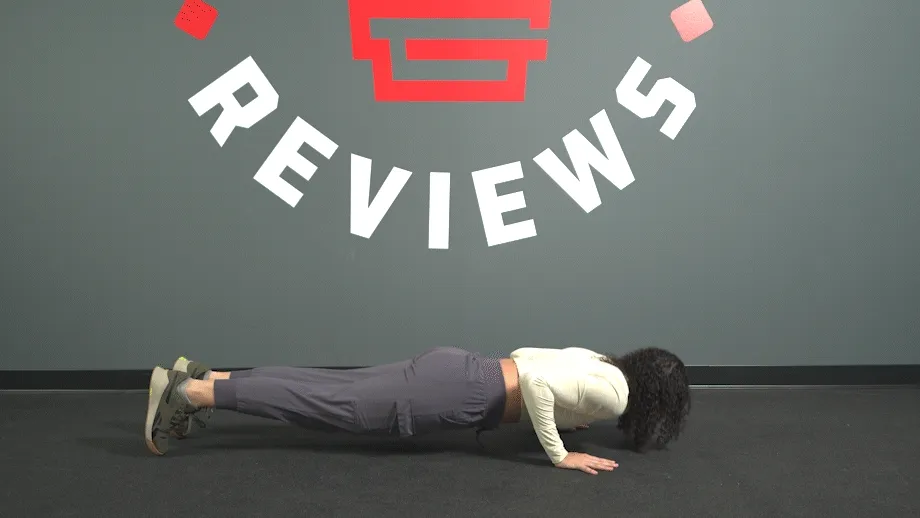
Day 3—Push-Up: 3 sets of 5 to 10 reps
Place your hands under your shoulders, shoulder-width apart, with straight arms. Straighten your legs, keeping your feet together, assuming a plank position. Ensure your body forms a straight line from head to heel. Lower your body by bending your elbows until your chest nearly touches the ground. Aim to keep your elbows at a 45-degree angle when lowering.
Pause briefly, then push yourself back up to the starting position.
Trainer Tips on Push-Up Form
Over the past decade, I’ve consistently utilized these techniques and advice when training both beginner athletes and seasoned gym-goers. These are my tried-and-true methods for establishing a solid foundation in push-up technique.
Smooth Reps are the Best
No matter the exercise, control is always better than chaos.
During the push-up, you’ll work through three phases: lowering (eccentric), transition, and upward (concentric). Controlling your body as you move through these phases will help you execute a push-up with better form, especially as fatigue sets in. You’ll also reap the benefits of strengthening your muscles and improving joint stability.
Position Your Hands Correctly
The standard position for your hands will be slightly wider than shoulder-width, ensuring you’re in a viable spot to recruit the appropriate muscles—your chest, shoulders, delts, triceps, and abdominal muscles—while providing a strong and stable support base.
As you progress beyond the beginner push-up program, try different hand positions to align your push-up focus with your fitness goals. In a November 2015 study in the Journal of Athletic Training4, researchers found that narrow-grip variations target the triceps brachii and pectoralis major more effectively. Furthermore, adjusting your hand placement forward or backward can engage your abdominal and back muscles to a greater extent.
Variation is Key
Variation in push-up exercises is crucial when learning how to perform a push-up. Programming different variations, such as incline push-ups or knee push-ups, or tweaking reps to use tempos and pauses, allows you to build strength and perfect your form. They can also help you develop specific positional strength or the ability to maintain your posture throughout the movement.
For example, slowing down and focusing on a push-up’s eccentric (lowering) portion can help you build strength and stability in that particular phase by increasing muscle recruitment of the chest, triceps, shoulders, and core.
Ultimately, variations also allow for targeted muscle engagement and help accommodate varying fitness levels, allowing beginners to progress toward mastering the standard push-up. Plus, experimenting with different variations helps keep your workouts interesting, preventing training stagnation.
RELATED: Tempo Training
Be Patient!
Remember, progress isn’t linear. If you’re new to push-ups—be patient! Developing the strength, stability, and coordination to perform push-ups well will take time, often more than you realize. Stick to the beginner push-up program, avoid common mistakes, and keep up the hard work.
My advice is that there are two things you can control: attitude and effort. Keep a positive attitude, and always put effort into your workout routine.
Common Push-Up Mistakes
A grade-school P.E. class isn’t the only place where you’ll witness the most common push-up mistakes. Be aware of the mistakes below to make sure your form checks out! And remember, give yourself some grace. Push-ups aren’t easy.
Maintain Correct Posture and Body Alignment
Maintaining proper form can be tough as push-ups become more challenging, especially regarding body alignment. You might be tempted to compromise by bending at your waist or lifting your rear end high, reducing core engagement. Similarly, relaxing your abdominals and allowing your pelvis to drop before your sternum reaches the ground can also compromise form.
Expert tip: Engage your core by contracting your abs and using those muscles to pull your belly button in toward your spine. You can practice this movement while standing by performing the stomach vacuum exercise. Breathe in, using your abdominal muscles to pull your belly button toward your spine, hold for 10 seconds and then gently exhale.
To strengthen your push-up positions, give a few of the best ab exercises and glute exercises some love in your routine. These exercises target the muscles needed for stability during push-ups, which will help maintain proper form and maximize the effectiveness of your push-ups.
RELATED: Glute Exercises At Home
Lock In Your Elbow and Hand Positions
This might be the most common push-up mistake I see in the gym. People tend to flare their elbows due to incorrect hand positioning that is too wide. While you might think this wide position could be beneficial for increasing the engagement of your chest, it may be doing more harm than good, especially for your shoulders. The previously mentioned study in the Journal of Athletic Training4 found that a wide hand placement activated the chest and triceps muscles less than a narrow hand placement. Reducing the range of motion decreases muscle engagement and restricts the mobility benefits of exercising through a full range of motion.
A good rule of thumb is to place your hands slightly wider than shoulder width, with your elbows tucked at about 45 degrees.
Control Your Push-Up
A lack of control diminishes the effectiveness of the push-up and increases your risk of injury. Proper push-up form requires deliberate and controlled movements.Focusing on performing push-ups with a controlled tempo ensures that correct muscles are fully engaged throughout the entire range of motion. Slowing down the pace of movement extends the time under tension, effectively stimulating muscle growth (hypertrophy) and improving strength.
Beginner Push-Up Program: Final Thoughts
Achieving consistent, high-quality push-ups can feel challenging. However, with this month-long progression plan and valuable trainer tips, you’ll be well-equipped to enhance your push-up strength and technique.
To summarize:
- Push-ups, just like pull-ups, are an excellent upper-body calisthenics exercise to master.
- Push-ups work your pectorals, triceps, anterior delts, core, and even some variations that can target your upper back.
- Prioritize smooth repetitions, pay attention to hand positioning during setup, and use various push-up variations to enhance your training.
- Steer clear of common pitfalls such as improper body alignment, incorrect elbow and hand placements, and lack of control during repetitions.
Beginner Push-Up Program: FAQs
How many push-ups should a beginner do?
If you’re new to push-ups, I’d recommend focusing on 2 to 3 sets of 5 to 10 reps per workout. Play close attention to your form, moving with smooth tempos, and using different variations for each workout. Here’s a simple weekly progression example:
Workout 1: Assisted Push-ups 2 to 3 sets of 5 to 10 reps.
Workout 2: Incline Push-ups 2 to 3 sets of 5 to 10 reps.
Workout 3: Traditional Push-ups 2 to 3 sets of 5 to 10 reps.
Include at least one rest day between your push-up workouts.
How should a beginner start push-ups?
The best way for a beginner to start knocking out sets and reps of push-ups would be by following a simple yet effective progression. A scalable progression that can be modified based on your strength and fitness level is ideal. Start with assisted push-up variations, such as wall push-ups or knee push-ups with tempos and pauses. Next, incorporate elevated push-ups to train through a full range of motion while decreasing the perceived body weight you’ll be moving. After that, give full push-ups a go.
As a certified strength and conditioning coach (CSCS), I typically recommend that clients perform a set of regular push-ups and transition to assisted push-ups (when they gas out) to increase their training volume and build more strength and endurance.
Can you get abs by doing push-ups?
While push-ups may not specifically target your abdominal muscles like exercises designed for core strength, they engage your abs to provide stabilization while performing repetitions. This helps maintain proper alignment throughout the various stages of the push-up. Your abdominal muscles serve an important role as a vital link connecting your upper and lower body during the movement’s execution.
If you want to fire up your abs during push-ups, you can try TRX home suspension trainer variations, an effective method to achieve high muscle recruitment. In a September 2014 study in the Journal of Sports Medicine and Science5, researchers found that suspended push-ups increased core muscle activation more than standard push-ups on the floor. Just be ready; they’re no joke.
What is a good push-up schedule?
If you plan on training push-ups several times a week, you should have at least one rest day between each training session. Rest plays a crucial role in allowing your muscles to recover after workouts, and scheduling rest days is essential for an effective strategy.
Here are two recommended frequency options for your training schedule:
– Monday/Wednesday/Friday
– Tuesday/Thursday/Saturday
RELATED: Workout Schedule for Beginners
References
- Harris-Love MO, Gollie JM, Keogh JWL. Eccentric Exercise: Adaptations and Applications for Health and Performance. J Funct Morphol Kinesiol. 2021;6(4):96. Published 2021 Nov 24. doi:10.3390/jfmk6040096
- Ebben WP, Wurm B, VanderZanden TL, et al. Kinetic analysis of several variations of push-ups. J Strength Cond Res. 2011;25(10):2891-2894. doi:10.1519/JSC.0b013e31820c8587
- Wilk M, Zajac A, Tufano JJ. The Influence of Movement Tempo During Resistance Training on Muscular Strength and Hypertrophy Responses: A Review. Sports Med. 2021;51(8):1629-1650. doi:10.1007/s40279-021-01465-2
- Marcolin G, Petrone N, Moro T, Battaglia G, Bianco A, Paoli A. Selective Activation of Shoulder, Trunk, and Arm Muscles: A Comparative Analysis of Different Push-Up Variants. J Athl Train. 2015;50(11):1126-1132. doi:10.4085/1062-6050-50.9.09
- Calatayud J, Borreani S, Colado JC, et al. Muscle Activation during Push-Ups with Different Suspension Training Systems. J Sports Sci Med. 2014;13(3):502-510. Published 2014 Sep 1.