
The world of indoor cycling training has grown tremendously over the past 10 years. Professional cyclists and triathletes alike can increasingly be found training in their very own pain cave rather than on the road. Why, you ask?
Because performing indoor cycling workouts is a time-efficient, convenient, and effective way to improve speed and overall fitness. And, thanks to the rise of cycling apps and technological innovations, indoor cycling sessions are no longer necessarily a solo or boring activity. Cyclists can connect with other riders, train together, and, if you’re getting fancy, even ride in a virtual world with your tribe on their next group ride.
If you’re new to indoor cycling, setting up your space and knowing where to start in your training can be overwhelming. Truly, the importance of creating a pain cave really cannot be underestimated. Hopping on your indoor trainer requires some self-motivation, so you want to ensure you create the right space to meet your needs, goals, and most importantly, budget. Because, as any cyclist can attest, cycling gear and gadgets can cost a pretty penny.
In this article we offer a comprehensive guide on how to get started with your cycling journey by setting up the best indoor cycling space, getting important pieces of cycling gear you will need, and offering a few go-to workouts that range from high-intensity interval training rides (HIIT) to cardio endurance. But first, let us explain just how awesome indoor cycling is.
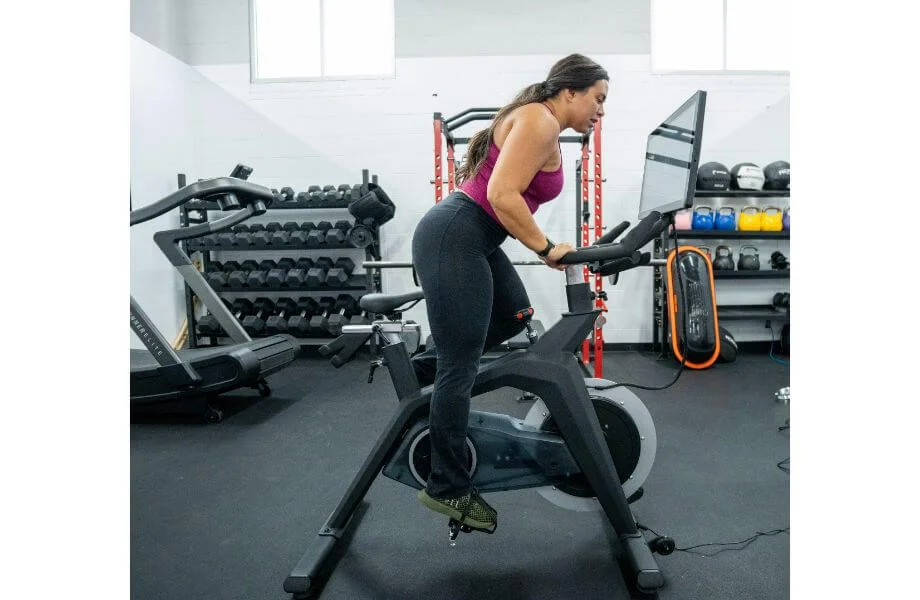
Best Exercise Bike Overall
NordicTrack S22i Studio Bike
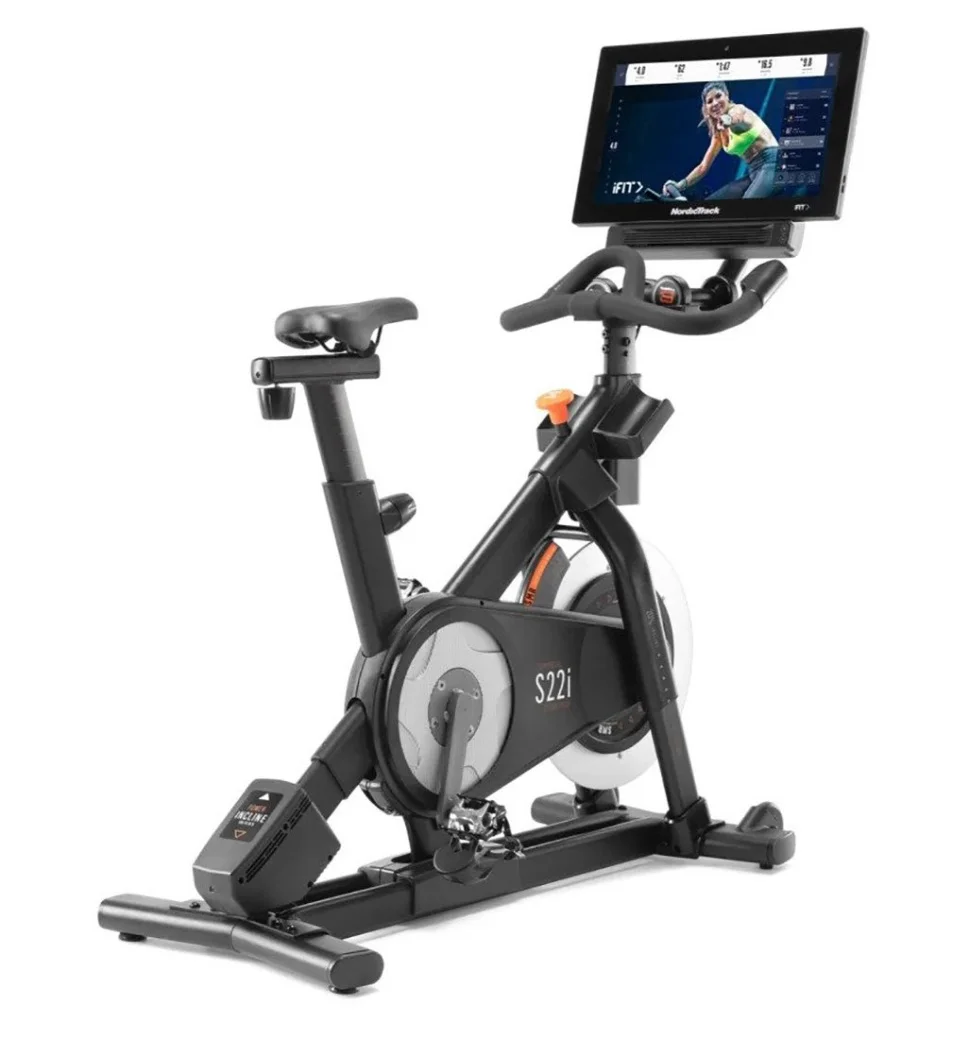
Product Highlights
- 24 digital resistance levels
- Incline and decline adjustments
- Fully rotating touchscreen
Pros & Cons
Pros
- Large 22" smart HD touchscreen
- Incline and decline ability
- Compatible with iFIT
- Adjustable seat
- Adjustable handles
- Dual-sided pedals
- Fan
- Comes with 2 3-lb dumbbells
- 24 digital resistance levels
Cons
- Expensive
- iFIT membership not necessary, but most beneficial
- Difficult to assemble
- Can’t be stored in the garage (brand states doing so will void the bike’s warranty)
- Hard to move and weighs more than 200 pounds
Bottom Line
This is the bike to get if you want an indoor cycling bike with interactive programming, incline and decline capabilities, and all the extras.
Types of Indoor Cycling Trainers
Not all exercise bikes are built the same. Here’s a comprehensive breakdown of the most common types of indoor cycling trainers so you know the benefits and drawbacks of each:
- Turbo Trainer: The most common (and affordable) indoor cycling trainer offers a stable ride without all the interactive features found in higher-end models. The bike fits onto the trainer with a skewer through the axle of the rear wheel. The wheel rests against a drum that’s connected to a resistance unit, which spins when you start to pedal.
- Smart Trainer: A perfect match for cycling apps, a smart trainer is a tech-driven bike that automatically increases or decreases the resistance based on the virtual terrain.
- Roller: A set of cylindrical drums you place your bike on to allow for a natural riding feel. Although a roller isn’t the most stable choice, it can help you improve your bike handling technique.
- Stationary Bike: A dedicated indoor bike that doesn’t require a road bike attachment, this popular piece of home and commercial gym equipment typically has features like resistance controls, performance tracking, and integrated workout programs. Check out our guide to the benefits of station bikes for more information.
- Rear Wheel-Mounted Trainer: These trainers attach to the bike’s rear wheel and use magnetic or fluid resistance to provide a smooth, quiet ride.
- Magnetic Trainer: While magnetic resistance results in a quieter ride, this type of trainer can lack the smoothness of the aptly named fluid trainer below.
- Fluid Trainer: The fluid trainer provides a smooth ride by using liquid to provide progressive resistance that mimics real-road conditions.
- Wind Trainer: This type of indoor cycling trainer uses a fan to create resistance based on your pedaling speed. While wind trainers provide a realistic road feel and are budget-friendly, they also produce quite a bit of noise.
RELATED: Air Bike Vs Stationary Bike
How To Set Up Your Indoor Cycling Trainer
Preparing your home gym for another piece of equipment is an exciting experience that should make you even more motivated. Whether you work out in your garage or another area, you’ll need a flat, stable surface to set up your indoor cycling trainer, as a sturdy floor will help prevent wobbling during intense workouts.
Meanwhile, if the floor is slippery, I recommend installing horse stall mats or a similar type of rubber mat to add traction and prevent your floor from getting damaged. Since you’re bound to get sweaty, you’ll also want a fan and proper ventilation to make your training environment comfortable.
You’ll also need to make sure you have sufficient space around the bike so you can mount and dismount safely and avoid hitting anything while you ride. Footprint-conscious home gym owners can create more room by using folding squat racks and weight benches that store vertically.
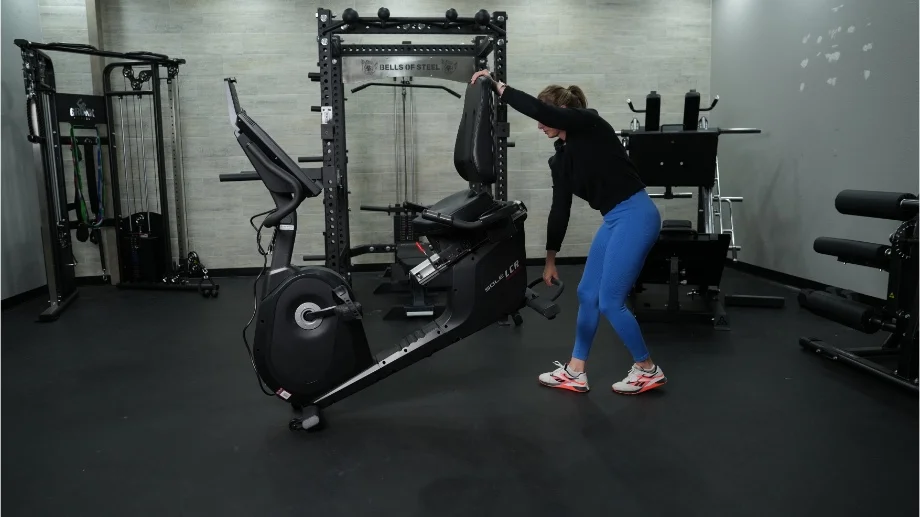
Once you’ve figured out where your bike will reside, you need to adjust the settings for an optimal ride. Set the saddle height to be level with your hip bone when you stand next to the bike. Adjust the handlebar height to a comfortable position where you can maintain a slight bend in your elbows while keeping your back straight. Carefully secure the bike to the trainer using the manufacturer’s instructions to ensure it remains locked in before you start pedaling away.
We are not all fortunate enough to have this amount of dedicated real estate in our home for a pain cave. So if you simply don’t have a space where you can leave the majority of your training equipment set up, find an area close to where your gear and bike are stored. You do not want to be dragging your stuff around the house everytime you want to ride—trust me on this one.
Gear
Now for the fun stuff: What cyclist doesn’t get at least a little bit excited about their bike gear? We listed the types of trainers above, so here are the extras. While there are tons of accessories available, we’ll focus on the essentials.
Heart Rate Monitor/Power Meter
If you own and are using a smart trainer, this portion on power meters is not relevant as they are generally built directly into these high-tech trainers. Power meters have become the norm for serious cyclists often favored over heart rate monitors, and here’s why: They’re more accurate in the moment.
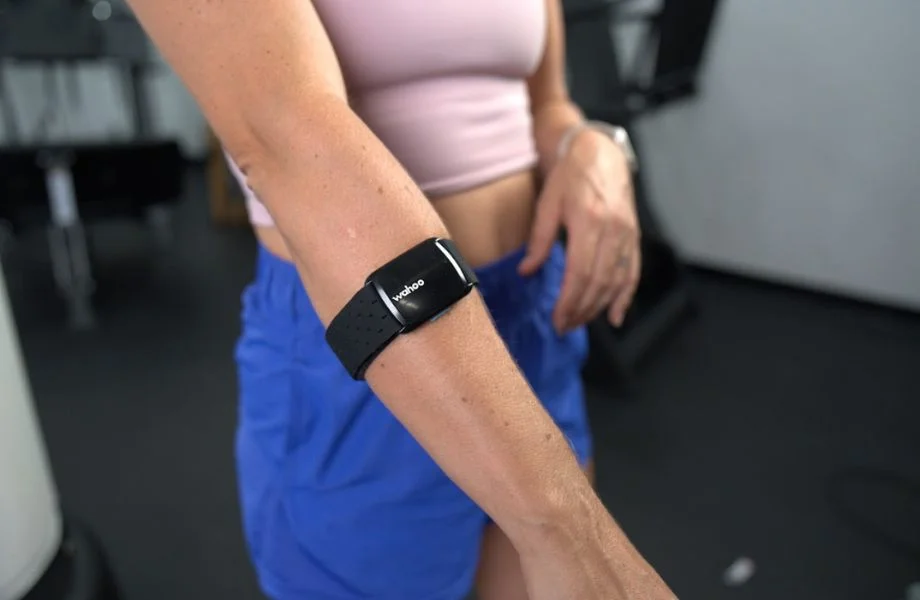
The main difference between using a heart rate monitor and a power meter lies in what they measure. Power refers to the direct amount of work you are putting out in real-time. In other words, it measures your power output at any given moment during your ride. Heart rate is a measure of your body’s response to that output. Heart rate measurements can be delayed and are affected by outside variables such as fatigue, previous performance, and hydration, which makes it a bit less reliable when monitoring your effort.
Riser
If you are using a wheel-on trainer, you will need a riser, block, or some item to raise the front wheel of your bike so that it is level with the rear axle. Some risers offer different heights and angles to simulate hills.
Fan
Anyone who has spent time on the saddle for an indoor training session knows what a complete sweat sesh these can be. You will want at least one fan to get some decent air flow in your training space. Most riders prefer multiple fans to keep the temperature at a comfortable level. If you are using just one fan, be sure it’s a strong one.
RELATED: Best Fan For Garage Gyms
Table
Grab a small table where you can store anything you may need during your ride close by. Water bottles, remotes, phones, a laptop, and a towel are some key things to place here.
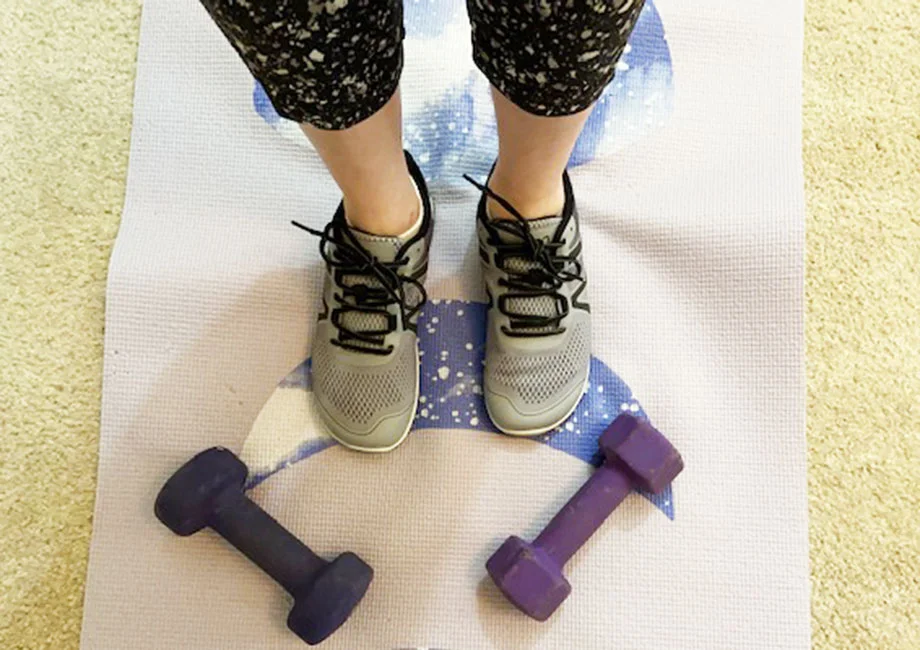
Towel or Mat
One thing is for sure with indoor cycling—you will sweat. Protect your home gym flooring by placing a towel or a bike or yoga mat under your trainer set up. It makes for easier clean up and a more stable surface area.
Entertainment or Virtual Reality
Even the most avid cyclists can get bored on a long indoor training session. With the rise of cycling apps and immersive riding experiences, this is really no longer a problem we need to worry about. Regardless of your training content or entertainment, your space needs some sort of screen for viewing purposes. Whether you want to catch up on your favorite shows or connect live with riders across the globe on your favorite training app, you will want a screen that is positioned at eye level so you’re not hyperextending your neck at any point.
Using Apps
Cycling apps have changed the game for indoor training. Gone are the days of staring at a wall, listening to music, and begging the clock to move faster. Riders can now connect with others across the globe to ride virtually together, choose a virtual race, plan routes and ride immersively anywhere in the world, track a ton of fitness metrics, and access training plans. The most commonly used apps for indoor cycle sessions are TrainerRoad, Zwift, and Wahoo SYSTM.
TrainerRoad
Cyclists looking for science-based, structured workout plans will really enjoy TrainerRoad. Using Adaptive Training technology with analytics, TrainerRoad creates personalized, data-driven indoor cycling training plans specifically designed to make you a faster and a more efficient rider.
TrainerRoad
Product Highlights
- Personalized, AI-based workouts
- Indoor or outdoor cycling
- Workout with or without a training plan
Pros & Cons
Pros
- Compatible with over 200 devices including speed sensors, power meters, and smart trainers
- 30-day money-back guarantee
- Creates training program based on your goals
- Can view/listen to other content while using Trainer Road
Cons
- Trainer/indoor focused
- Detailed workouts can’t be viewed in app
- Buggy app that forces user to restart devices
Bottom Line
Trainer Road users enjoyed the workouts and thought they improved their cycling performance but found the app buggy and frustrating.
Here is where it gets really cool: Using your fitness metrics, TrainerRoad continually analyzes your progress responding to strengths and weaknesses to make adjustments to the training plan. Every four to six weeks the program prompts you to take a functional threshold test, which guides further training.
TrainerRoad really does not have any social connections or virtual training options. It’s easy to work around this and get some entertainment via other devices or music. The app really is best-suited for those specifically looking for in-depth, science-based training programs with structured workouts and detailed feedback.
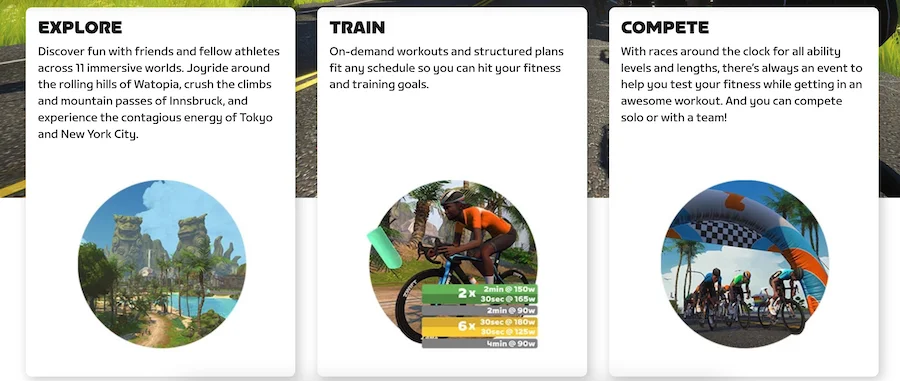
Zwift
Zwift has forever altered the face of indoor cycling—a bold, but very true, statement. Appropriate for beginners and elite riders alike, Zwift offers an immersive game-like training experience where you can connect with fellow cyclists to race, compete, or just go on a leisurely ride. The interface is super cool and you actually get an avatar that syncs up with your smart trainer to mimic your ride.
Zwift

Product Highlights
- Compatible with many trainers
- Syncs with smart gear & wearables
Pros & Cons
Pros
- Immersive, game-like training environments
- Works with many smart trainers and sensors
- Offers community events and group rides
- In-depth workout tracking and analysis
Cons
- Monthly subscription required
- Requires compatible devices or smart gear
- Setup can be tech-heavy for beginners
- Best experience depends on strong Wi-Fi
Bottom Line
Zwift brings indoor cardio training to life with virtual worlds, competitive workouts, and real-time data tracking. While it requires a monthly fee and smart equipment, its engaging platform is perfect for cyclists and runners who want to elevate at-home training.
If you don’t have a smart trainer, you still have the ability to use Zwift. You will need a Bluetooth-enabled speed or cadence sensor and an ANT+ dongle to connect with the virtual platform. Not as techy and cool, but it gets the job done for those on a budget.
There are also a lot of training plans to choose from if you’re looking for structured workouts. You can search by length and type of ride, or get more targeted workouts by choosing a ride/plan specified by a target heart-rate or power zone based on your Functional Threshold Percentage (FTP). My fellow statistic geeks will not be disappointed with the metrics provided on Zwift.
Unfortunately, this is not a free app and costs $14.99 a month after a seven-day free trial. Also to really use this app to its fullest potential, you’ll want a smart trainer.
Wahoo SYSTM
Wahoo SYSTM prides itself on being the complete training app for cyclists offering training plans for multiple disciplines including running, mountain biking, and CX. These training plans are much more than the average training plan. They are immersive, sports-science based workouts designed by professional athletes. What’s more is that each training plan is created to meet your specific fitness level, needs, and goals.
Wahoo SYSTM
Product Highlights
- Wahoo’s virtual training app
- Formerly known as Sufferfest
- Part of Wahoo X subscription: includes SYSTM and RGT
Pros & Cons
Pros
- Fitness test more extensive than other apps
- Cycling and multisport training plans
- Lots of cycling content
- Includes other types of workouts to complement endurance training
- Part of Wahoo X subscription get access to SYSTM and RGT
- 14-day free trial
Cons
- Running and swimming workouts cannot be exported to fitness tracker
- Long time users prefer old interface from Sufferfest
- Does not provide a lot of data analysis
Bottom Line
Wahoo SYSTM provides good indoor cycling workouts but needs improvement incorporating running, swimming, and outdoor rides.
Unique to SYSTM is their Four-Dimensional Power (4DP) test, which takes FTP tests to the next level. The 4DP analyzes neuromuscular power, maximal aerobic power, functional threshold power, and anaerobic capacity. This one-hour long test produces results that classify you into one of six types of cyclists. Based on all this information, a personalized workout plan is created to target your strengths and weaknesses.
In addition to training plans, Wahoo SYSTM offers several workout session types per week: a week with a celebrated cyclist, pro rides, on-location routes, Sufferfest, Global Cycling Network (GCN) certified trainers in studio-type classes, and documentaries. Prefer to listen to music? No problem. Simply link your favorite playlist with the platform and read the text on the screen for any given training session.
This platform really is awesome but, as with everything in life, nothing is perfect. Where SYSTM is lacking is in social connections. This is more of a solo experience for cyclists.
Indoor Cycling Training Workouts
As mentioned above, one main benefit of indoor cycling is the ability to complete a targeted workout—not always a possibility when riding outdoors. If you are looking to tuck some go-to workout sessions in your back pocket, we are going to outline a few options here for you, all of which are an hour or less.
Speed
Looking to work on speed and improving your VO2 max? Sprint intervals are a great and time efficient way to improve explosiveness. While the length of the sprint can vary, we recommend keeping the all out/max effort sprints at one minute or less.
Here is one sample for you.
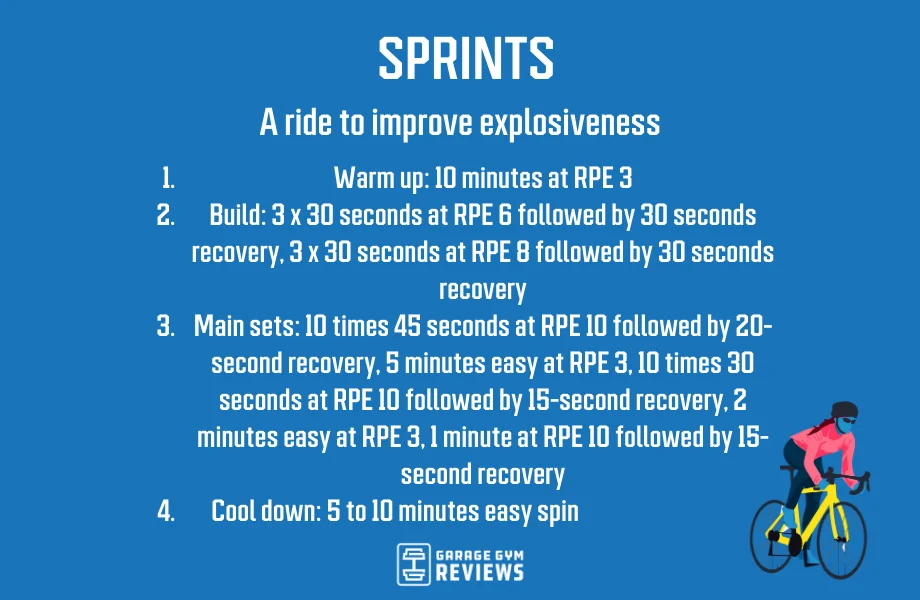
- Warm up: 10 min at RPE 3
- Build:
- 3 x 30 sec at RPE 6 followed by 30 sec recovery
- 3 x 30 sec at RPE 8 followed by 30 sec recovery
- Main sets:
- 10 x 45 sec at RPE 10 followed by 20-sec recovery
- 5 min easy at RPE 3
- 10 x 30 sec at RPE 10 followed by 15-sec recovery
- 2 min easy at RPE 3
- 1 min at RPE 10 followed by 15-sec recovery
- Cool down: 5-10 min easy spin
Strength
Although cycling falls under the “cardio” category, the best exercise bikes let you build strength, too. To make your ride a muscle-building experience, you’ll follow a classic interval workout that involves alternating positions and adjusting the resistance to give your quads, hamstrings, glutes, calves, and core a challenge throughout the entire session. Make sure to use a low resistance level during your recovery periods at an RPE of about 3 to 4.
- Warm up: 10 min at RPE 3
- Main sets:
- 5 min at RPE 7-8 with high resistance (seated), followed by 2 min recovery
- 4 min at RPE 7-8 with high resistance (standing climb), followed by 2 min recovery
- 3 min at RPE 8-9 with max resistance (seated), followed by 2 min recovery
- 2 min at RPE 8-9 with max resistance (standing climb), followed by 2 min recovery
- 1 min at RPE 9-10 with max resistance (alternate between seated and standing every 15 seconds), followed by 2 min recovery
- Cool down: 5-10 min easy spin
Endurance
This training focuses on riding for a longer period of time in a challenging but sustainable zone. Most commonly referred to as Sweet Spot training rides, these workouts are designed to keep you bordering between heart rate zone 3 and 4 which is about 85% to 95% of your FTP. This type of training is a good way to increase your endurance and lactate threshold by focusing on a difficult yet attainable effort level. Here is one sample endurance ride:
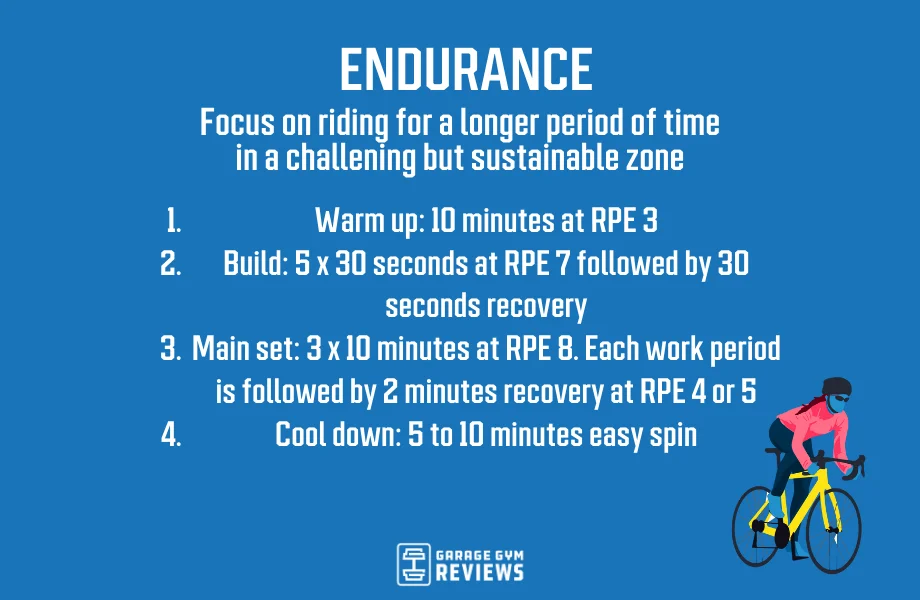
- Warm up: 10 min at RPE 3
- Build: 5 x 30 sec at RPE 7 followed by 30 sec recovery
- Main set: 3 x 10 min at RPE 8
- Each work period is followed by 2 min recovery at RPE 4 or 5
- Cool down: 5-10 min easy spin
As time permits, you can extend the work periods every week.
Tabata Cycling Workout
Enjoy the benefits of Tabata with a HIIT bike workout that’s super simple but incredibly effective. This rigidly structured training method originated in Japan and is considered one of the best ways to build anaerobic capacity.
Each four-minute round consists of eight intense work intervals of 20 seconds with 10 seconds of rest in between. Pedal at a slow pace for that 10-second reprieve before you ramp up the intensity again.
- Warm up: 10 min at RPE 3
- Main sets:
- 20 sec at RPE 9-10, followed by 10 sec recovery (Repeat 8 times)
- Rest for 2-3 minutes
- 20 sec at RPE 9-10, followed by 10 sec recovery (Repeat 8 times)
- Cool down: 5-10 minutes easy spin
RELATED: Tabata Cardio Workout
All Over the Map
This workout is designed to bust any boredom by including everything from all-out sprints to steady hill climbs.
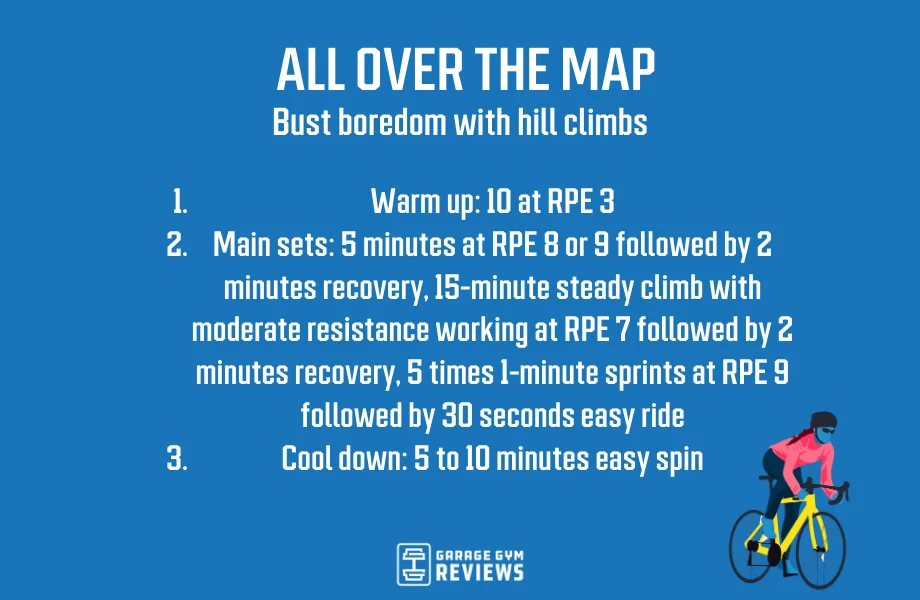
- Warm up: 10 min at RPE 3
- Main sets:
- 5 min at RPE 8 or 9 followed by 2 min recovery
- 15-min steady climb with moderate resistance working at RPE 7 followed by 2 min recovery
- 5 x 1-min sprints at RPE 9 followed by 30 sec easy ride
- Cool down: 5 to 10 min easy spin
Benefits of Indoor Cycling Training
Bringing your bike training indoors has some real advantages, which is why we hear more and more about professional athletes jumping on the indoor cycling bandwagon.
- With inside training, you can ride without interruptions, meaning it is a whole lot easier to complete a specific training session without being disrupted by a traffic light, unforeseen road closure, or other uncontrollable variable like weather.
- Inside, cyclists can control performance variables, such as effort/tempo, cadence (pedal strokes per minute), power, and heart rate in order to really focus each training session. With this, you can receive data-driven feedback on workout stats without having to account for external variables.
- Perhaps one of the biggest benefits of indoor cycling is that it’s incredibly time-efficient. You can do more work in less time as indoor workouts are generally shorter and more intense. They eliminate downhill coasts or drafting behind your riding buddy on a nice flat road, forcing you to have consistent and concentrated effort. Also, you do not have to spend time riding to your planned route which, if you live in a city, can be time-consuming.
Indoor Cycling Training: Final Thoughts
Whether you are just starting your cycling journey, simply looking to improve fitness with a low-impact activity, or you’re a triathlete training for your next Ironman, indoor cycling workouts are a fantastic way to improve cardiovascular capacity, speed, endurance, and overall health. Indoor cycling affords benefits that you simply just can not get on any outdoor ride. It eliminates external variables such as traffic, weather, noise, and poor road or weather conditions. But more importantly, you reap numerous benefits with indoor training. It’s time-efficient, convenient, and enables more focused training in less time. So what are you waiting for?
Indoor Cycling Training: FAQs
How long should I indoor bike for a good workout?
How long you should bike indoors to get a good workout is highly dependent on your fitness level and fitness goals. With indoor cycling, you can easily get an intense workout in as little as 15 to 20 minutes. Alternatively, if you are looking to build stamina for an endurance race or ride, you can ride for several hours indoors to achieve a good training workout.
Is 30 minutes of indoor cycling a day enough?
Thirty minutes of daily indoor cycling can help improve your cardiovascular health, develop muscular endurance, and burn calories. Combining cycling with a balanced diet and consistent strength training should enhance your overall health and fitness.
Is indoor cycling good for training?
Indoor cycling is a safe, convenient, and effective way to train, as it eliminates factors such as weather, terrain, and traffic that can interfere with outdoor cycling.
Can you lose weight with indoor cycling?
Yes, indoor cycling can certainly be an important part of any weight loss journey. It is a low-impact, endurance-based activity that affords users a variety of workout types and intensity that is suitable to athletes at every fitness level. But the key here is that indoor cycling and exercise in general is only one part (albeit an important part) of any weight loss plan. Consistency, healthy diet, rest, and recovery are all critical pieces of the puzzle.