
When you think of a barbell, cleaning it probably isn’t the first thing that comes to mind. Well, we should clarify: We don’t mean cleaning as in performing power cleans. Rather, we’re talking about removing rust and debris from your bar. And that’s okay, because most of us would rather lift the bar than give it a shine. Even so, we think you should know the ins and outs of how to clean a barbell, so your garage gym equipment stays in tip-top shape.
Cleaning your barbell can do things like remove the oxide (what we call rust) that forms when the metal bar reacts with water and oxygen in the air. A good cleaning can also increase the lubrication, so the sleeves continue to spin the way they should during training or weightlifting. Proper barbell care can help kick your barbell workouts up a notch.
While cleaning your Olympic barbell may not always be a pressing matter, this complete guide will detail multiple approaches you can take to remove rust and restore some of that new bar shine.
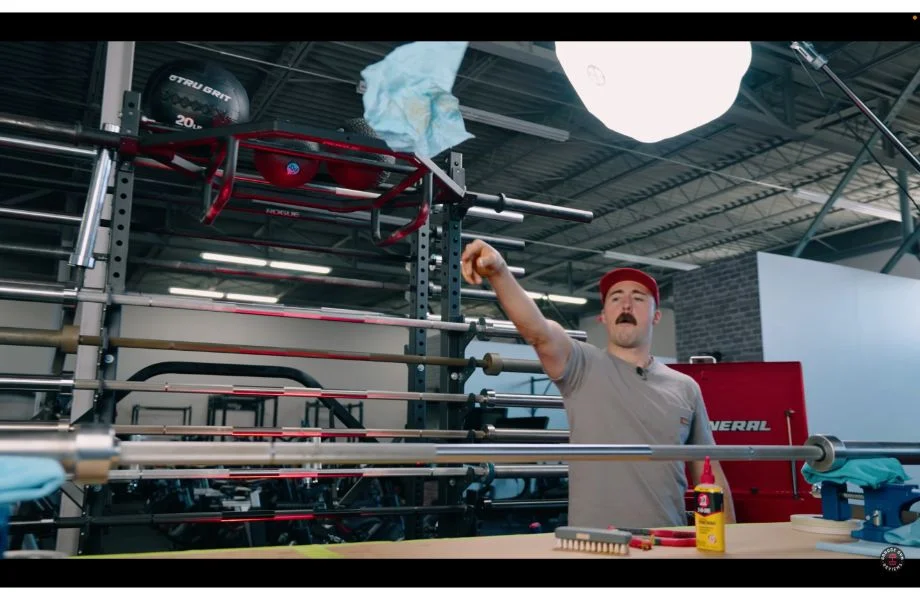
Video Tutorial
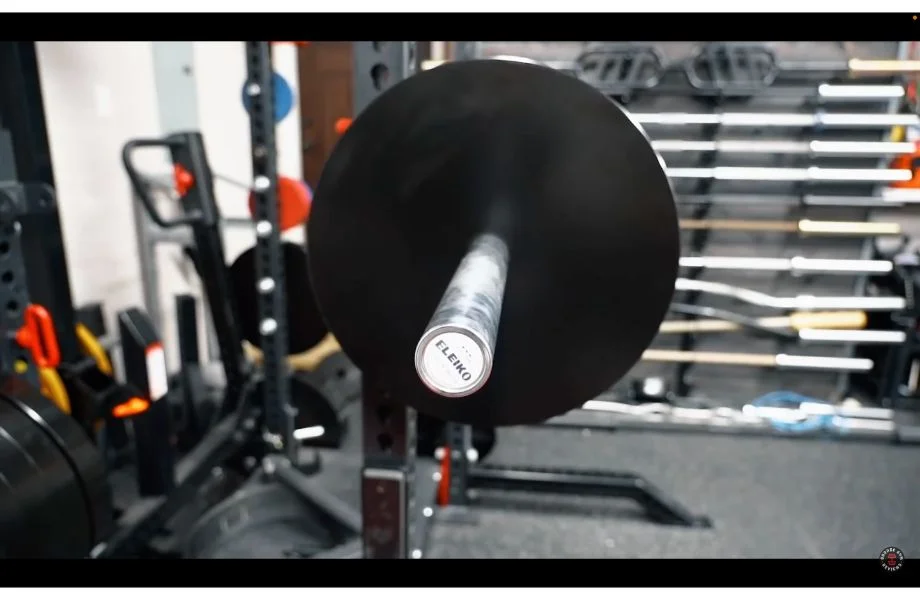
Anatomy of a Barbell
Luckily, a barbell is a relatively simple piece of equipment. There are a few main components, which I’ll explain here:
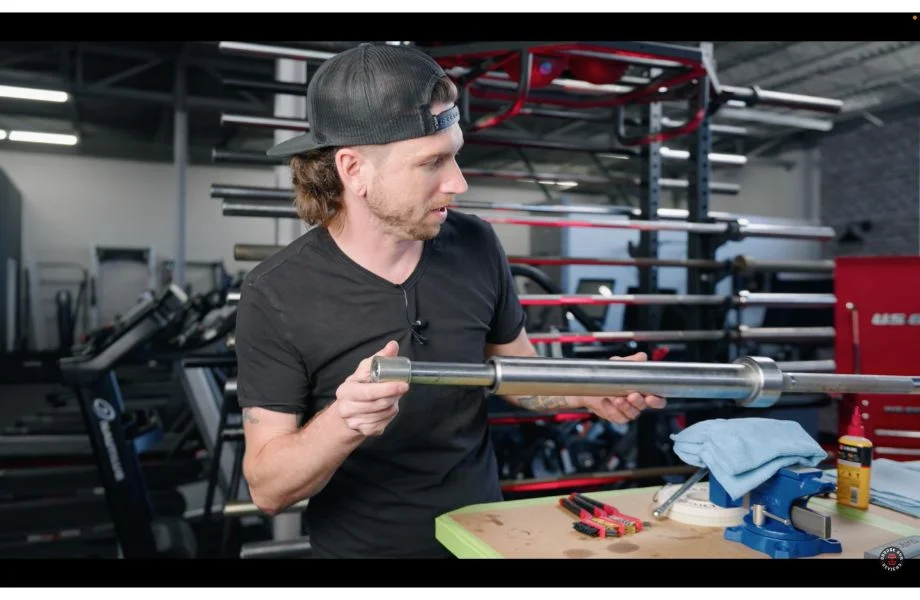
- Shaft: This is the central portion of the barbell. It features the knurling, and it’s where you’ll place your hands during exercises like deadlifts, bench presses, etc.
- Sleeves: These are the thicker sections at either end of the bar where you’ll load the weight plates and barbell collars. The sleeves can be removed, allowing you to clean the portion of the bar underneath them.
- End Caps: These circular metal pieces sit at the outside edge of the sleeves. They keep the sleeves from sliding off the bar.
- Snap Ring: This is a small metal ring located on the outside of the end caps (sometimes on both sides) meant to hold them in place.
Method 1: Disassemble, Wipe, and Brush
Any guesses as to what the main components of this method are? All jokes aside, this approach should allow you to clean some of the grime off your bar in as little as 10 to 15 minutes. Keep this one in mind if you’re on a time crunch but still feel like a cleaning is necessary.
Supplies Needed
For the first method, your barbell cleaning kit will consist of:
- 3-in-1 oil
- Pair of snap ring pliers
- Standard microfiber rag (the microfiber won’t leave any lint behind after use)
- Brass bristle brush or nylon bristle brush. The material of your brush matters: Use nylon for coatings like Cerakote or zinc, as a brass or steel brush can damage your barbell finish.
- Optional: Safety equipment, like protective gloves or goggles.
Before you begin, lay out some newspaper or cardboard over the area you’ll be cleaning your barbell; when the steps that require the oil roll around, this can help prevent excess oil from dripping onto your home gym flooring.
All these materials should be available at your local hardware store or on Amazon, and none of them should break the bank for you, making for an easy DIY cleaning process.
Step 1: Remove the Sleeves
This is where your pliers will come in handy. To remove the sleeves of your barbell, use the pliers to grasp the snap ring that protects the end cap and pull backward to remove it. This can be tricky, and it’ll likely take you a couple of tries.
Also, keep an eye out when actually pulling the snap ring out, as they can be prone to flying off unpredictably during this step in the process.
After removing the snap ring, the end cap should slide off easily. Depending on the model, there might be another snap ring on the other side of the end cap, in which case you’d repeat the same removal steps as before.
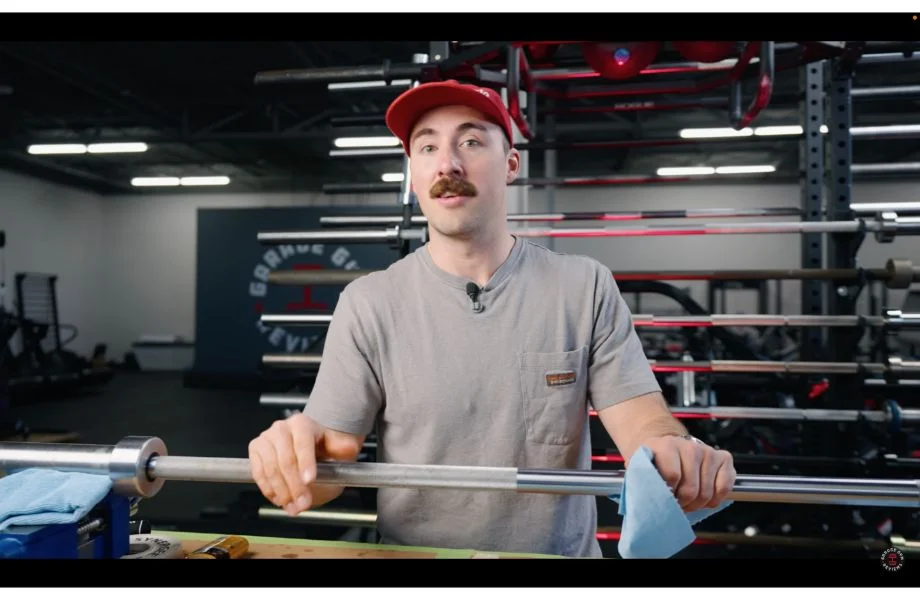
Step 2: Wipe the Bar
This one’s pretty self-explanatory. The best way to facilitate rust removal here is to take your cloth and wipe down the areas of the bar underneath the sleeves. While you’re at it, you can give the sleeve itself a good brushing and wipe-down.
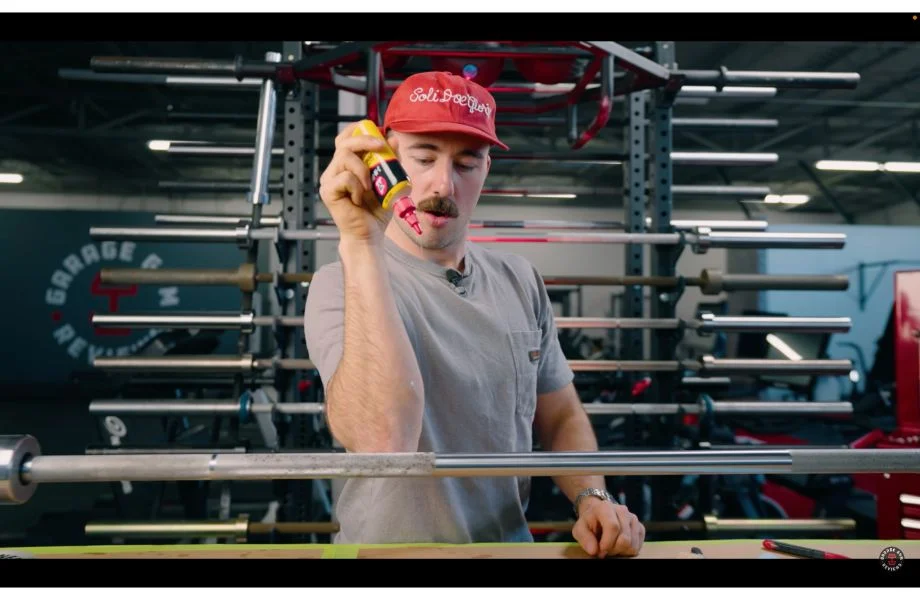
Step 3: Re-Lubricate the Sleeves
3-in-1 oil, it’s your time to shine. To make sure the sleeves continue to spin properly after cleaning, apply a liberal coating of your barbell oil to the area under each sleeve prior to reassembly. You can use the same wipe as before to spread the oil around evenly, which can prevent unwanted friction between the bar and the sleeve during exercises like powerlifting.
Step 4: Reassemble
Repeat the steps you completed above in reverse order, first sliding the sleeves back on and then replacing the end cap and snap ring(s). If you notice any grime lodged in your end cap area, you can use your brush to dig it out prior to replacing the cap.
Step 5: Oil and Brush the Shaft
Because the shaft is the area of the bar that’s been most exposed to the elements, this is likely where you’ll see the most surface rust or other debris, especially if you’re doing something dynamic like Olympic weightlifting or CrossFit where a lot of lifting chalk is often used.
You’ll probably see some gunk in the knurled section specifically, since that’s where your hands live most of the time. Apply some oil there, then use your brush to work the oil in and freshen up the knurling. The more effort you put in here, the more you’ll see dirt and debris begin to flake off.
Make sure you’re rotating the bar during cleaning to cover all the surface area, and use a variety of different motions when you’re brushing to work against the grain of the knurling and get a deeper clean. Between brushing sessions, you can use your wipe to clean off any of the material you may have dislodged.
Method 2: Vinegar Soak
If you’re looking for the deepest clean possible, this approach might be the one for you. Using a vinegar bath can go a long way toward removing most, if not all, signs of corrosion from your bar. This may be necessary if you use a stainless steel bar prone to high amounts of rusting versus one with a Cerakote finish like the Rogue Ohio Bar 2.0s.
However, keep in mind that this method is more time-consuming, requiring an overnight soak when completed properly.
Supplies Needed
For this method you’ll need:
- Nylon or brass brush
- Microfiber cloth
- 3-in-1 oil
- Spray bottle solution consisting of water and dissolved baking soda
- 1 gallon of white vinegar
Also, if you have one, grab a cardboard box big enough to hold all the parts of your barbell, as well as trash bags to line the box with. If you don’t have access to one of these, you can use paper towels and plastic wrap to apply the vinegar to the barbell.
Step 1: Brush the Surface
Before getting into the thick of it, it can help to use your brush to get any surface-level debris off the barbell, focusing on the knurling. No need for a ton of elbow grease here; this step is just meant to prepare the bar for the deeper clean.
Step 2: Bath Time
This one requires some preparation, and you can tackle it a couple different ways. If you have a box big enough to fit your entire bar, you’re in business. You can line the box with garbage bags, disassemble the barbell (using the same steps as before) and place everything inside. Fill the box with enough white vinegar to make sure each part of the bar is completely covered, and leave it dunked overnight.
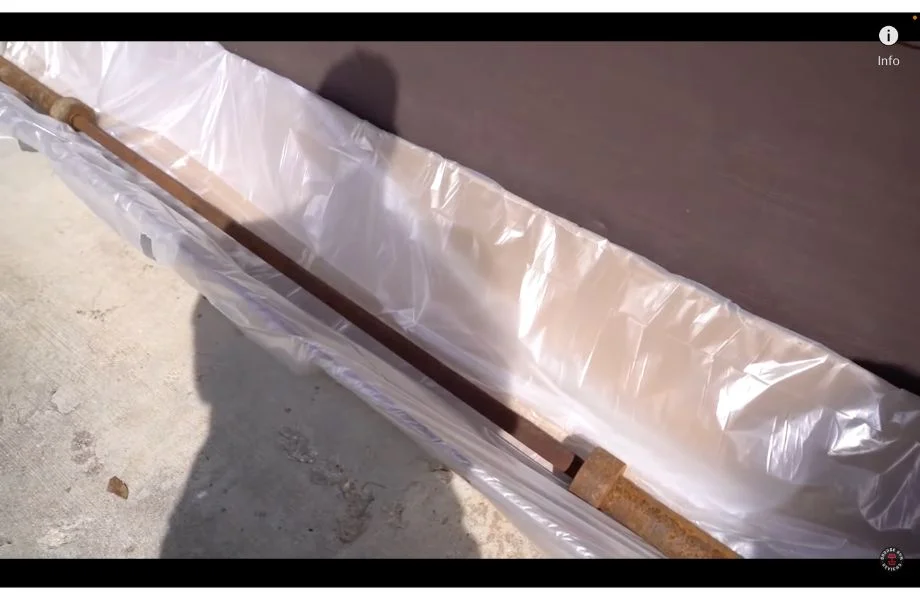
If you don’t have a box that works, paper towels provide another option. You can douse some paper towels in vinegar and cover each section of the barbell with them before wrapping each in plastic wrap. The plastic wrap is important here in helping keep flash rust (rust that can appear on the bar in mere minutes) away. Once everything is wrapped, let the vinegar work its magic overnight.
Step 3: Hose it Off
You’ll have only a short time to complete this step after either removing your bar from its vinegar soak or taking the paper towels off, so be ready for action. If you wait too long, the vinegar will evaporate and a layer of flash rust will settle on the bar.
Begin with a thorough brushing of the barbell. This should help knock off any lingering rust remaining on the bar after the soak.
Next, hose the bar down with water to remove the vinegar. This is important given how fast flash rust can build up; don’t wait too long, or your bar could end up with more rust than when you started.
Finally, apply your baking soda/water solution to the bar using a spray bottle. This should balance out the acidity of the vinegar and further keep the rust off the bar.
And voilà! If done correctly, your bar should shine like Lightning McQueen after he used that Rust-Eze stuff in Cars.
Step 4: Grease it Up
After drying the bar off, brush some more oil on to complete the cleaning. Once it passes your eye test, you should be good to go. If you want to go the extra mile to keep the surface rust-free for longer, oiling up the bar once more with a paper towel can help keep everything functioning properly moving forward.
How Often Should You Clean Your Barbell?
A barbell is a sturdy piece of equipment that doesn’t require a ton of maintenance. As such, it’s up to you how often you want to perform barbell repair and cleaning. If you’re using a lot of chalk for your workouts, it might be helpful to brush your bar a few times a month to keep debris away. If not, you shouldn’t need to deep clean it more than once a month even if you use it frequently, though it’s never a bad idea to wipe down your bar with a microfiber rag after each use.
“If you’re barbell isn’t noticeably rusty, you probably don’t need to clean it, especially if it’s a high-quality bar,” says GGR founder Cooper “Coop” Mitchell. “However, if you’re spending a lot of money on something, it’s nice to keep it clean.”
The main thing you’ll have to worry about is surface rust, as that’s the most common characteristic of a barbell that hasn’t been cleaned in a while. This is especially true of bare steel bars.
How to Prevent Barbells from Rusting
As we hinted above, the main issue you’re going to encounter is rust, especially if you live in a humid environment. If that’s you, you might find the need to clean your bar more often than someone living in a dry climate.
To maintain the integrity of your bar, avoid leaving it outside at all costs and refrain from storing it in your garage if you live in a place with especially humid conditions. Keeping it inside, preferably on some sort of horizontal wall rack, can help prevent your barbell from being damaged.
For the most part, any general purpose barbell should spin and perform all its other functions effectively, no matter how frequently or infrequently you clean it. It’s more a matter of aesthetics and personal preference. However, we always say, if you take care of your equipment, it will take care of you.
Can Rust Damage a Barbell?
While you may think rust is simply a cosmetic issue, rust can actually create issues with the longevity of your bar.
You might not notice the difference immediately, but if left untreated, rust can cause pitting and corrosion in your barbell. This can weaken the entire structure of your bar, and since many high-end barbells can last a lifetime for home gym owners, there’s no reason to let your barbell slowly degrade over time.
Will Cleaning or Disassembling Your Barbell Void Your Warranty?
Probably not. Most companies offer warranties that aren’t affected by disassembling the product in order to clean it.
However, we can’t guarantee there aren’t exceptions to that rule. For these reasons, we always recommend reading up on the details of each product’s warranty before you decide to disassemble your barbell for cleaning.
Final Verdict on How to Clean a Barbell
Cleaning your barbell—whether a budget barbell or luxury profile—isn’t necessarily a high-priority task for your home gym. It’s more of an at-will chore if your bar is looking particularly rusty or you’re just doing regular maintenance on your equipment.
If you want a quick clean, the “disassemble, wipe, and brush” method shouldn’t take you more than about 15 minutes. On the other hand, the “vinegar bath” method can provide a deeper clean and requires an overnight waiting period to complete all the steps.
Either way, the necessary supplies can all be purchased at your local hardware store or ordered online and shouldn’t be too troublesome to obtain. The cleaning methods are fairly simple, and the results speak for themselves.
How to Clean a Barbell: FAQs
What can I use to clean my barbell?
One approach involves using a nylon or brass brush, a microfiber cloth, and some 3-in-1 oil to clean and re-lubricate the bar. The other requires you to soak your bar in a vinegar bath to remove surface rust and debris.
How do you clean a barbell after use?
There are two main methods in relation to how to clean a rusty barbell. In the first method, you can disassemble the barbell, apply 3-in-1 oil, wipe it in with a microfiber cloth, and flake off debris with a brush. In the second, you soak the barbell in vinegar to remove surface rust and debris.
Should you clean a barbell?
This is mostly up to you. It depends on the level of surface rust you’re comfortable with and how important aesthetics are to you. If a significant amount of rust has accumulated, barbell maintenance can be helpful to make sure the bar functions optimally for you during training.
How do you clean a stainless steel barbell?
Sometimes, steel barbells can be prone to significant rusting over time. In these cases, soaking the barbell in vinegar can help provide a deep clean and restore the integrity of the barbell.