If you’re into heavy lifting, you probably already understand the importance of having a spotter nearby. It’s harder to push PRs and rack up plate after plate when your gym bestie doesn’t have your back.
Lifting with a spotter is the safest way to go about it, but what if you don’t have a buddy at your will? What if you’re trying to lift heavy but you’re riding solo?
That’s where bailing becomes a crucial skill. Understanding when and how to bail out of a lift allows you to push your limits even when there’s no spotter present.
Bailing will save your skin when the weight is too much, but it’s also helpful in learning proper technique for successful lifts. Intentionally bailing complex lifts like the Olympic weightlifting cleans, jerks, and snatches teaches your body in real time what to do when things go wrong, and what to adjust for better results on your next attempt.
The same applies for the humble back squat, which, according to a 2014 article in the Strength and Conditioning Journal1, is “arguably one of the most critical fundamental movements necessary to improve sport performance, to reduce injury risk, and to support lifelong physical activities.”
Squats help us improve athletic performance in sports, log better scores in CrossFit WODs, and improve our overall functional strength in everyday life.
If you want to keep getting after those goals when lifting all alone in your garage gym, you’ll need to know how to bail out of a squat to do it safely. Let’s dive in.
Related: The Most Comprehensive Guide To Squat Rack Safety Ever
A Quick Refresher on the Barbell Squat
Dedicated lifters usually complete sets of barbell squats once or twice a week, but everyone could use a refresher from time to time.
Related: Proper Squat Form: Tips From An Olympian
Start by adjusting the J-hooks to your height. When set, the barbell should start at the same height as your collarbone. Once you have the barbell in place, load it with the desired weight and get ready to squat.
If you’re going to back squat, here’s how:
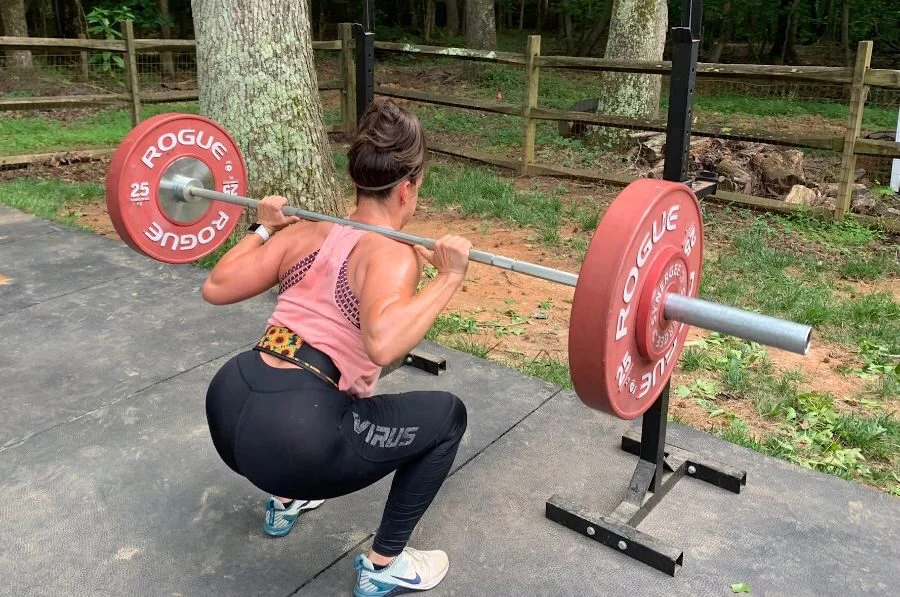
- Remove the barbell from the rack, resting it on the rear shoulder muscles of your upper back, and take two steps back. Stand with your feet shoulder-width apart, your toes pointed out slightly, your back flat, and your eyes forward.
- Push back your hips and lower your body slowly as though you are sitting down in a chair. Inhale as you descend. At the bottom of the movement, your thighs should be parallel with the floor.
- Exhale as you push from your heels to stand back up.
- Repeat as needed.
The perfect form involves holding tension from start to finish. Avoid lowering your chin, looking down at the floor, rounding your back, or shifting your weight from your heels to your toes. You want a flat back, eyes and chin up, and the weight on your heels. Be sure not to allow your knees to extend past your toes either. Ideally, they should be in line with each other.
The front squat is another popular barbell squat exercise. It is very similar to the back squat but places the barbell in front of the body to better target the quads.
Start your front squat by removing the barbell from the rack, except this time you’ll be resting it on your front shoulder muscles in front of your face instead of behind your head. You may cross your arms over your chest to secure the barbell or you may hold the barbell in each hand with your elbows pushed forward.
From this position, perform the front squat as you would perform the back squat, taking care not to lose tension, round your back, or shift your weight off your heels.
Related: The Best Barbell Exercises For Full-Body Strength
What Does It Mean to Bail a Squat?
Lifting heavy requires more than just physical strength. You have to have the mental fortitude to push past your perceived limits and really test your mettle. And, if and when you fail, you have to have the courage to pick yourself up and try again.
As they say, “If you haven’t failed, you haven’t tried.”
That said, you also should have the knowledge of how to properly bail on the lift to avoid getting hurt during heavy squats.
Bailing a squat involves letting go of the barbell mid-squat to avoid injury in the event you are unable to complete the lift and there is no spotter present. Most often, you will bail when you are stuck at the bottom of your squat or hit any sticking point from the bottom of the movement on your way back up.
Knowing how to bail out of a squat is essential for heavy weightlifting, powerlifting, and CrossFit. In fact, a 2020 study completed by Rehabilitation Process and Outcome2, which endeavored to “[evaluate] CrossFit-associated musculoskeletal injuries on a large scale,” found the “most common exercises that caused injury were squats.”
As illustrated by the study, squats are one of the riskier lifts. Knowing how to bail out of a squat gone wrong will help mitigate this risk and keep you safe while lifting heavy and pushing your limits.
Related: The Best Powerlifting Barbell For 2023
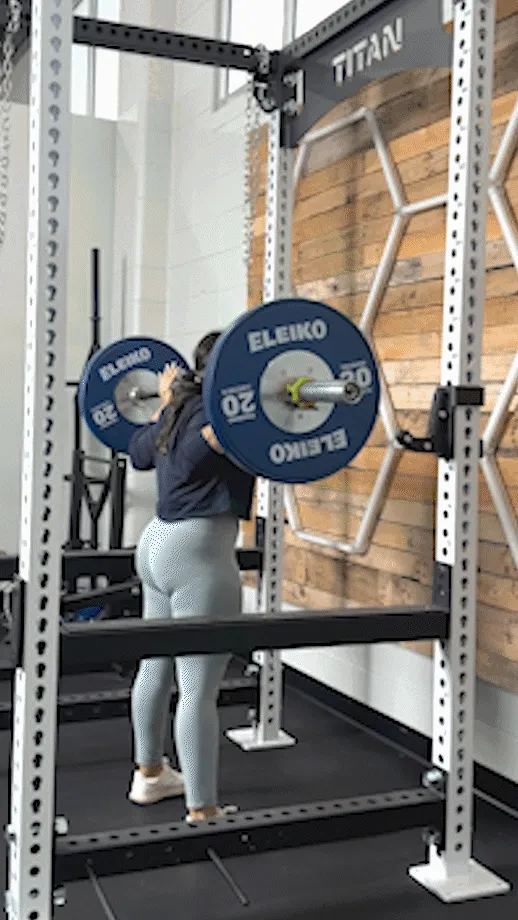
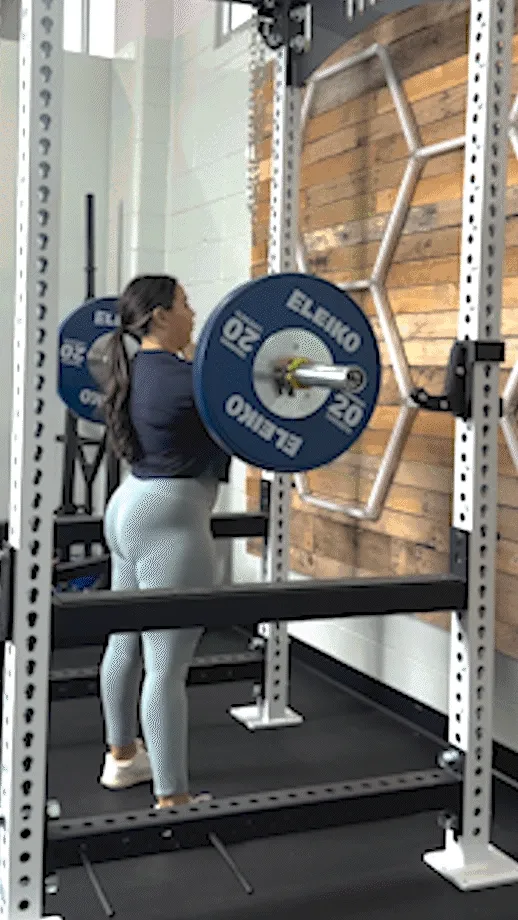
How To Bail Out of a Back Squat
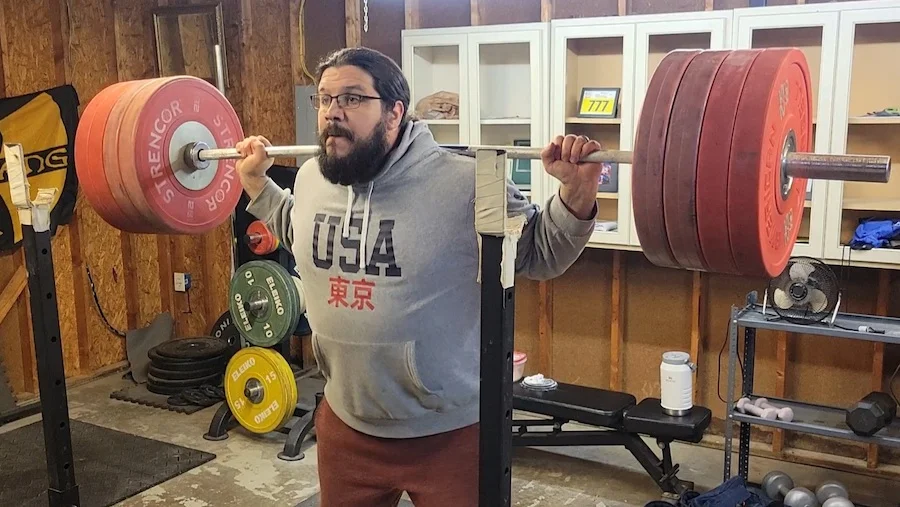
The safest way to bail out of a back squat is from inside a power rack with the safety spotter arms set just below the bottom position of your squat. With the safety bars set at this height, there’s not much distance to travel when the barbell falls, minimizing the risk for anything to go wrong.
Related: 10 Strength-Building Squat Rack Exercises
Here’s how to practice bailing out of a back squat from inside a power rack:
- Set the safety spotter arms to the appropriate height before lifting. Enter the cage of the power rack and lift as per usual.
- From the bottom of your squat, bring your chest up and forward, allowing the barbell to roll off your shoulders behind you.
Power racks are very safe, as the arms will catch the barbell after you bail the weight. Even a catastrophic failure where you wind up falling forward or backward will be mitigated by being inside the cage.
If you’re using a squat rack or squat stand without safety bars, on the other hand, you’ll need to implement some technique to properly bail. Before practicing bailing a barbell to the floor, you must know the following:
- Use bumper plates.
- Never drop an empty barbell.
Whether you’re in a commercial gym or your home gym, traditional cast iron plates will decimate your floor. Bumper plates feature a rubber coating that will protect the floor in the event they are dropped.
We also do not recommend practicing how to bail a back squat using an empty barbell. It seems like the best way to practice, since it’s lighter than using weight, but using a few light bumper plates is the much better bet. Empty barbells tend to bounce and roll, and could very well ricochet back into your feet, ankles, or calves, causing injury.
That said, here’s how to practice bailing out of a back squat for when you don’t have a power rack, safety spotter arms, or an actual spotter available:
- Set up your squat as per usual and start lifting.
- From the bottom of your squat, bring your chest up and forward, allowing the barbell to roll off your shoulder behind you. Step forward as the bar falls to the floor behind you.
Practice this skill regularly until it becomes second nature. When it comes time to bail a heavy squat, you’ll have to act quickly and won’t be able to think through each step.
How To Bail Out of a Front Squat
Bailing out of a front squat is less precarious since the bar is in front of you. Nonetheless, we recommend practicing bailing before you need to, as it’s easier to try at light weights than to rack up heavy weights and try to figure it out under dire circumstances.
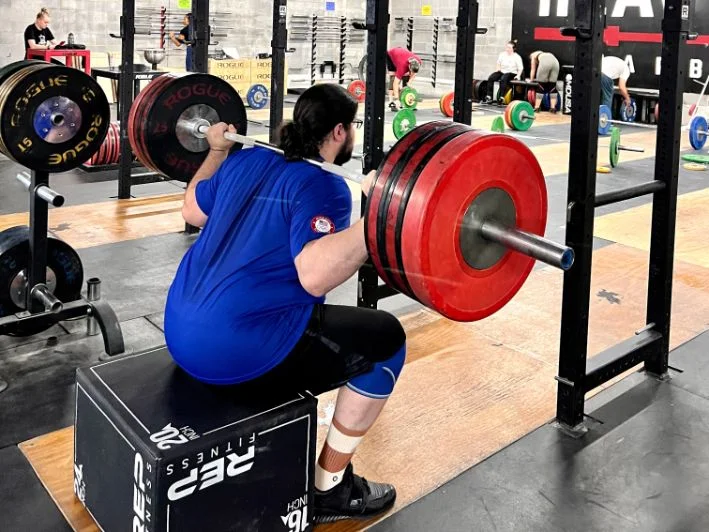
Start by setting up your squat as per usual. If using a power rack, set the safety spotter arms just below the height of the bar at the bottom of your squat. Proceed to perform your front squats until you’re ready to practice a bail.
Ready to try? Let’s go.
From the bottom of the squat or whatever sticking point you feel comfortable with, release the bar. If you prefer holding the barbell with your arms crossed, uncross your arms to release the bar. If you’re holding on with your hands, let go.
Once the bar is released, bring your elbows back in and jump backward. The jump does not have to be your best attempt at a backward long jump, by any means, but a short and low jump to get your knees, thighs, and toes away from the bar path is crucial.
How to Bail Out of a Squat: Final Thoughts
The average person might not understand the need to bail out of a lift. They might wonder, if you aren’t able to lift that heavy weight, why not keep things more manageable and just lift lighter?
Related: Beginner Barbell Workout: Learn The Basics
The hardcore gym enthusiasts might not even dignify that with a response. For many, it’s a given that you have to push your limits and lift heavy to get great results.
There is a real reason why it’s wise to push it to the limit. In a 2021 study completed by the European Journal of Applied Physiology3, researchers observed that “trunk neuromuscular activation increases in a fatiguing set of heavy squats regardless of training status.” Novice and experienced lifters alike yielded better muscular activation as they lifted relatively heavier weight, helping promote gains.
As they say, “Nothing ventured, nothing gained.” And what’s more important in the gym than the gains? Nothing!
Well, one thing—safety. It’s important to lift heavy to encourage hypertrophy (muscle growth) and build strength and muscle, but it’s pointless if you’re doing it at the risk of your health and wellbeing. Understanding how and when to bail out of a squat helps you lift heavy safely when you don’t have a spotter around.
Try practicing the technique on light weights so you have the skill committed to muscle memory for the next time you’re in a sticky situation mid-lift. Failure is just part of the process when it comes to heavy weightlifting, but knowing what to do when you lose control of the lift is crucial to keeping yourself injury-free.
Remember, folks: Safety first!
How to Bail Out of a Squat: Q&A
What to do if you get stuck in a squat?
Well, what do you do if you get stuck at a “fun party” that turns out to be not so fun? You bail!
It’s the same for when you get stuck in a squat. If you’re safe inside your power rack, bailing is easy and the barbell will be caught gently by the safety arms. If you’re lifting using a squat stand or something without safety measures, let it roll off your back and crash down on the floor.
Does the technique for bailing out of a squat differ if you’re doing a high bar squat or low bar squat?
The technique for bailing out of a high-bar squat and low-bar squat is essentially the same since the movement is nearly identical and the positioning is only slightly different.
For those not “in the know,” a high-bar squat refers to your standard back squat form where the bar is placed high on the upper back, resting across the tops of the shoulders on the trapezius muscle. The low bar squat, by contrast, rests the bar lower on the back, specifically on the posterior deltoid.
The high bar hits your quadriceps mostly, whereas the low bar version targets the posterior chain including the glutes, hamstrings, and back extensors.
Can you bail out of squats while dumbbells or kettlebells?
Bailing out of a barbell squat requires a specific technique since the weight is often very heavy and the bar has the ability to pin you to the ground. Dumbbells and kettlebells, on the other hand, do not pose this same risk.
If you find it too difficult to stand up from a heavy dumbbell squat or goblet squat using a dumbbell or kettlebell, we recommend doing your best to lower the weights gently to the ground. Dropping or throwing a dumbbell or kettlebell poses great risk to the free weight bouncing into you or others nearby and causing injury.
References
1. Myer GD, Kushner AM, Brent JL, et al. The Back Squat: A Proposed Assessment of Functional Deficits and Technical Factors That Limit Performance. Strength Cond J. 2014;36(6):4-27. doi:10.1519/SSC.0000000000000103
2. Alekseyev K, John A, Malek A, et al. Identifying the Most Common CrossFit Injuries in a Variety of Athletes. Rehabil Process Outcome. 2020;9:1179572719897069. Published 2020 Jan 22. doi:10.1177/1179572719897069
3. Clark DR, Lambert MI, Grigson C, Hunter AM. Impact of resistance training status on trunk muscle activation in a fatiguing set of heavy back squats. Eur J Appl Physiol. 2021;121(2):597-608. doi:10.1007/s00421-020-04540-0