Squat racks are often the centerpiece of a great home gym. Our team of expert personal trainers, Olympic weightlifting coaches, and CrossFit L1 trainers have been safely using squat racks in our professional lives and personal fitness for ages.
Squat rack safety starts with buying the best squat rack that can hold up to whatever your workouts can throw at them. Just like any other gym equipment, racks can be as dangerous as they are helpful if not used correctly. Whether you’re just starting strength training or starting to lift heavier, this guide to squat rack safety is for you. You can’t get better and lift heavier if you’ve hurt yourself. We don’t want you to end up the subject of viral lifting fail video. Safety first!
RELATED: The Ultimate Guide to Squat Racks
Key Safety Considerations With Your Squat Stand
Purchasing any kind of rack can be tricky because there are lots of very cheap and unsafe products available. So we’ll take you through what we look for when we evaluate equipment for our reviews. You can take all the precautions possible, but if your equipment fails you’re at risk of getting hurt.
Weight Capacity
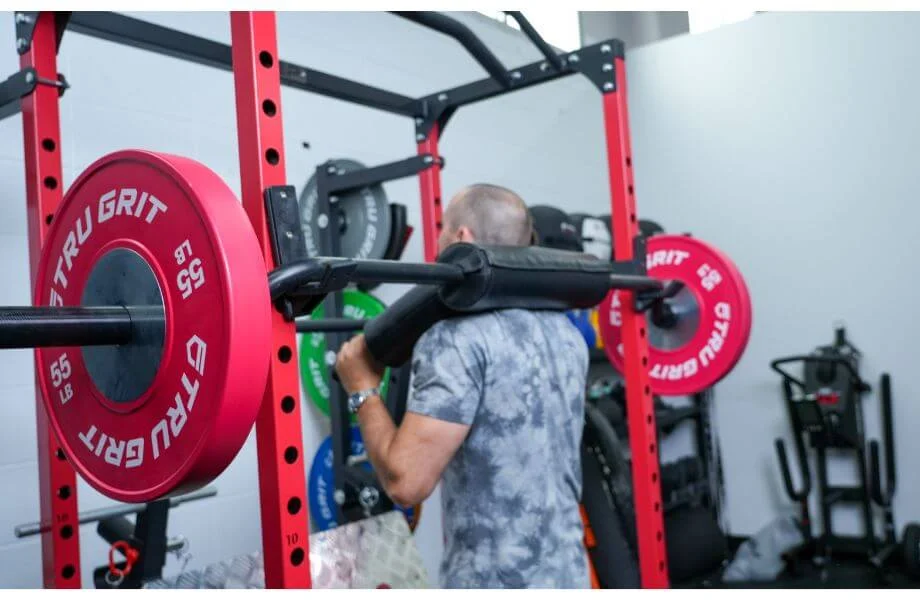
Squat stands typically have a weight capacity from 500 to 1,000 pounds. Make sure your squat stand can handle more weight than you plan on lifting. You don’t want to be testing the rack while you test your one rep max.
Choose the Right Build
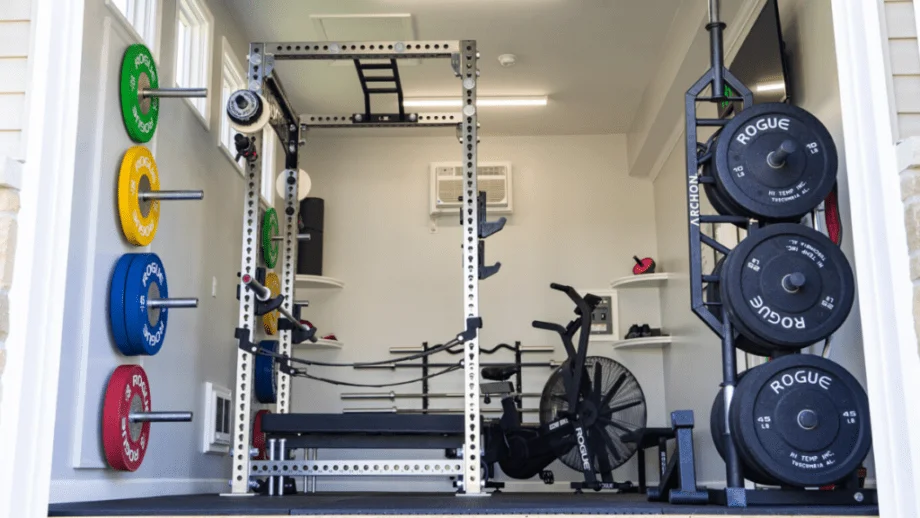
Squat racks come in many forms, and knowing which best suits your needs (and your budget) will help you use the equipment safely.
- Power Rack: Also known as power cages and squat cages, these are designed for you to squat inside the cage. We most often recommend power racks because they are the most versatile and safest option. You can purchase a wide variety of accessories to expand the number of exercises you can do such as: dip bars, land mines, and pulley systems. However, the best power racks are also the biggest and most expensive. A lot of people just don’t have room for a full power rack in their home gyms.
- Half Rack: A half rack is basically a smaller power rack. It is designed for you to lift outside the footprint of the rack. This is great for people with smaller spaces, and it is significantly cheaper than full power racks.
- Squat Stand: Squat stands may have two independent uprights, uprights that are attached by a single horizontal beam, or a squat stand with an integrated pull-up bar. Squat stands are the smallest and cheapest option for squatting. They will not have the same footprint, but they also won’t have the same stability and safety of larger power rack and half rack.
- Folding Rack: Does your garage have to function as a garage AND a gym? The fold-away rack is probably for you. This is exactly what it sounds like. This is a wall-mounted rack, and when it isn’t in use, it folds away to become almost flush with the wall it is mounted on.
- Combo Rack: A combo rack is an extremely specialized piece of equipment that is fairly expensive. It is designed for powerlifting meets and combines a squat rack and weight bench press station. These will be great if you are a powerlifter looking to simulate a meet day environment in your home gym.
If you want utmost versatility and safety, a power cage is ideal. There are countless attachments you can use with one of those, versus a squat stand, including dip stations, lat pulldown attachments, and multi-grip pull-up bars.
Construction
When we look at squat racks, we like them to have at least 11-gauge steel. Steel gauge describes the thickness of steel used in construction, lower numbers indicate thicker steel. The 11-gauge steel is heavy duty and will hold up for a lifetime. If the manufacturer doesn’t disclose the gauge, it likely is not at least 11-gauge.
Exercise Selection
In general, squat stands offer less versatility than power racks and half racks. Some squat stands are now equipped with pull-up bars. If you want the ability to complete a wide variety of exercises safely, consider how you might be using your squat rack.
For example, if you want a pull-up bar for strict chin-ups and pull-ups, then most stands with a bar will do. However, if you plan on kipping, you will need to bolt down your rack for the utmost safety.
Do Squat Racks Fall Over?
Squat racks are built to be stable, but there are still ways they can tip over. A wider and heavier squat rack will be more stable and have a smaller chance of tipping over. So a full power rack is less likely to fall over than a squat stand.
Your squat rack setup is at highest risk of falling over if it is not placed on level ground. This makes sense, because you’re more likely to fall over on uneven ground, too. They can also fall over if you exceed the suggested weights or quickly/forcefully re-rack weights on the stand. The weight capacities are for static weights, they do not take into account movement. It should be fine unless you are at the upper limit of your rack’s capacity.
The best way to prevent your squat rack from falling over is to bolt it down. You don’t necessarily have to do this, although some racks do require it (read your instructions). If you don’t want to bolt down your rack but you want to increase stability, you can also purchase accessories to use your rack as weight plate holders. The added weight from weight plates will help keep your rack in place. Some squat stands are even designed with integrated plate storage for this reason.
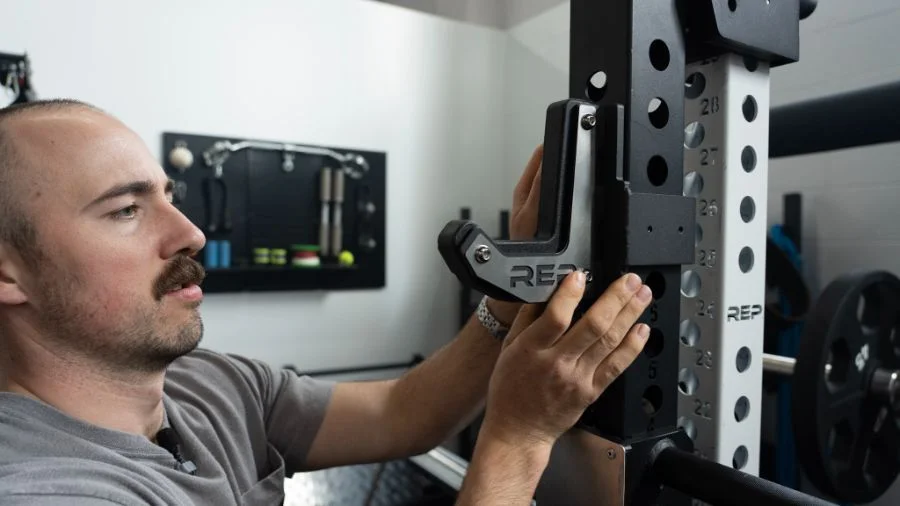
Tips for J-Cups (J-Hooks)
J-cups, also called J-hooks, are adjustable metal hooks designed to hold your barbell in place on the squat rack.
When squatting or pressing, J-cups should be set up so the bottom hook portion is just below your shoulder; unless your lifting buddy is shorter than you. The J-cups should always be set to the shortest person in the group. If that isn’t you, you just get some extra partial squats when re-racking that bar.
You want to be able to easily and comfortably rerack the bar after completing a set. Before starting your workouts, try un-racking and re-racking the bar with an empty barbell. You should be able to re-rack without going up onto your tiptoes. When in doubt, go lower. You really don’t want to be standing on your tiptoes to rerack your bar after completing a heavy set of squats.
There are different types of J-cups depending on your needs and what you’re willing to spend:
- Standard J-hooks: They are typically steel with ultra-high molecular weight (UHMW) plastic liner on the inside of the hook to protect your bar and reduce noise. These are the cheapest J-hook for racking your bar. Generally, the entire hook is not covered in the plastic, so there will be points of metal-on-metal contact between the J-cup and your barbell, which can scratch your bar.
- Sandwich J-hooks: These are a piece of UHMW plastic “sandwiched” (get it?!) between steel plates. This means that the entire interior of the J-hook is plastic, protecting your bar from scratches. Additionally, these hooks are thinner than standard hooks.
- Roller J-hooks: Roller hooks have a nylon roller on the interior of the J-cup. This roller allows you to easily move your bar left and right. This makes it much easier to center the bar before each of your lifts. This is a great feature for when you are lifting much heavier weights.
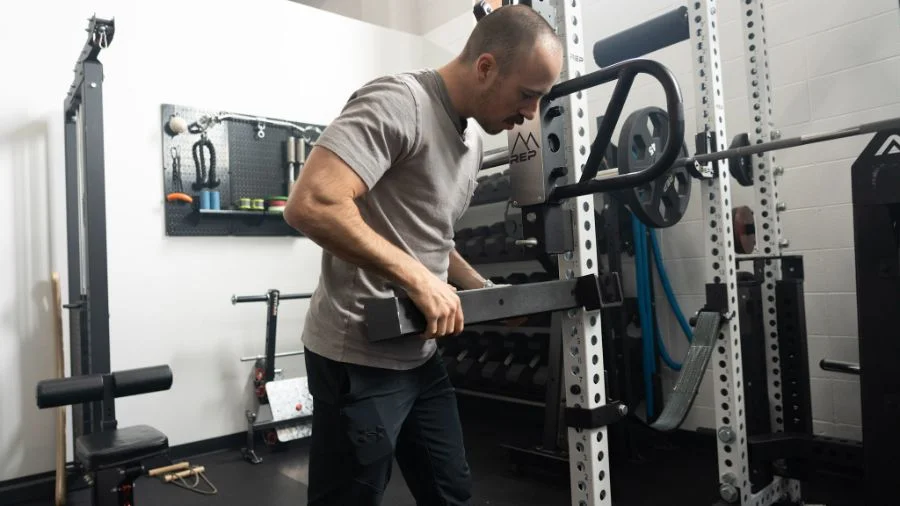
Safety Accessories for Squat Racks: Safety Spotter Arms, Safety Pins, Safety Straps
If you’re trying to start lifting or trying to lift heavier, one of the things holding you back could be fear of hurting yourself. You can significantly decrease that likelihood by using appropriate safety equipment. Spotter arms, safety pins, and safety straps are three options to make it easier to safely bail out of a failed squat.
- Spotter Arms: These attach to the front uprights of a rack and allow you to safely lift outside the rack.
- Safety Pins: Safety pins can only be used with a power rack and are sometimes included with the purchase of a power rack. They are metal cross beams that span between the front and back uprights. Safety pins are solid metal, so if you accidentally hit them while you are completing your reps it will be loud and jarring. Also, if you have to bail out a squat and the safety pins catch your bar, the metal-on-metal contact will scratch your bar.
- Safety Straps: Safety straps, like safety pins, can only be used with a power rack. They are usually nylon straps with reinforced stitching. You may be worried about fabric catching your heavy barbell, but don’t be. Lifters love safety straps, they won’t scratch your barbell like metal safety pins. Additionally, setting the bar in straps is less jarring since the nylon can absorb and spread the impact of the bar. The straps will still fully stop the bar when stretched to the limit but it is less abrupt than a metal pin.
Also worth noting, you can use some of these accessories for other exercises, like deadlifts from the rack, or rack pulls.
Setting Up Safety Accessories
The safety accessory of your choice should be set up 1 to 2 inches below the bottom of your squat. If you set them too high, they will interfere with your ability to complete full range squats. If you set them too low, they won’t be in position to help you when you need them.
Set up your safety attachment by completing a full-range squat with either an empty bar, PVC pipe or broom stick. You’ll want to pause at the bottom of your squat and note that location and stand up. Place the safety accessory 1 to 2 inches below the bottom of your squat. After you have adjusted the safety attachment, attempt the pause squat again, looking to see where the safety attachments are in relation to you and the bar.
If you are unable to complete a full squat, lower the spotter arms/safety pins/safety straps. If you complete a full squat, attempt to bail on the squat while using an empty bar. If you cannot bail comfortably with the empty bar or PVC pipe, raise the spotters up. Repeat until you have found the correct height. Once you have found the correct height remember the location so you don’t have to do this before every squat session.
As you progress and improve, you may find yourself hitting the safety attachments while completing reps. Congrats on improving your squat depth! Just lower your safety attachments to accommodate your new squat depth.
How to Set Up a Squat Rack Safely
Let’s get this out of the way first: a weighted back squat is not for beginner lifters. Squatting with a barbell is a progression, not a starting point. Make sure you are comfortable with an air squat before adding weight. You can also progress by using dumbbells if you aren’t ready for a barbell. Also, you can practice a barbell back squat by using a PVC pipe or broomstick before adding weight.
We do cover some very general squat mechanics; however, if you have specific questions about how to improve your squat and how you specifically can squat safer, consult a professional who can look at your specific form.
Setting Up the Barbell
1. Set up the J-cups:
- The J-cups should be set up so the bottom of the J-hook is just below your shoulder
- You should be able to re-rack the bar without having to stand on your tiptoes. You might be able to do this at lighter weights, but this quickly becomes dangerous with higher weights or when you are tired after many reps
2. Set up safety pins/straps/spotter arms
- Safety pins/straps/spotter arms should be set up 1-2 inches below the bottom of your squat. This is covered in more detail later in the article.
3. Place the barbell on the J-hooks
- Using the bar for a guide, double check that the J-hooks are set up at the same height
4. Load with your weights
How to Squat
Here is a quick look at how to squat properly.
Starting Position
- Stand within the power rack or safety arms facing the barbell
- Bring your body under the barbell with feet approximately shoulder width apart (the same stance as air squats).
- Rest the barbell on your upper traps and grab the barbell outside your shoulders. Your grip should be even on both sides and comfortable
- Take a deep breath and tighten upper back and core
- Stand up the weight and step backwards away from the j-hooks
Eccentric, or Lowering
- Keep eyes forward and feet on the floor lower to the bottom of your squat like you would for an air squat
- TIP: You don’t have to reach full depth, whatever your current mobility will allow without form breaking down
- TIP: Make sure your chest stays up and entire foot stays on the floor
Concentric, or Standing
- Drive through your heels to return to standing. Should be one fluid motion
- TIP: Try to avoid your knee caving in
Finish
- Walk forward to the squat rack and return the barbell to the J-hooks
How to Bail Out of a Squat Safely
Missed lifts can happen for all kinds of reasons, from poor setup, to being distracted, or simply going too heavy. Failing a lift isn’t necessarily bad if you do it safely. All your favorite lifters, including our Garage Gym Reviews experts, have failed lifts before. Failing lifts is a big part of training; like everything else, you should practice it so you can do it safely.
Pick a weight you feel comfortable with and practice failing squats so that when you actually need to bail out of a squat you can do it safely.
Option 1: Without Spotter Arms
If you’re not using safety equipment like safety pins or spotter arms, we suggest lifting with bumper plates. These plates are popular in CrossFit and Olympic weightlifting as they are designed to be dropped without causing damage to your floors.
To bail, you want the bar and your body to go in opposite directions. The bar is going to go backward, and you’ll go forward:
- Remove your hands from the barbell and lift chest and head up to send bar off your back.
- Bring your hips forward and hop forward
- Don’t drop your chest and head or look down. You don’t want the barbell to roll up onto your head/neck.
- Make sure nobody is behind you if you are attempting a heavy lift and think you might have to bail. You don’t want to send a barbell into them
Option 2: With Spotter Arms
If you are lifting in a commercial gym or have some good squat rack attachments, you likely have access to some kind of safety equipment.
To bail:
- Continue past the bottom of your squat until the barbell rests on the safety accessory. Once the barbell is resting on the safety attachments, you simply walk away from the bar.
- You may not have the range of motion to continue past the bottom of your squat. If that’s the case, remove your hands from the barbell and lift your head and chest up so that the bar falls offs your back and onto the safety accessory while you hop forward away from the bar.
Squat Rack Safety: Final Thoughts
We think that the squat rack is perhaps one of the most important pieces of home gym equipment there is. We’ll leave you with a few parting thoughts:
- Safety starts with purchasing the appropriate squat rack for your space and workout needs.
- You can’t improve if you’ve hurt yourself.
- You don’t need a power rack in order to squat or do overhead presses, but it’s really nice to have.
- Practice bailing out of squats at lighter weights.
Squat Rack Safety: Q&A
What are safety bars on a squat rack?
Safety bars are an attachment that helps you squat safely even when you do not have a spotter. They can ‘catch’ the bar if you are unable to complete your squat.
How do you adjust the safety on a squat rack?
Safety attachments should be set up 1 to 2 inches below the bottom of your squat depth. If they are too high the attachments will interfere with your reps. If they are too low you will not be able to use them when you need them.
Where do safety bars go on a squat rack?
Safety pins or straps go within the rack when using a full power rack. If you are using any other type of squat rack you will use spotter arms, which stick out in front of the rack.
What are the safety precautions you must observe in performing a squat?
– Your squat rack is appropriate for your space and workout requirements
– You are comfortable squatting without weight before you progress to using a barbell
– Make sure the J-hooks and safety bars are at the correct height
– You know how to bail out of a squat