Searching for the best home gym equipment might have you wondering, “Why is this so expensive?” For instance, cable machines are an excellent option for beginners and advanced trainees. Unfortunately, the price tag on some of these totals in the thousands of dollars.
But if you have a little time, about $25, and are interested in a DIY gym equipment hack, you could make your own cable system. Below, we describe the easy-to-follow steps for setting up the DIY pulley system that almost anyone can do on their own without breaking the bank.
RELATED: DIY Concrete Dumbbells
DIY Pulley System Video Tutorial
The Benefits of Building A DIY Cable Pulley System
According to Coop, founder of GGR and DIY specialist, this system offers numerous benefits. “It lasts a long time, is super cheap to make, and is a great place to start if you are starting a home gym,” he says.
Incredibly Easy to Do
This pulley system requires limited supplies that can be bought at your local hardware store or Home Depot, which is what Coop did. And, bonus, it’s pretty easy to assemble and won’t take up too much of your time.
An Affordable Option
Commercial power racks with lat pulldowns vary in price from just a few hundred dollars to thousands. For example, the Fitness Reality 810XLT on Amazon is about $300. Alternatively, a cable crossover machine like the REP FT-5000 Functional Trainer is priced as much as $2,500.
An adjustable DIY pulley machine option can undoubtedly save you some money. As Coop says, this whole system checks in at less than $25. In fact, Coop’s own equipment purchases at Home Depot totaled just over $22, which is a bargain compared to most of the pulley systems available on the market.
RELATED: DIY Weight Plate Tree
Quality Product
Even though the final product is a fraction of the cost of an already-built system, the quality of this DIY pulley might be even better because it uses a coated cable. Many of the commercial versions do not use any coating on their cables. This ensures that everything glides and slides smoothly and increases durability.
Incredible Versatility
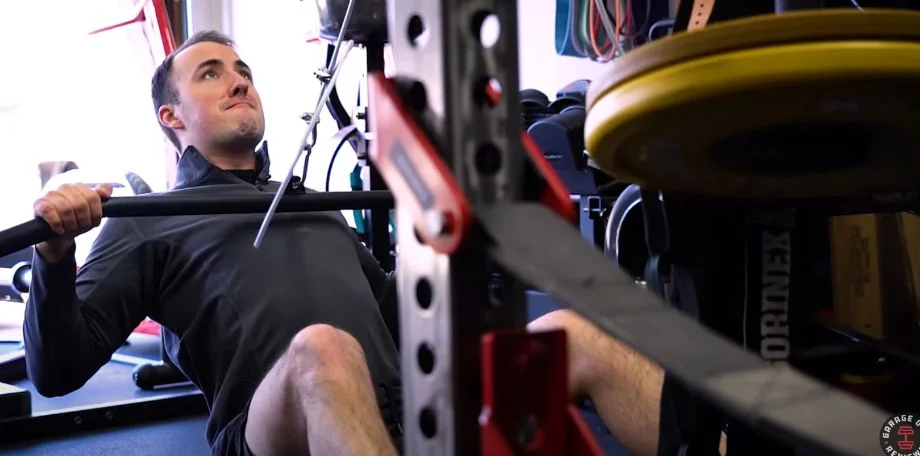
If you’re looking to build your own pulley system, you probably already know that there are many different ways to use it. We love it for strength training exercises such as:
- Lat pulldowns
- Low rows
- Tricep extensions
- Bicep curls
- Tricep pushdowns
- Leg extensions
Coop points out that this pulley system tends to be more angled than a traditional lat pulldown system. There are ways to work around this, though, by adding a second pulley. This would open up the possibility of doing low rows at an angle that maximizes benefits for all your muscle groups.
Materials List
- Cheap Swivel Pulley Block (with pulley wheels)
- More Expensive Climbing Pulley (still cheap, but slightly stronger and more durable)
- Wire Rope Clamps and Thimbles
- Vinyl Coated Cable 1/8″
- Loading Pin (optional)
- Lat Pulldown Attachments
- Super Glue
- Swivel pulley 1-½
- Carabiners (you can go cheap, but you may want to invest in higher-quality climbing carabiners)
- Cable attachments (this is optional and includes tricep ropes, straight bars, and other attachments to maximize your machine)
It’s crucial that you know what you want before you step foot in the store. If you plan on doing low rows, Coop says you’ll need two pulleys, but if you’re just doing a single lat pulldown, one should suffice.
RELATED: The Best Lat Pulldown Machines
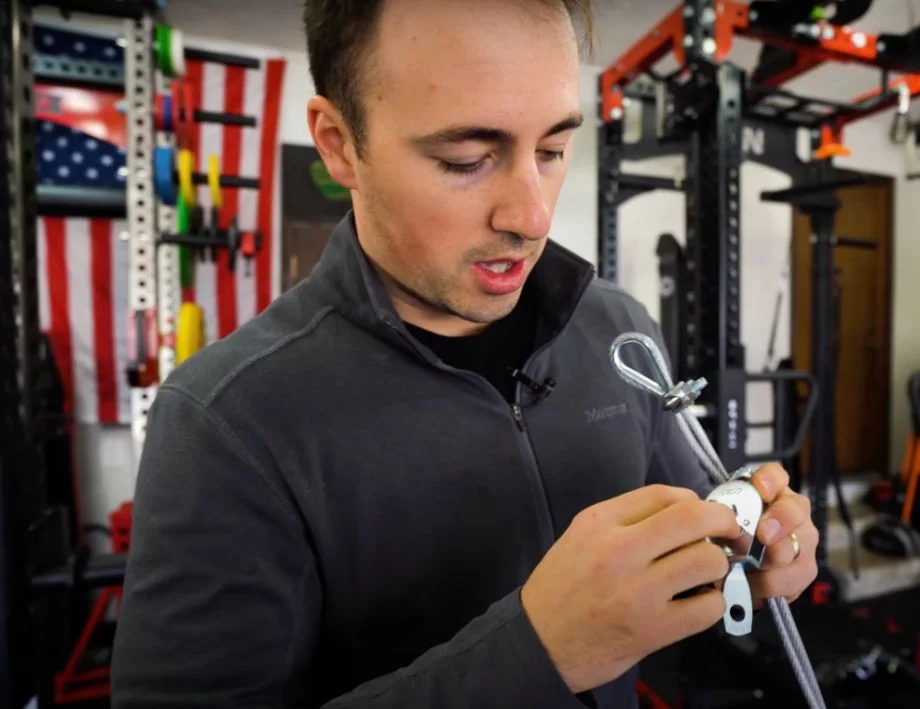
There are a variety of pulleys out there, so select them intentionally. Coop suggests that you should get one with a cotter pin so you can pull it out if you need to adjust the cord. The pulley he selected has a swivel at the top and a 420-pound working weight, which should be more than enough for most people.
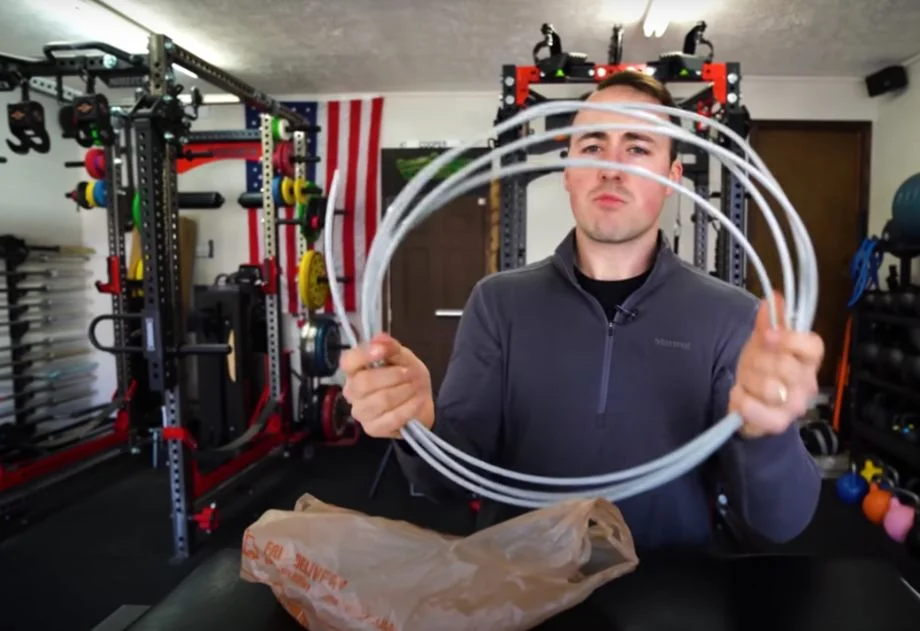
When it comes to the cable specifically, Coop says, “Please, please, please buy the one wrapped in plastic.” Even some of the best cable machines don’t have this, which is a flaw. He says to always go with a coated cable to cut your risk of fraying from wear and tear. The benefits of this coating far outweigh any small increase in cable costs.
In addition, if quality is important to you, you may want to venture to their outdoor sporting store for better-quality carabiners and clamps.
Steps to Make a DIY Pulley System
The steps outlined below take you from the hardware store to a completed system.
- Cut the cord to the desired length. Leaving extra length allows for more flexibility. The cable is super cheap, so buying extra length is not a big deal, as you can always cut it down.
- Length should be based on your personal height, the desired range of motion, and the height of the base equipment.
- Wrap the cable around the loop and attach it.
- Avoid placing the clamp directly on the cord.
- Attach clamps around the cord.
- Repeat on both sides of the cord.
- Put cord through the pulley system.
- Secure the pulley attachment to the cord. In the words of Coop’s dad, “Make sure that you are not saddling a dead horse.” Make sure that your attachments are always to the part of the cord that is active.
- Attach the pulley system to a squat rack cross member, pull-up bar, or rack. This can be done with chains, webbing, or carabiners. You have lots of choices.
- Attach carabiners to either side of the pulley cord.
- Attach the weight stack to a carabiner on one end of the pulley system.
- Add WD40 to the pulley cord for smoother pulling. This can prevent annoying squeaking noises.
- Add bands/extra weight for added resistance. This can also help stabilize the weights and prevent swinging.
Expert Final Thoughts: DIY Pulley System
The DIY pulley system is a great way to save money when starting your home gym. In a few simple steps and for under $25, you can have a system that is durable and has impressive functionality. Even if you are worried that you are not the handiest person, this project should not scare you off. It’s easy to do and can be done in a safe and secure way. As Coop points out, he didn’t have any sort of pulley system when he first started his garage gym, and this was a good way to get in the door.
FAQ: DIY Pulley System
How do you make a strong pulley system?
If you want a robust pulley system, you’ll need quality materials that can meet your unique needs. For instance, ensure the pulley block you get can handle the weight you plan on using. In addition, stay away from cheap cables. Grab the 3/16-inch coated cables; some have an 840-pound working load limit. The uncoated cables are more affordable but won’t last as long. Lastly, don’t skimp on the carabiners and clamps.
How do I stop my pulley from swinging?
You can stop and/or reduce your pulley from swinging by attaching a chain to the carabiner. This keeps most of the weight on the ground so it doesn’t sway back and forth. Add banding or extra weight may stabilize the weights and prevent swinging also.
What materials do you need to build a pulley?
You should count on needing the following:
– Swivel Pulley Block
– Climbing Pulley
– Wire Rope Clamps and Thimbles
– Vinyl Coated Cable 1/8″
– Loading Pin (optional)
– Lat Pulldown Attachments
– Super Glue
– Swivel pulley 1-½
– Carabiners