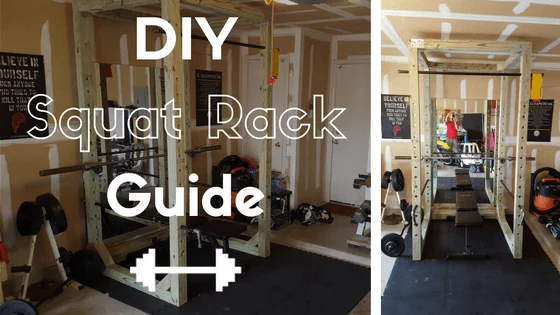
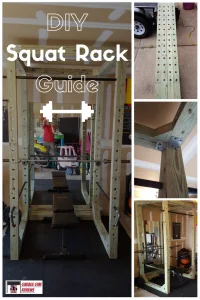
The Squat Rack is the centerpiece for just about every home gym in the world. However, some people don’t have the money or desire to buy a pre-made option. This is where the DIY Squat Rack comes in…
I love DIY projects.
I especially love when they’re well built and provide an effective piece of equipment for training.
This guide is built based off of two other guides. The parts list is based on Buff Dude’s design (they also have an AWESOME YouTube Channel.) The actual build is from Reddit User Holding_my_weiner (great name, right?) HMW said I could post the guide as long as I linked to his Imgur build, so here is that.
This is one the best looking and most functional DIY Squat Racks/Power Racks I’ve seen. Not only does it look like a beast, the various construction materials and the way it’s put together ensure it will perform like a beast for years to come.
Without further ado, I present to you the DIY Squat Rack Guide…
(P.S. If you don’t have it in you to DIY, check out my recommendations for the best squat racks you can buy.)
Materials Needed for Squat Rack
- 8 – 8 Foot 4×4 Douglas Fir or Equivalent Wood
- 8 – 3×5 Flat Steel Ties (Simpson’s Strong-Tie TP 5)
- 14 – 1/2x2x2 3/4 90 Degree Steel Ties (Simpson’s Strong-Tie A23)
- 1 Pound of 2 inch Star Bit Wood Screws
- 1/2 Pound of 3 inch Star Bit Wood Screws
- 1 – 1/8 inch Drill Bit For Pilot Holes
- 1 – 1 1/4 inch Tri Fluted Wood Boring Bit
3/4″ Pipe List Needed:
Racking Pins:
- 2 – Chair Flanges
- 2 – 1 1/2 Inch Pipes
- 2 – Pipe Connectors
- 2 – 4 1/2 Inch Pipes
- 2 – Caps
Safety bars:
- 2 – 60 Inch Pipes
- 2 – 4 Inch Pipes
- 2 – 90 Degree Elbows
- 2 – Caps
Pull Up Bar:
- 1 – 60 Inch Pipe
- 2 – Caps
Tools Needed
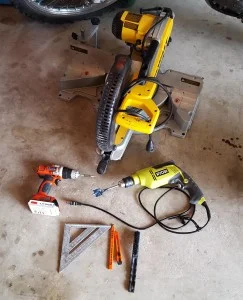
- Power Drill
- Measuring Square
- Miter Saw – Alternative: Hand Saw
- Power Drill
- Xacto Knife and Brush for cleaning up holes
Build Instructions
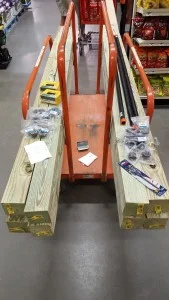
1. Collect the necessary materials.
Any big home store will have all that you need.
One suggestion is to make sure all of your boards are straight and true. Dealing with a warped board is not only difficult but also could cause your rack to fail prematurely.
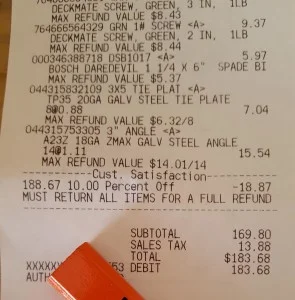
2. Project total should come out to around $200.
All told, the total came out to less than $200.00 from Home Depot. Not too shabby for a rack that should outlast you, if used properlythat is.
You can also see from the receipt some of the items purchased.
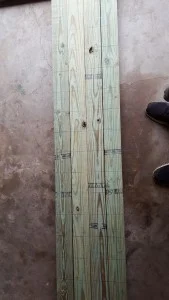
3. Mark Boards 4.5″ center to center. Use the Square to make sure everything is straight.
Although the picture looks slanted, the lines are actually marked correctly.
This is one of the most important parts of the project. Marking the holes incorrectly can lead to incorrectly drilling the holes, and thus causing the rack to be much weaker than it would have been otherwise.
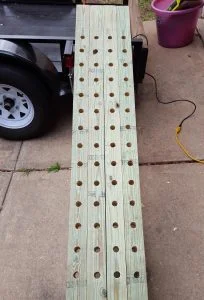
4. Drill the holes for spotter arms and j-cups.
Using the lines you’ve marked, drill the holes using either a hand drill or a drill press.
A drill press is highly recommended here as off-center, and slanted holes can hurt the structural integrity of the rack. There’s not much worse than being worried about whether your squat rack can hold the weight you’ve just racked.
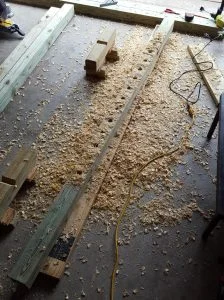
Although you can definitely accomplish the task of drilling the holes for the spotter arms and j-cups using a hand drill, your results may end up looking like this:
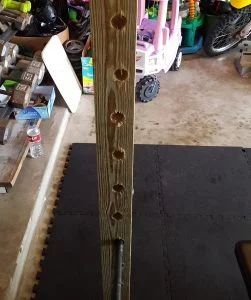
As you can see, the holes are not only off-center, but they’re also slanted. This makes it not only difficult to insert the spotter pins but also pretty close to impossible.
Also, because the holes are off-center, the rack is more susceptible to breaking. Something we want to avoid at all costs.
You can also drill holes for the pull-up bar. The location is up to you, I would just make sure it doesn’t intersect with the holes drilled for the spotter’s arms.
5. Sand and clean up holes.
Take your sander and make sure all of the holes are clean so that the spotter arms can pass through quickly.
You can also sand and stain the posts at this point if there is a particular look you want to achieve.
6. Cut cross pieces.
Using your hand saw or chop saw, cut the 4-foot cross pieces. You will need a total of six 4-foot pieces, with onebeing used optionally, as shown later on.
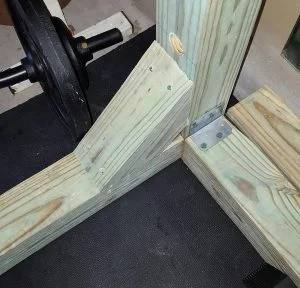
You will also need to cut the 45-degree pieces used for the bottom corners.
These will provide more structural integrity for the rack and prevent any swaying while using it for things like pullups.
The size of these don’t have to be exact. However, I would suggest making them uniform to give the rack a more professional look.
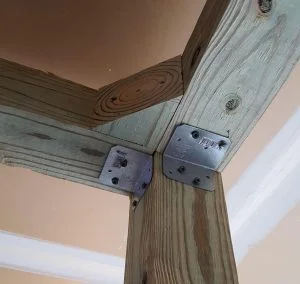
7. Assemble the rack!
Using your various screws, put the rack together.
The best way to do so is starting off on one post at a time, making sure to keep everything level along the way.
Make sure to use your steel ties in the corners as shown here:
Assembly is pretty self-explanatory.
For extra stability, you can choose to place the optional cross-member at the base of the rack like was done here:
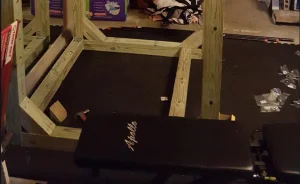
This piece isn’t necessary unless you’re squatting above 400 lbs. It also helps to keep the rack from swaying during kipping pullups.
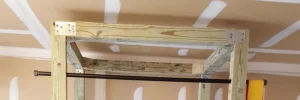
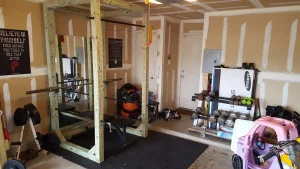
8. Admire your work!
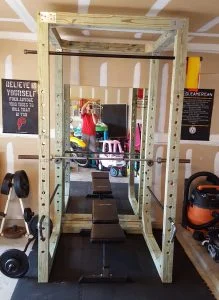
In this picture, you can see how the pull-up bar, spotter arms, and j-cups have been attached.
This bad boy is about as versatile as they come.
What if I Don’t Want to Build My Own Rack?
I would much rather buy a squat rack than build one.
I understand the love of Do-It-Yourself Projects – I have a whole section of the website dedicated to them.
But, to me, a rack that will be holding massive amounts of weight and is something i’ll be using just about everytime I’m in the gym deserves extra attention.
Here are a couple racks I would suggest:
Rogue Fitness
Rogue R-3 Power Rack
Product Highlights
- Limited lifetime
- Westside hole spacing
- Free with some orders
Pros & Cons
Pros
- Heavy-duty steel construction
- Includes pull-up bar and J-cups
- Compact design fits most home gyms
- Westside hole spacing for precision
Cons
- Not compatible with all attachments
- No plate storage included
- Bolting to floor may be required
- Limited color options
Bottom Line
The Rogue R-3 is a compact yet sturdy commercial-grade rack with Westside spacing and a strong reputation. Just keep in mind you’ll need to bolt it down for stability.
This is the power rack I use in my gym as show in “The World’s Greatest Garage Gym” walk-through as well as in the Ultimate Home Gym Guide.
You can read my full in-depth review here of the rack, but if you want the tl;dr version, this is the best rack for your money.
Rogue Fitness
Rogue SML-2 Squat Stand

Product Highlights
- Efficient and compact
- 3×3 in.11-gauge steel uprights
- Adjustable fat/skinny pull-up bar
- 5/8 in. holes in Westside spacing pattern
- Affordable hybrid Rogue model
Pros & Cons
Pros
- 3" x 3" 11-gauge steel
- Laser-cut holes and logos
- Comes in a wide variety of colors
- Accepts Rogue Monster Lite accessories
- Fat/skinny pull-up bar comes standard
- Lifetime warranty
- Made in the USA
- No requirement to bolt down the rack
Cons
- Rack can rock with kipping pull-ups if not weighted down
- Doesn't come with spotter arms standard
- Squat stand style isn't as versatile as a power rack
Bottom Line
The Rogue SML-2 is the first rack Coop had in his garage gym, and he still has it to this day. Despite being used for nearly a decade, the rack still looks great with only a few chips and surface rust spots. Although we prefer a power rack, if you don't have space or don't feel like spending the extra to buy one, the SML-2 is the squat stand we recommend most often. It's stable, has a lot available accessories, and is priced well for the quality.
This is actually the first rack I ever had. This is more than enough for just about everybody.
It can hold a tremendous amount of weight and also gives you the ability to do pull-ups.
You can find my full review of it here: Rogue SML-2 Squat Stand Review
Final Thoughts
The DIY Squat Rack is a fun build.
There are a few problems inherent in the build, however.
First, I would make sure you use the heaviest-duty materials possible. This rack could potentially save your life someday.
I’d also suggest buying a commercial rack if you’re going to be squatting or pressing over 400 lbs. Wood, although strong, is not as strong as steel. You can also get a mighty fine steel rack for not a whole lot more than a wood rack.