Frequently, when we think about our home gyms, we tend to focus on the high-quality, big-ticket pieces of equipment. But, often, it is smaller items that make the difference between a great home gym and one that falls short. One of these often-overlooked items is j-hook liner. You could have the best Olympic barbell in the world, but all it takes is a poorly lined j-cup to ruin that bar’s finish and knurling.
Coop Mitchell, founder of GGR and expert in DIY gym equipment, has given us an easy tutorial for DIY j-hook liners. We’ll highlight how this simple and inexpensive add-on to your j-cups can protect equipment in your garage gym.
As Coop says, “I think this solution is genius.”
DIY J-Hook Video
The Need for Good J-Cups
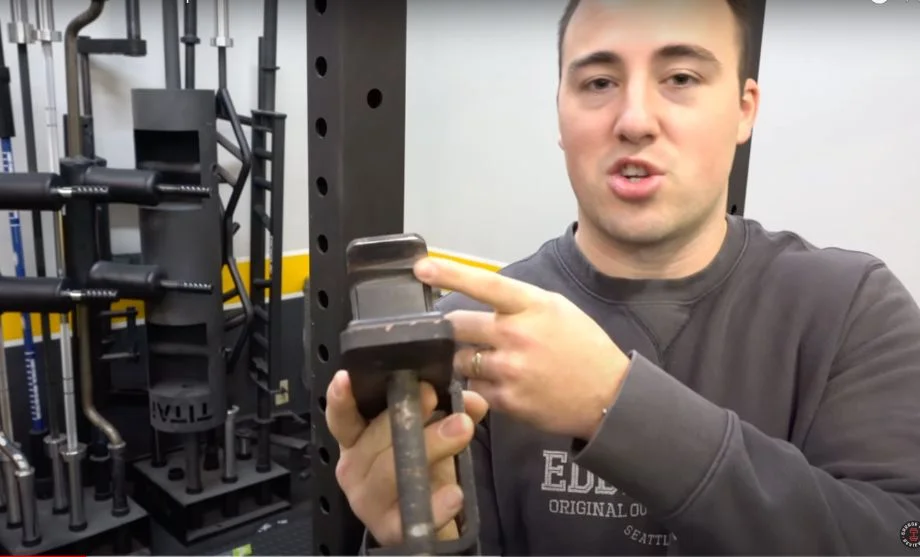
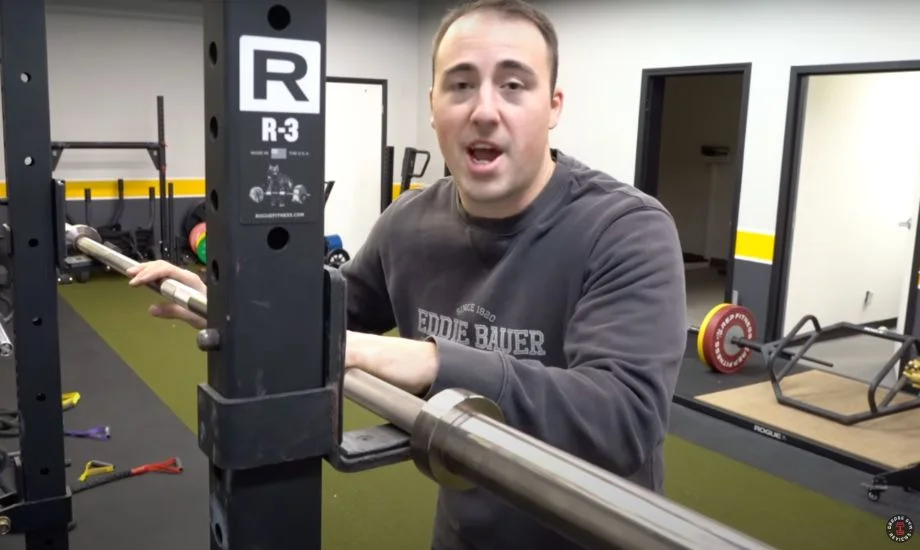
When setting up for exercises like bench press or rack deadlifts, you place a barbell in a squat rack’s uprights using j-cups. The knurling of the bar rests directly on the metal, and may even be pulled into the lip of the j-cup, causing potential friction and grinding, and ultimately, inflicting unnecessary damage to your bar.
As Coop says, “Manufacturers do not want any metal-to-metal contact on knurling.” This is a well-known truth, and it’s not just regarding weightlifting equipment either.
Coop says, “There is no reason why companies should make j-cups the way that they have,” meaning lined with metal alone. Some of the best squat racks do offer UHMW lining on the inside of j-cups, but not over the lip.
Benefits of DIY J-Hook Liners
Why should you tackle this project?
Protect Your Home Gym Equipment
Standard j-cups are typically made with thick steel and a UHMW plastic liner on the inside of the hook. This helps reduce noise and protect your bar, but only to an extent. Unfortunately, the front lip of the cup isn’t protected.
As Coop says, “I have told companies before that the part of the j-cup that gets worn down is the hook.” The great news is that these simple 3D-printed liners can stop this from happening.
A Budget-Friendly Fix
Lots of people are intimidated when they hear the term DIY. The immediate assumption is that these do-it-yourself projects are costly and time-consuming, but we can attest that making your own DIY squat racks and DIY power racks really isn’t that bad. What’s even easier is creating these j-hook liners. They don’t require much equipment and can be done in less than five steps.
Making your own 3D-printed liners more affordable than spending $40 or more each on Amazon for all-new standard j-cups. The sandwich and roller J-cups are an option, too, but they’re not cheap. Imagine getting all the way to website checkout and realizing that the Rogue Monster sandwich J-cups are $139. Yikes! When you’ve got other fitness equipment to buy, these just aren’t a budget-conscious choice.
Quick, But Temporary
As Coop notes, these plastic liners will not last forever, especially if made from thinner 3D-printed plastic. Eventually, the plastic will get worn down at points of contact, and people will need to replace them.
Materials List
- UHMW plastic or 3D printed plastic cover. (UHMW may be more durable than 3D-printed plastic. However, it is challenging to punch this out using 3D printers.)
- Bolts
- Allen key
- 3D printer
Note: The exact 3D print settings you’d need may differ (here is a summary of settings you may be able to use). However, the Rogue Monster J-Cup cover required a Lulzbot TAZ6 printer, no rafts, and 20% infill. You could use 50% infill if you want a thicker cover. Print version 1 required small grid supports set at 50 degrees and print version 2 required no support.
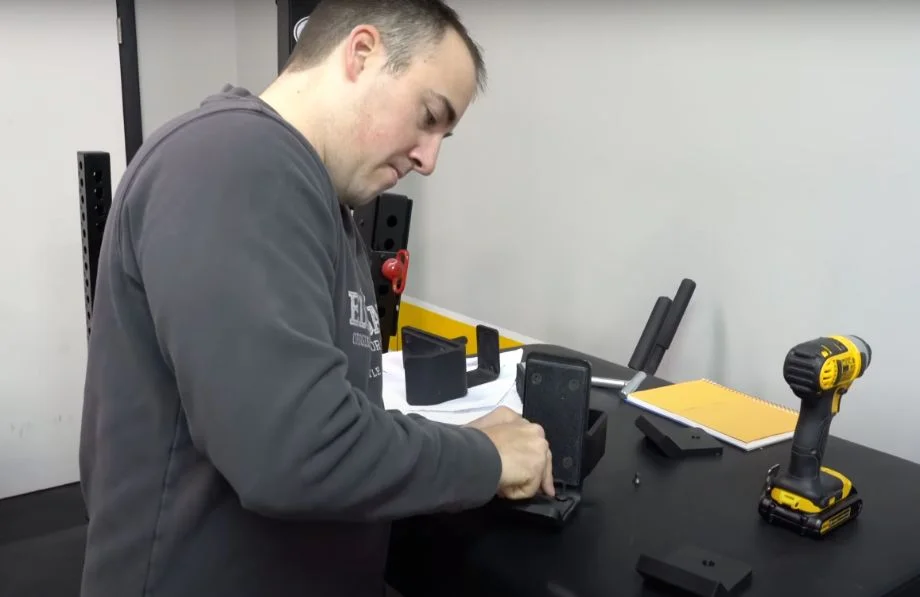
Step-by-step Instructions for DIY J Hook Liners
- Print the liner using the appropriate settings.
- Unscrew bolts with the Allen key to remove the plastic part from the preexisting j-cup.
- Replace the plastic piece with UHMW.
- Optional: If necessary, punch a hole in the plastic cover to align with the j-cup holes to screw in place.
This last step is not required for all j-cups. It will depend on how many holes the j-cup has compared with the printed plastic liner. It may also be possible to simply lay the liner on top of the j-cup without needing to screw anything in, although that may not be as durable or stable.
RELATED: DIY Pulley System
Expert Final Thoughts: DIY J-Hook Liners
So, are you ready to create your own DIY j-hook liners? These convenient plastic liners stop metal-on-metal rubbing with minimal cost and time effort. Putting these in place will let you focus more on bodybuilding and less on if your heavy-duty barbell knurling is being destroyed from.
We’re all for making tiny tweaks that let us save money and prolong the use of our home gym materials.
FAQs: DIY J-Hook Liners
How much weight can J-Hooks hold?
Many j-hooks can hold about 1,000 pounds of weight. However, it does vary. Some are slightly less than that, while some claim they can hold 1,500 pounds. Therefore double-check the product description to ensure it can meet your needs for powerlifting or CrossFit exercises.
Are all J-hooks the same size?
No, the size of j-hooks depends on the thickness of the frame on which it’ll be used. Most frames are 2-inch-by-2-inch, 2-inch-by-3-inch, or 3-inch-by-3-inch. You also have to be mindful of the hole size, which is where the j-hook pin fits into the rack. Check out our full power rack attachment guide for more information.
What are J-hooks for on a power cage?
J-cups are squat rack attachments that fit into the uprights on a power cage, squat rack, or squat stand. They hold a barbell in place, making it much easier to do exercises like