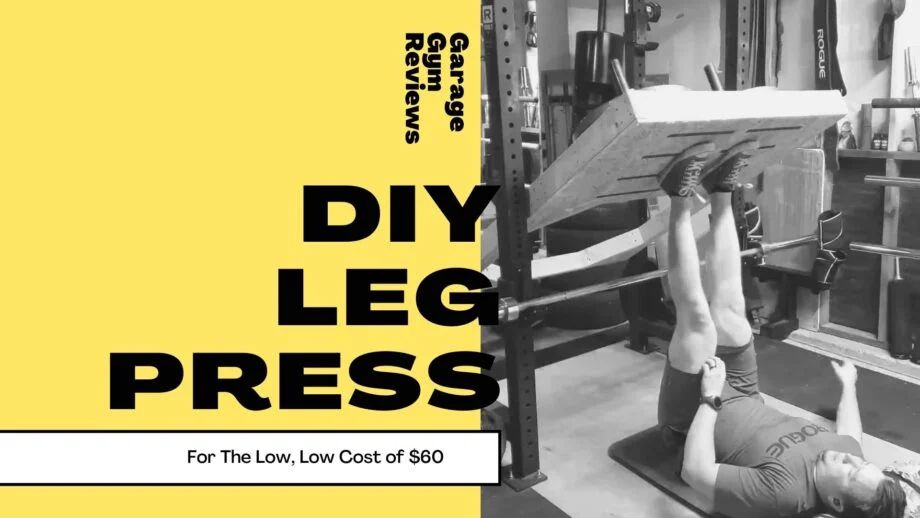
One type of equipment that’s often lacking in home gyms are machines. Following our guide, you can build a rack-attachable DIY Leg Press capable of holding 600+ LBs for less than $60 and an hour of your time. Setup is easy, but the gains are hard. Get to work.
I love do-it-yourself home gym projects. This is how the garage gym movement started and it’s cool to see all of the people that continue to innovate by creating a budget home gym with equipment made by their own hands. This DIY Leg Press attaches to a power rack so it’s easy to setup and doesn’t a lot of money to build. Whether you want to use this leg press for single leg movements or dual or even use it for overhead press or curls thanks to it’s leverage design, we think you’ll like the addition to your gym.
Why You Should Build A DIY Leg Press For Your Home Gym
If there is one piece of equipment that seems elusive to the home gym owner, it’s definitely the leg press. In commercial gyms, the leg press is probably only second in use to the power rack by trainees working their legs. People love it.
I’m not here to argue the effectiveness of the leg press versus the back squat, but I will speak personally–I miss being able to do leg presses in my garage gym. It’s not something I think about a ton, but there are times after squatting that I’d love to do a finisher on a hack squat machine or leg press.
The reason they’re practically non-existent in home gyms is because of the space they take up.
There are also the factors such as the high cost and lack of versatility. However, the biggest reason for them not finding their way into more people gyms is the footprint issue. A belt squat like the Rogue Monster Rhino Belt Squat we’ve reviewed is great, but it doesn’t feel like a perfect replacement (check out our DIY Belt Squat Guide here.)
Therefore, a DIY Leg Press that is rack attachable, priced affordably, and can be made quickly is a tremendous idea for many home gym owners.
If you’ve missed the leg press or simply want to add some variety to your lower body training days, this DIY Leg Press Guide is for you.
Read more about budget-friendly equipment in our guide about the best budget home gym equipment.
Build Materials
Although a typical leg press takes up a ton of space, the leg press we’re building is attachable to a squat rack and easily removable. This means the number of materials needed are low as the base support isn’t needed to be built.
Here are the materials we used to build our DIY Leg Press. Depending on the size of your squat rack, you may need more or less material. Our design is based around the Rogue RML-3 Power Rack, which has a depth of 30” and a width of 49”.
- Wood Screws
- Wood Glue
- 1.5″ diameter, 24″ long metal pipe with threading on both ends, cut it in half.
- 5/8″ diameter, 28″ long zinc rod. You could use band pegs in place of this, however.
- (2) 1.5″ metal flanges for pipes
- (8) Lag bolts, (8) Washers
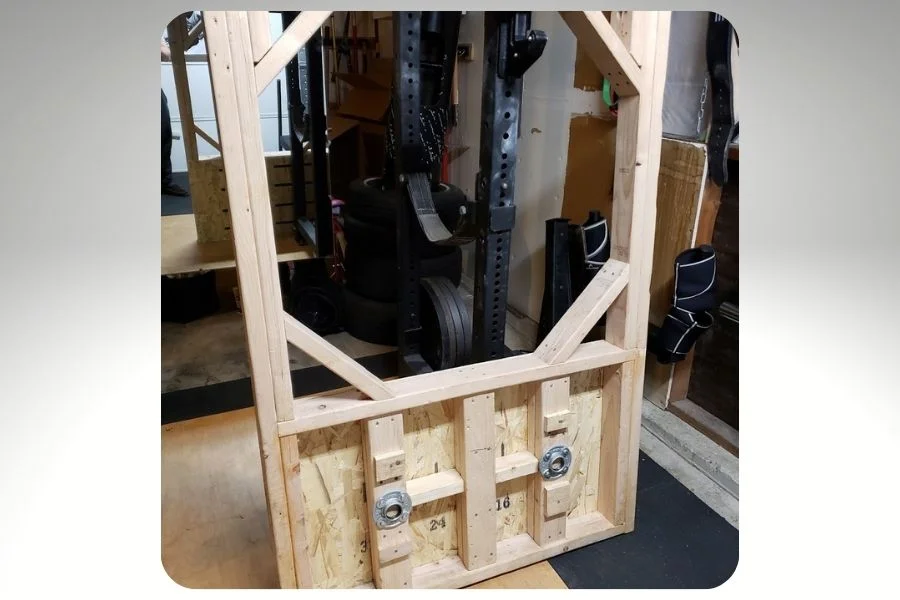
Overall Leg Press Measurements
As previously mentioned, these measurements are designed around a 30” deep, 49” width power rack from Rogue Fitness. You can adjust accordingly, however, these rack dimensions are very popular and should fit many racks.
I would suggest that the deeper your rack is, the more support you should provide the
- Frame length: 61.5″
- Frame Width: 41.75″
- Foot Platform: 41.75″ x 24″
Leg Press Setup Instructions
Setting up the leg press in your rack is simple and quick. We’ve found when gym equipment takes a ton of setup time, it simply doesn’t get used. This is the issue with many rack attachments and why we’re not always quick to recommend them.
As you’ll see, taking our DIY Leg Press from storage (which can easily be done on the wall) to in the rack and ready to thrash your legs can be done in as little as 90 seconds.
Step 1: Rack your Olympic Barbell and J-Cups to the appropriate height. You’ll have to play around with this to find what’s adequate. Different heights may require a different height on the bar, but this is one reason this design is so nice because it can complement any body size.
For extra security, we suggest wrapping bands or wraps around the bar and j-cups to make sure it doesn’t move. This isn’t a requirement, but may be helpful if you’re worried about the bar moving.
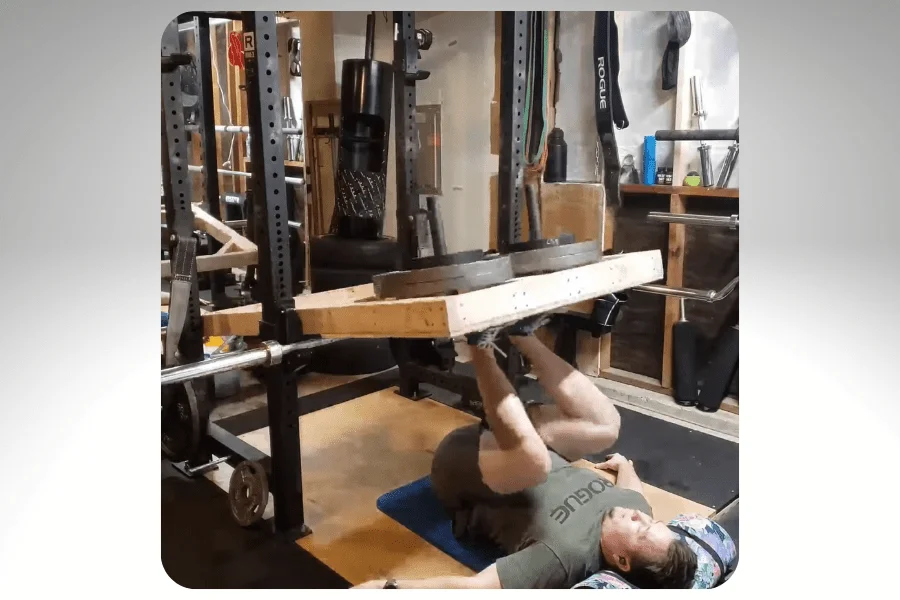
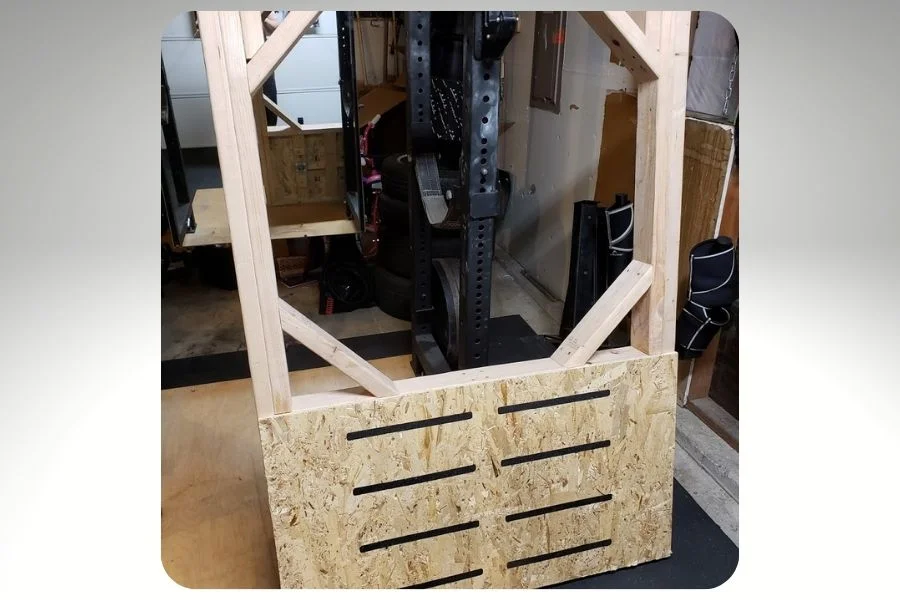
Step 2: Stand the leg press up vertically so that the footplate is on the floor, and the loading pins are facing the outside of the rack.
This is the easiest way we’ve found to place the leg press attachment in the rack with one person. If you have a training partner, this part could go even quicker.
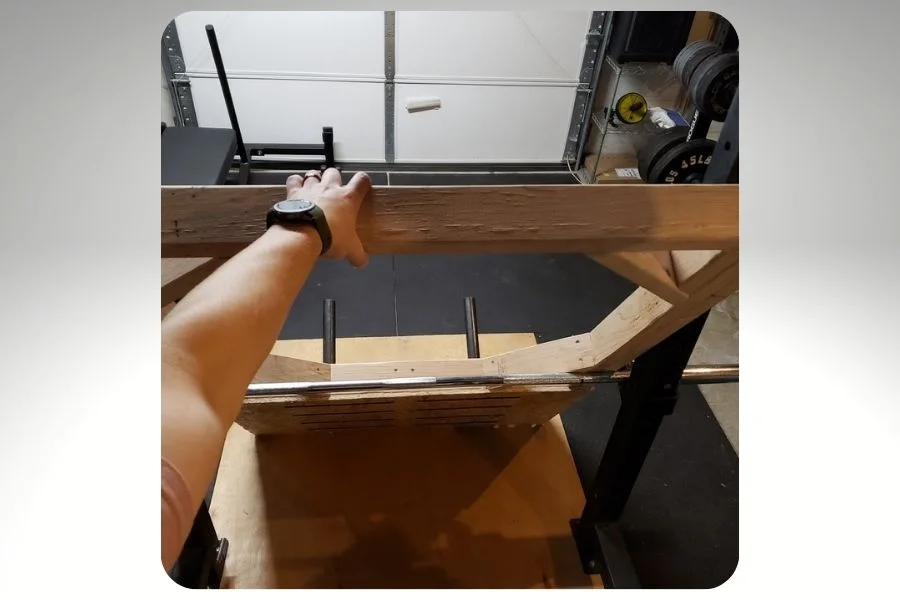
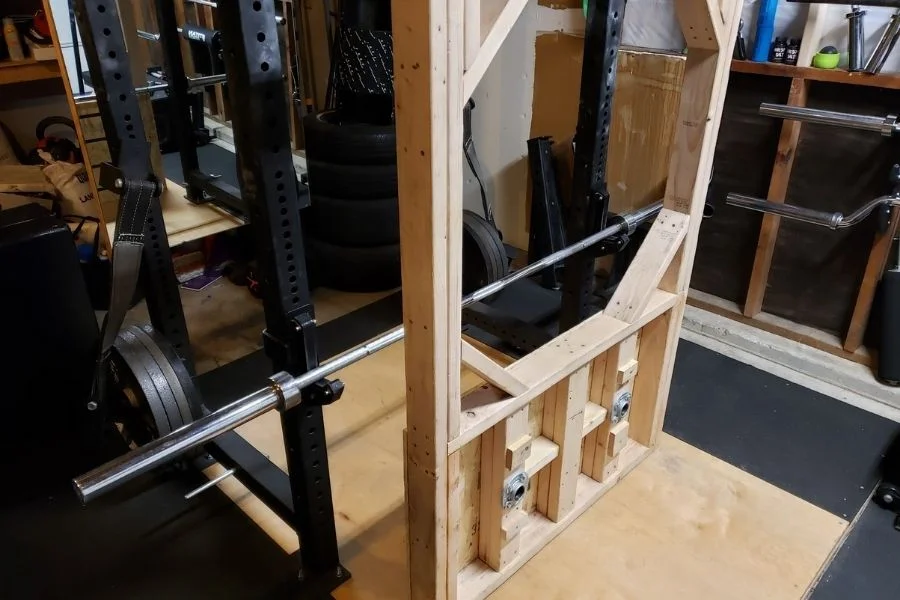
Step 3: Grab the top of the frame where the rods will connect through the side of the squat rack uprights and into the back portion of the leg press. Pull the attachment over the bar to the other side of the rack.
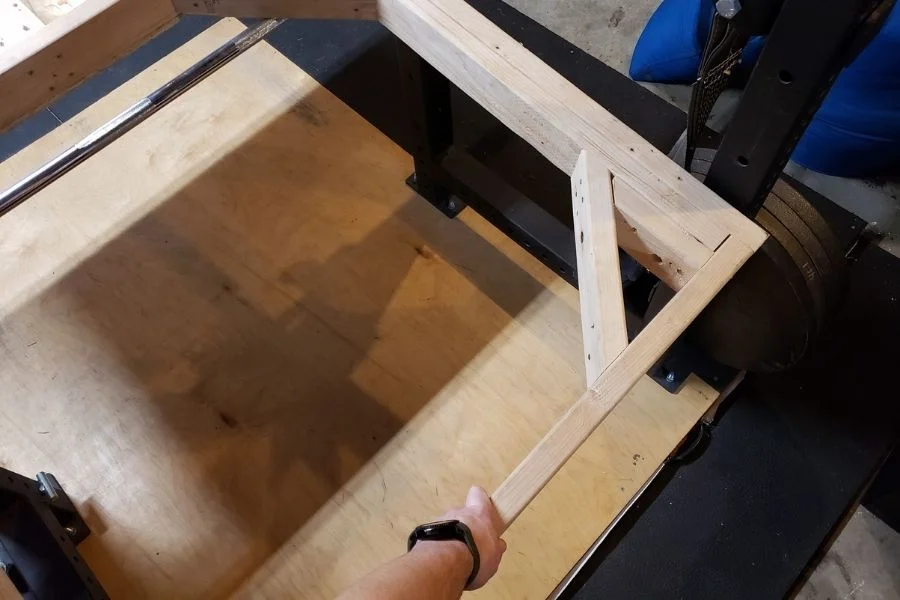
Step 4: Align the holes for the rods to the desired hole on the frame of the rack.
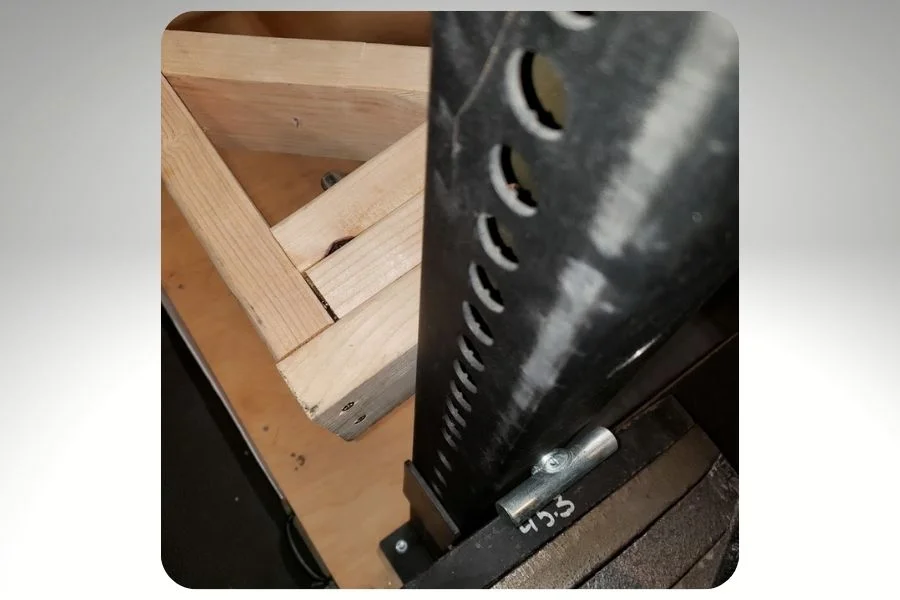
Step 5: Insert the rod or band pegs from the rack side hole first into the frame hole and then repeat on the other side.
Pro-Tip: You can use band pegs as well if you don’t want to buy an extra 5/8 in rod just for this purpose, we’ve tested it and they fit no problem.
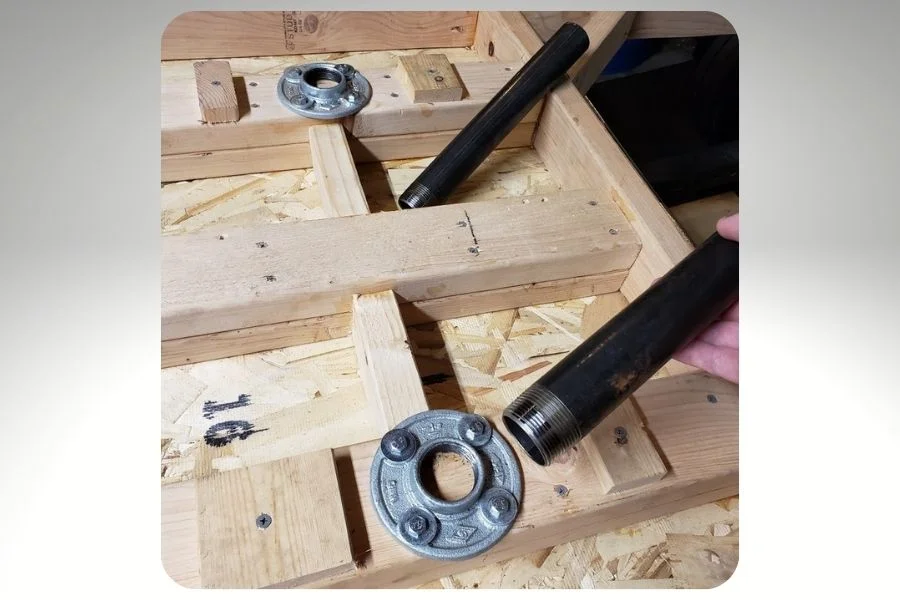
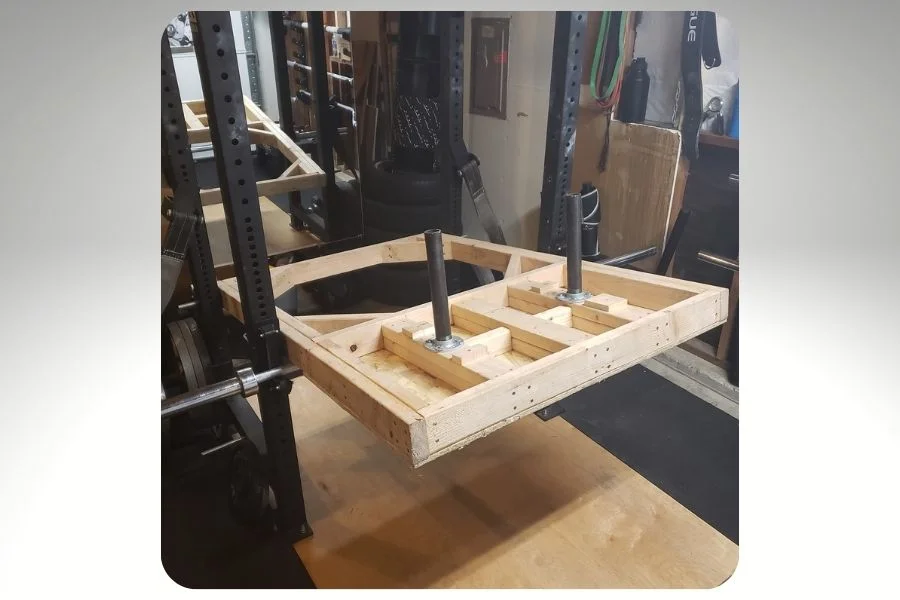
Step 6: Attach the threaded pipe for the weight plates to sit on the footplate. You can leave these on if you desire, but we typically remove them so that the leg press can sit flush up against the wall.
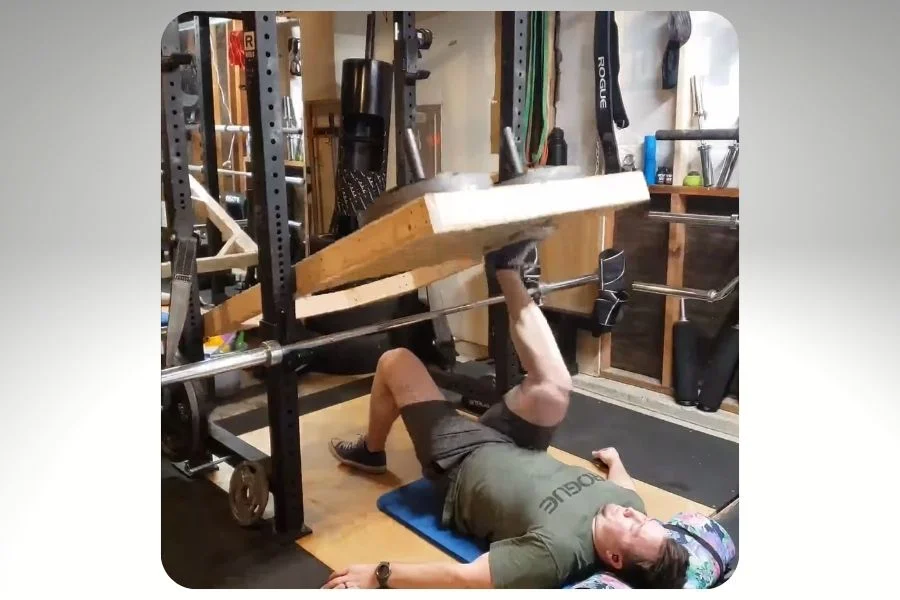
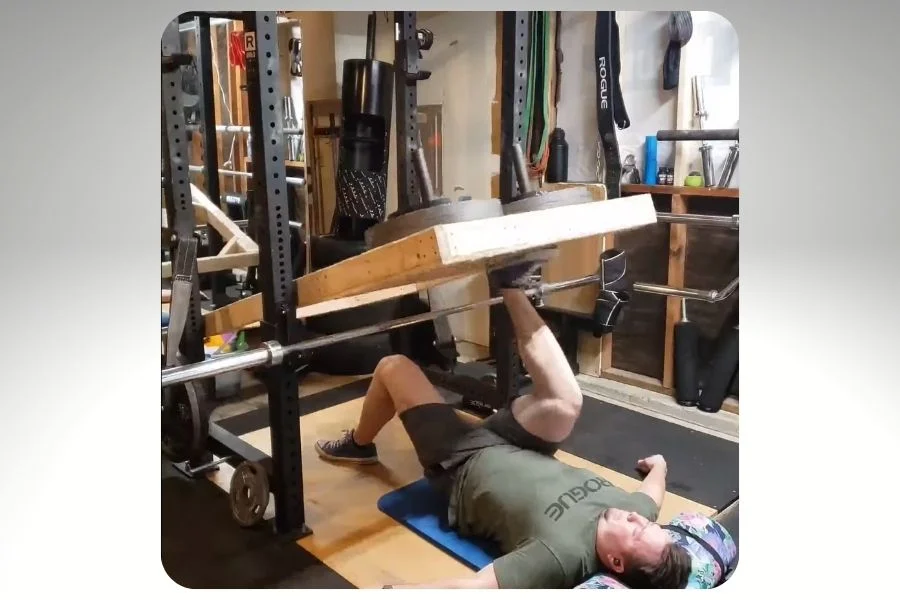
Step 7: Get to work. As you can see. It’s that quick and easy to use.
Building Notes
We suggest not assembling the frame lengthwise with just one 2×4, while later deciding to sandwich another 2×4 thinking it’s not strong enough. Start by using two 2×4’s from the beginning or even just a 4×4 if you really want it to be sturdy.
2×4’s are the cheapest, so if you want to keep it low cost, they would be your best option. If you plan to go very heavy, we suggest 4×4’s.
There are other methods for racking the leg press that could be explored. We rested ours on a barbell, but you could easily add chains and an eye hook so that the leg press was held by a pull-up bar or cross member at the top of the rack. The downside to this method is that it may take longer to set up, but probably not significantly more.
If you buy your wood from Home Depot or Lowers, you can get a few cuts free so you don’t have to do much material work at home.
We want to give a shout-out to one of our Home Gym Community Members Dylan Lasich who came up with the build. This is sure to help many improve their training and fitness.