We test and review fitness products based on an independent, multi-point methodology. If you use our links to purchase something, we may earn a commission. Read our disclosures.
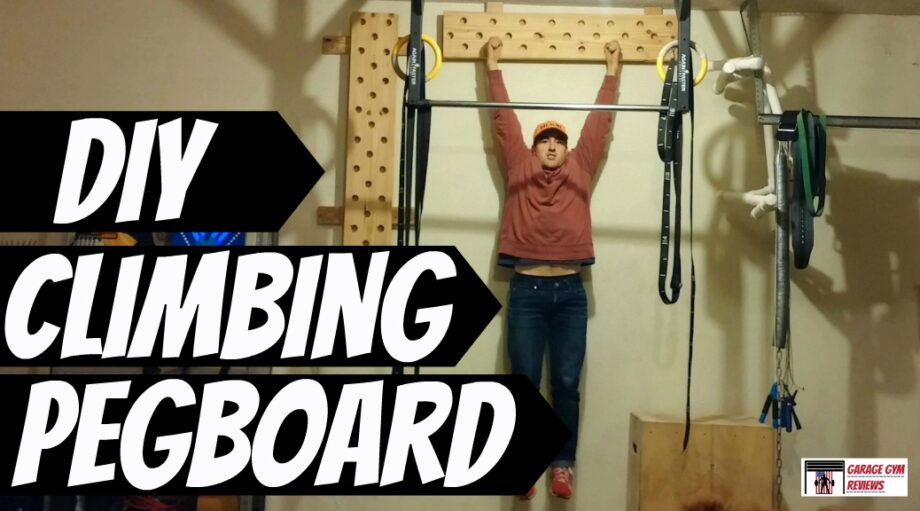
The climbing pegboard has become popular ever since introduced by Dave Castro at the CrossFit Games. Although they aren’t too expensive to buy, they’re even cheaper to make. Here’s how to make your own DIY Climbing Pegboard.
There are so many options for creating Do-It-Yourself Equipment available today.
It amazes me that more people don’t take advantage of making their own equipment on their way to fitness dominance.
The climbing pegboard is something that I didn’t have a chance to use until I made it. The inspiration came when I was going through old photos of workout equipment and saw some kids in gym class climbing a pegboard.
Most garage gyms don’t have room for rope climbs, so to build the upper body pulling strength you’re pretty limited to a pull-up bar. The climbing pegboard offers a unique challenge that is not only highly effective, but also pretty fun.
A quick search online took me to a couple retailers offering a pegboard for way more than I wanted to pay. So, being the cheap (my wife would say) and resourceful (I would say), I decided to create my own. that in my opinion looks and performs as well as any you could buy.
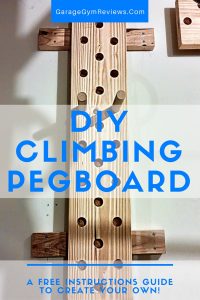
Although this is a DIY guide, the pegboard you can make utilizing the guide is in my opinion the same if not superior to those offered by retailers all over the world.
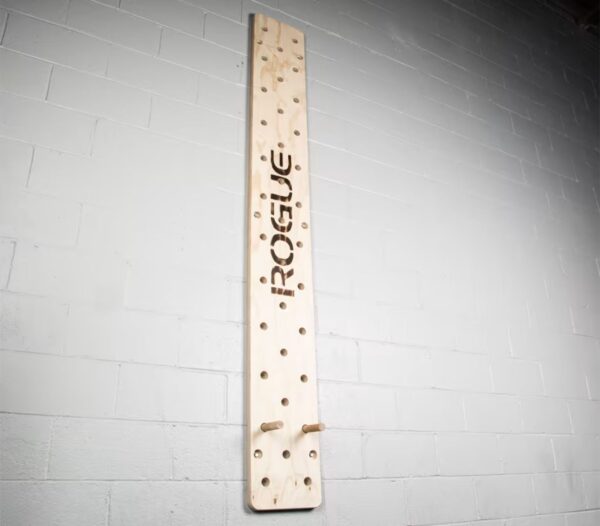
Rogue Fitness
Rogue Peg Board
Product Highlights
The official, wall-mounted Rogue Peg Board is made in the USA from your choice of top-quality maple or pine. Each set includes one 1.
Pros & Cons
Bottom Line
Video Tutorial

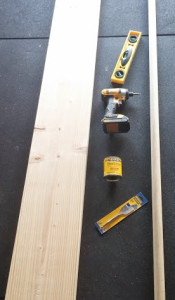
Supplies
- One 8′-10′, 2″ x 8″ Board
- One 8′, 2″x 4″ Board
- One 1 1/4″ Dowel Rod
- One Thin Sheet of Plywood
- Wood Glue
- One Box of 1″ Wood Screws
- One Box of 3″ Wood Screws
- Sandpaper (optional)
- Wood Stain (optional)
Tools
- Power Drill
- Drill Bits
- 1 1/4″ Spade Bit (A Forstner Bit would also suffice)
- Miter or Circular Saw
- Pencil
- Ruler
Total Price: ~$35
Instructions
First off these instructions are for one 4′-5′ long Peg Board, if you’d like longer, or would like to make another (say one vertical, one horizontal) like I did you just double the instructions.
Step One:Cut the board to length.
The length of the board obviously varies depending on where you will be using your pegboard as well as how tall you want it to be. For a garage with standard ceilings, a 4 to 5-foot board would be best.
I cut my 8′-10′, 2″x 8″ board in half using the Miter or Circular Saw. It ended up being about 4 1/2 feet in length.
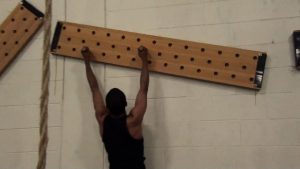
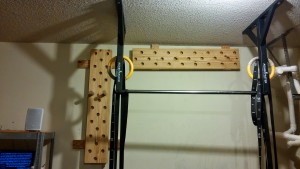
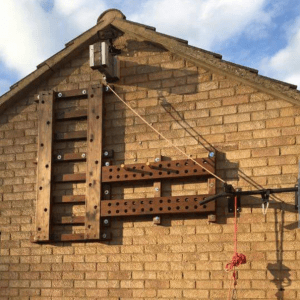
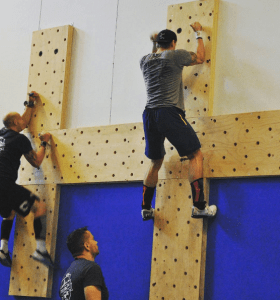
For a taller pegboard like those used in commercial gym settings, you can either keep your board long or combine multiple short boards at different angles for an extra challenge like seen here:
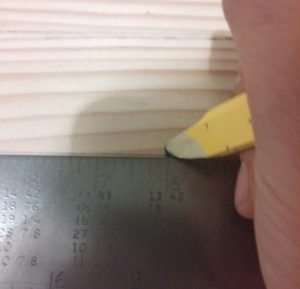
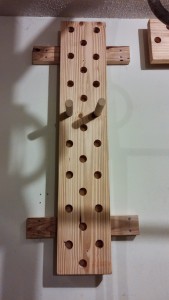
Step Two:Measure out your hole pattern.
There’sa seemingly endless amount of ways you could cut your holes. I’ve seen many people who have used this guide use random placement to exact science.
For mine, I simply drew three vertical lines with each being 2″ apart. Then, I took my ruler and made a mark every 6″ to be used for my pilot holes.
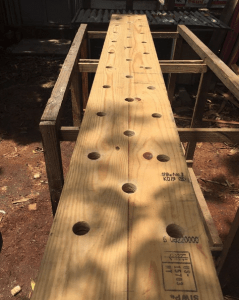
Step Three: Drill holes.

Find the locations where you marked for your holes to be and begin drilling. 1 1/4″ Spade Bit where you made your marks
I used a Drill Press combined with a 1 1/4″ Forstner Bit, but you could easily get by with a Spade Bit and a handheld drill.
If you plan to use a handheld drill, try to keep it as vertical as possible to prevent any wonky holes and make sure you have your batteries charged as this takes some time.
For a more challenging grip workout, simply make your holes larger and use larger dowels. The thicker the handle, the harder it is to use. Or you could also throw a pair of Fat Gripz (see my review here) onto the dowels like I’ve done many times, although it takes a while to build up to.
Step Four:Cut out the backing.

In order the keep the Pegboards from sliding all the way through and you getting your hand pinched, a backing is pretty necessary.
In reality, you could use a thin piece of chipboard like I did all the way up to a nice seven-ply piece of plywood. If you have scraps, I would opt for those.
Simply place your pegboard on the backing material you’ve chosen, trace it out, and cut away.
I used a jigsaw to cut the backing, however, if you don’t have the power tools, a simple handsaw will do just fine.
Step Five:Attach Backing to Pegboard
This part is simple. Grab your handy-dandy wood glue andlather it on. Although unnecessary, I suggest spreading the glue evenly to make sure it’s attached evenly.
After the glue is spread, attach the backing and clamp to dry (you could also put some weight plates on top.)
Step Six:Cut out support boards.
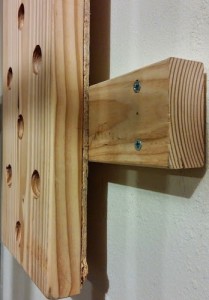
To anchor the pegboard to the wall, you’ll want to use some wood stringers that are long enough to reach the wall studs on either side of the pegboard.
I used two 2″x4″ boards I had laying around.
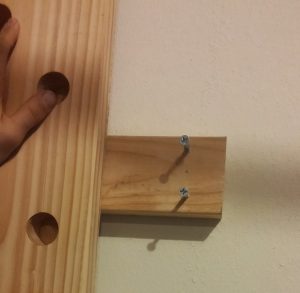
First find the studs in the wall, then measure and cut your boards accordingly. Once cut, place them on the back of the board, one near the top, and one near the bottom of the board.
Using screws, screw the boards into the back of the pegboard. I suggest not skimping on the screws here either as this will your entire bodyweight.
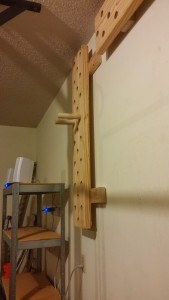
Step Seven:Attach the Pegboard to the wall.
Using 3″ long wood screws, attach the pegboard to the wall lined up with the wall studs.
(Optional: Sand and stain for fresh-looking gainz.)
Step Eight:Cut the dowels.
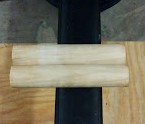
Cut the 1 1/4″ dowels based upon your hand plus 2″.
I suggest a hardwood maple for the dowels as they will have a lot of pressure.
Step Nine:Climb that wall!
Pegboard Photo Gallery
My Favorite Pegboard Workouts
10-9-8-7-6-5-4-3-2-1
Power Cleans (185 lbs.)
One Pegboard ascent and descent in between
EMOM 10
5 Strict HSPU
1 Pegboard Ascent
Death By Pegboard
Minute 1: One Pegboard Ascent
Minute 2: Two Pegboard Ascents
Minute 3: Three Pegboard Ascents
Etc. until failure
5 Rounds – Rest as Needed
Ascend Pegboard
Every time the Right Peg Moves, do one Pullup
EMOM 10
15 Second Effort on Airbike (see my in-depth Schwinn Airdyne Pro review here)
1 Pegboard Ascent
CrossFit Games Pegboard

The pegboard was featured in both the 2015 and 2016 CrossFit Games.
Rather than the traditional, wooden style pegboard as shown in this DIY Tutorial, Rogue created their boards out of metal and plexiglass.
The event has proved to be a tough for nearly all competitors, and it’s cool to see the pegboard be used on such a large stage as the CrossFit Games.
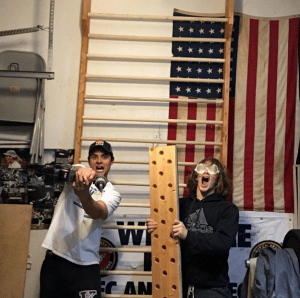
Pegboards Created Using This Guide
Commercial Pegboard Options
Rogue Fitness
Rogue Peg Board
Product Highlights
The official, wall-mounted Rogue Peg Board is made in the USA from your choice of top-quality maple or pine. Each set includes one 1.
Pros & Cons
Bottom Line
Final Thoughts
A Peg Board is a piece of equipment that I believe should be in every gym in America.
Its practicality, price, and strength building properties make it a very under-appreciated piece of gym equipment. The project is really quite easy. Go to Home Depot, get your materials and build your strength.

Further reading

Tim Ferriss is known for many different things, most notably his podcast and books that delve into the lives of top performers. Nearly all top performers have one thing in common - a home gym; Tim Ferriss is no different. Read more

Our Evie Ring vs Oura Ring comparison breaks down everything you need to know about two popular fitness trackers so you can pick the right one for your finger. Read more

Our experts in the fitness industry have tried out the best shaker bottles on the market. Check out our top picks, varying in materials, cost, and features. Read more

NordicTrack makes premium products, but with a NordicTrack promo code you don’t have to pay a premium price at checkout. Find out more here. Read more