We test and review fitness products based on an independent, multi-point methodology. If you use our links to purchase something, we may earn a commission. Read our disclosures.
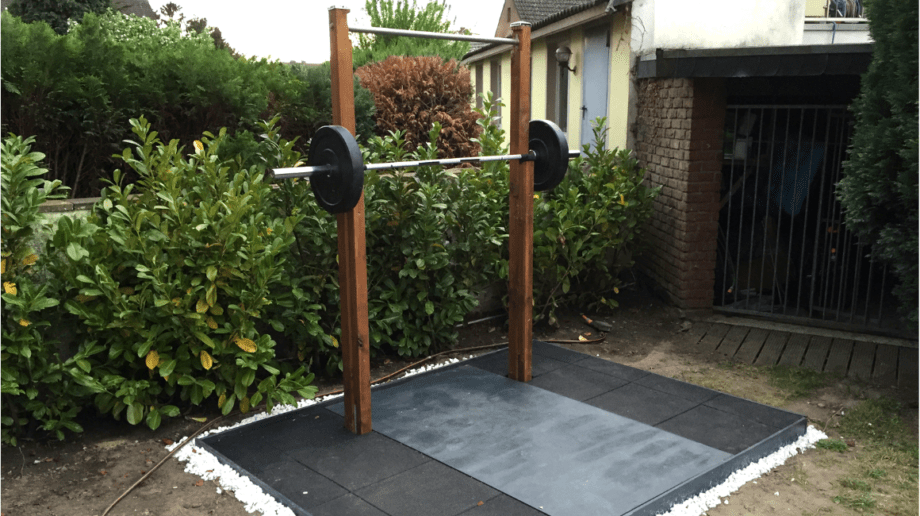
Having a home gym is one of the best parts of adulthood. But, something that can be even more fun is being able to workout outside. In steps the DIY Outdoor Weightlifting Platform and Rack. Enjoy this weekend project.
I was scanning Reddit the other day and saw an awesome tutorial for an outdoor weightlifting platform and squat rack.
There are quite a few DIY weightlifting platform tutorials available, although I think mine is the best *wink* *wink*, but there’s very few that could stand the abuse of being outside.
RELATED: Best squat racks
So, I contacted the creator of the tutorial, u/IAMgrrrrr and he said go ahead and post it on the site.
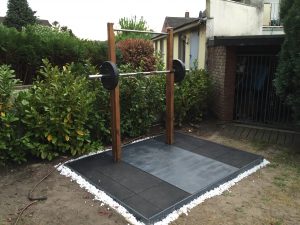
So without further adieu, here is the DIY Outdoor Weightlifting Platform and Squat Rack.
Supplies
- One 4′ stainless steel bar
- Twoimpregnated wooden beams 10’x4″x4″
- Two Stainless Steel H-Anchors all connected with 1/2″ screws
- Two 1 1/2′ and 6″ in diameter Water-pipes
- Forty-Four1 1/2′ by 2″ Stone Squares
- Five 4’x6′ 3/4″ Plywood Sheets
- One 4’x6′ 3/4″ Horse Stall Mat
- Box of Wood Screws
- One Can of Waterproofing Wood Protector
- (Optional) One Large Roll of Foam
- (Optional) One Can of Paint
Instructions
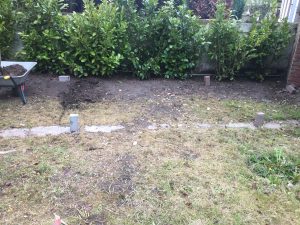
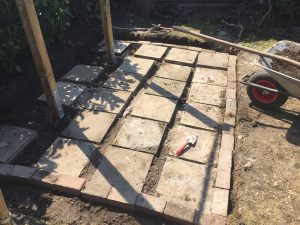
1. Mark off starting position along with cornerstones
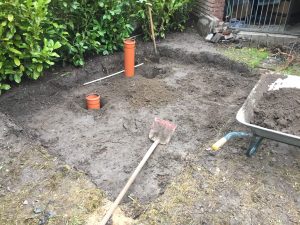
2. Dig the “basement” of the platform. This will keep the platform from rotting and essentially sitting in water. The foundation is 9″ deep. The waterpipes are 1 1/2′ and 6″ in diameter.
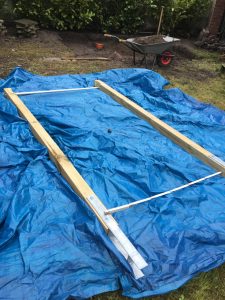
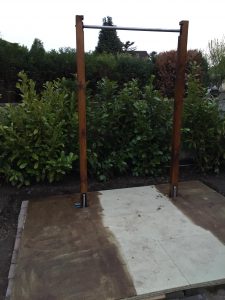
3. Begin constructing the rack. Attach the 4′ stainless steel bar to the two wooden beams. Also attach the H-Anchors to the base of the beams using 1/2″ screws. The H’Anchors help secure the beams in the ground/concrete.
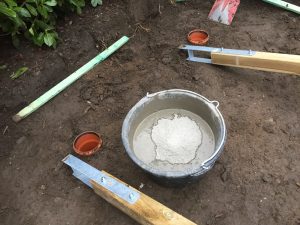
4. Submerge the water-pipes in the ground and fill with concrete. Once filled, erect the rack.
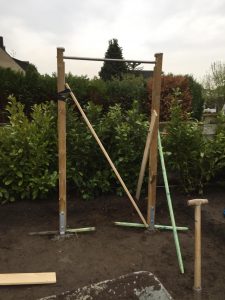
5. Erect the rack and level it out. This is a very important step and extra material should be used to support it as the concrete cures.
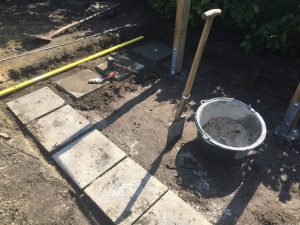
6. Level out the “basement” and place 1 1/2′ by 2″ stone somewhat evenly spaced out.

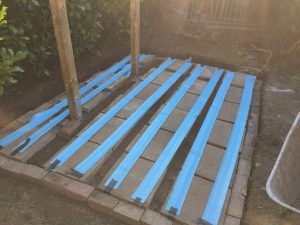
7. (Optional) Using the roll of foam, roll out strips to help reduce noise and level out the platform.
8. Lay a second layer of stone and pack dirt in between stones to even out.
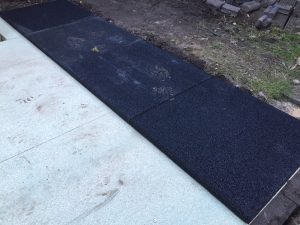
9. Place Sheets of Plywood and screw together. For more detailed info on how to do this see here.
10. Cut stall mat in half and screw to platform. You could also use playground rubber mats, but they are more expensive.
11. Weatherproof platform using wood protector.
12. Complete platform by painting and adorning with rocks or dirt to fill in edge gaps.
Final Thoughts
This is an awesome platform for those who want to train outside.
I would apply very liberally the wood protector and paint. Unless your platform is covered, this bad boy is going to take a lot of abuse from the elements. I think it will hold up just fine if it’s reconditioned at least once a year and the basement is properly done.

Further reading

Exercise is more than just good for your body—it’s good for your mind, too. Read on to find out about the benefits of exercise and mental health. Read more

Find out what two of our expert product testers thought when testing this under-desk mini treadmill for our Egofit Walker review. Read more

We put together one of the best dumbbell triceps workouts ever, so you can build bigger, strong arms with minimal equipment! Check it out! Read more

The Kabuki Strength Trap Bar is the latest specialty bar from powerlifter and engineering mastermind, Chris Duffin. It combines an open-end design with a built-in deadlift jack, swappable handles, and amazing attention to detail. This is the most versatile trap bar we've used and we recommend it to anyone who doesn't mind spending extra for the quality. Read more